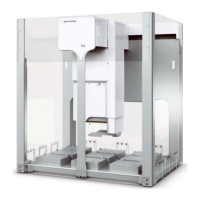
2 Setting up the Bravo Platform
Workflow for setting up the Bravo Platform
16 Bravo Platform User Guide
Workflow for setting up the Bravo Platform
About this topic
This topic outlines the procedures to set up the Bravo Platform.
If you have an AssayMAP Bravo Platform, see “AssayMAP Bravo Platform” on page 197.
Workflow
The general workflow for setting up the Bravo Platform is as follows:
Step Procedure See…
1 Start up the Bravo Platform. “Starting up and shutting down” on
page 17
2 Create a VWorks device file that
includes the Bravo device.
“Creating or adding a Bravo device” on
page 19
3 Create a Bravo profile for the
specific Bravo Platform.
“Creating and managing profiles” on
page 26
4 Initialize the device profile in Bravo
Diagnostics to verify
communication with the device.
“Initializing the device” on page 31
5 Verify that the deck configuration in
the Bravo profile matches the
physical deck layout of platepads
and accessories. Configure any
accessories, such as an autofilling
reservoir.
“Bravo accessories overview” on
page 104
6 Edit or set teachpoints for the
specific Bravo Platform.
“Setting teachpoints” on page 34
7 If the Bravo Platform includes a
gripper, verify the gripper y-axis
offset.
“Verifying the gripper setup” on
page 41
8 If the Bravo Platform is integrated
with external robots, specify the
deck locations that the external
robots can access and whether to
allow concurrent operations.
“Configuring external robot access”
on page 46
9 Save any changes that you made in
steps 3–8 in the Bravo profile.
“Creating and managing profiles” on
page 26