145
A Accessories and platepads
Installing and configuring a Magnetic Bead Accessory
Bravo Platform User Guide
Teaching the Magnetic Bead Accessory
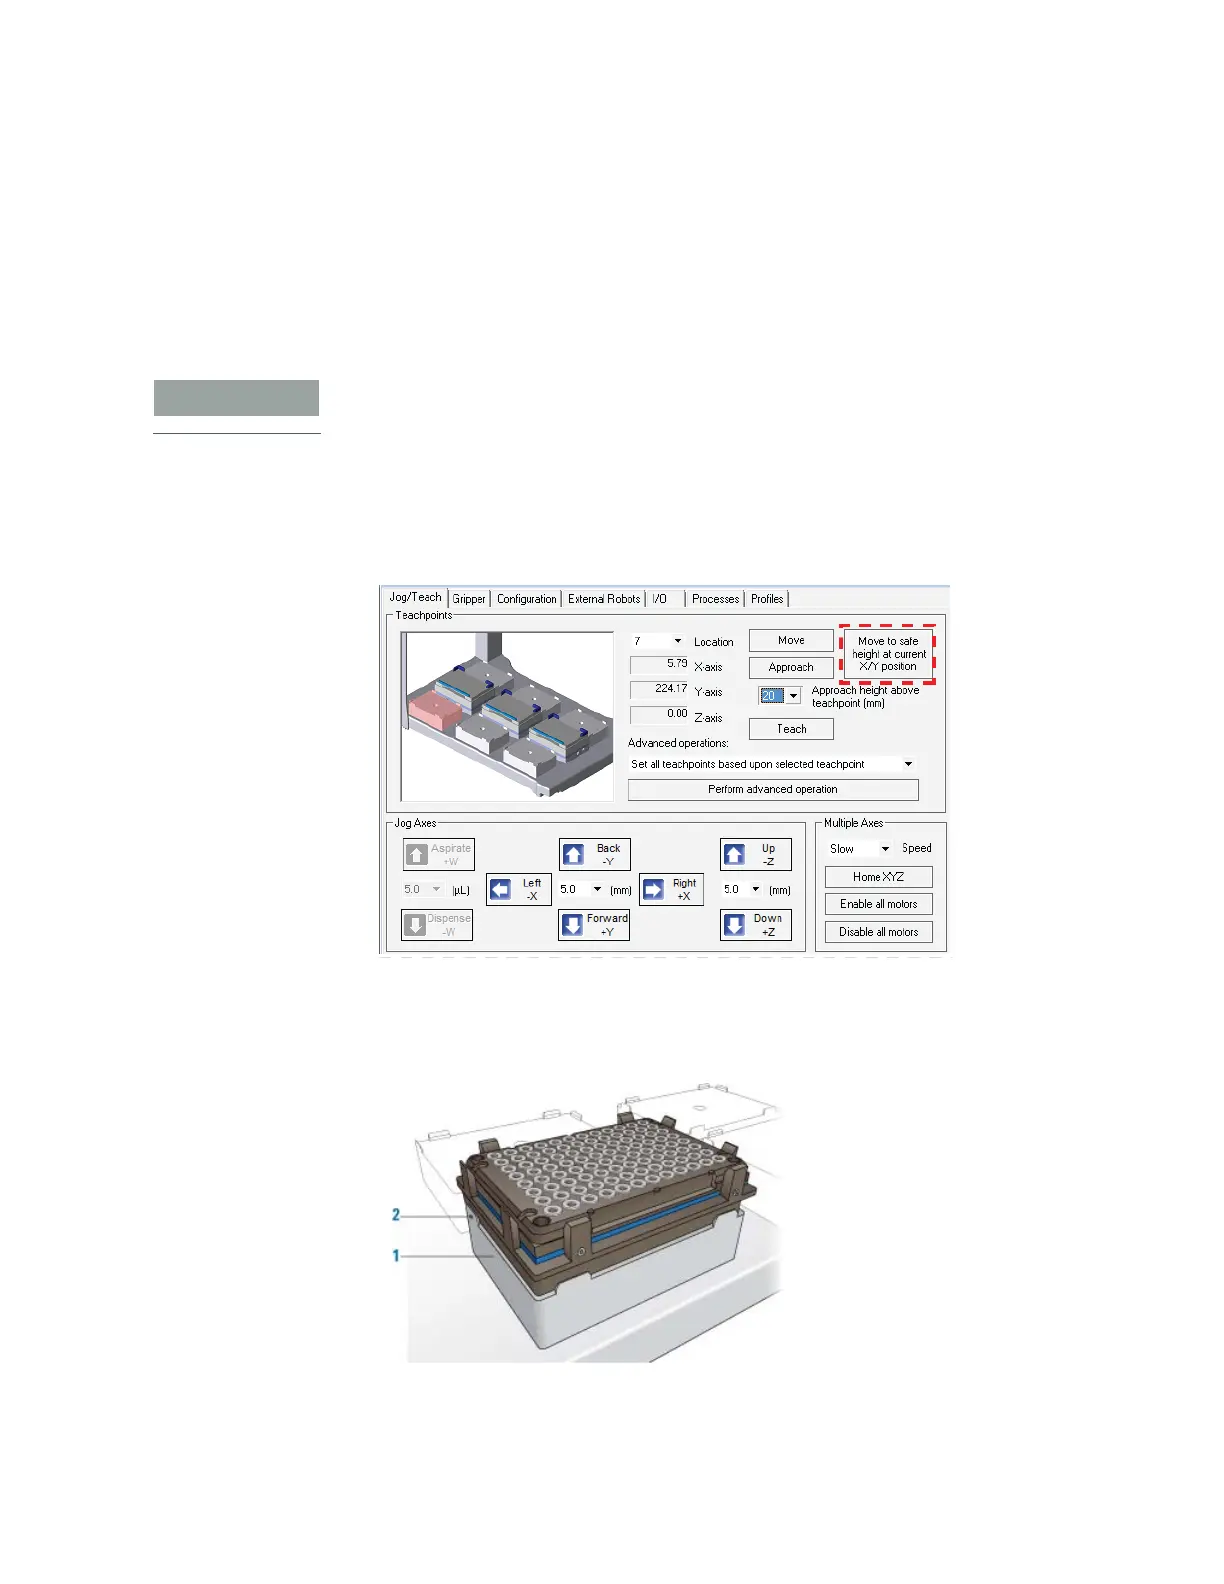
To set the deck location teachpoint for the Magnetic Bead Accessory:
1 At the target installation location, make sure that a standard platepad is installed
and ensure the Magnetic Bead Accessory is removed from the platepad. Set it
aside temporarily.
2 Set the teachpoint to the crosshairs of the platepad. For instructions, see “Setting
the first teachpoint” on page 36.
The 29.6 mm height will accommodate the accessory height only if installed on a
standard platepad.
3 Raise the head up in the z-axis by 29.6 mm using the Jog Axes controls in the Jog/
Teach tab.
Click Teach.
4 Click Move to safe height at current X/Y position.
5 Reposition the Magnetic Bead Accessory on the platepad, as shown in the
following figure (1). Ensure that the accessory is fully seated on the platepad.
Figure
Magnetic Bead accessory on top of a standard platepad
6 Using the 1.5 mm wrench, tighten the set screw in the tab, as shown in preceding
figure (2), to secure the base to the platepad.