A Accessories and platepads
Installing and configuring a Magnetic Bead Accessory
146
Bravo Platform User Guide
7 In the Jog/Teach tab image of the Bravo deck, click the accessory Location.
8 In the Approach height above teachpoint list, select 2 mm, and then click Approach.
The Bravo head moves to the deck location and moves down so that the pipette tip
is approximately 2 mm above the Magnetic Bead Accessory.
9 Verify that the pipette tips are centered above the magnet rings in the x- and y-axes.
If necessary, adjust the x- and y-axes at this point, and then jog the head down by
2 mm to the teachpoint z-axis and click Teach.
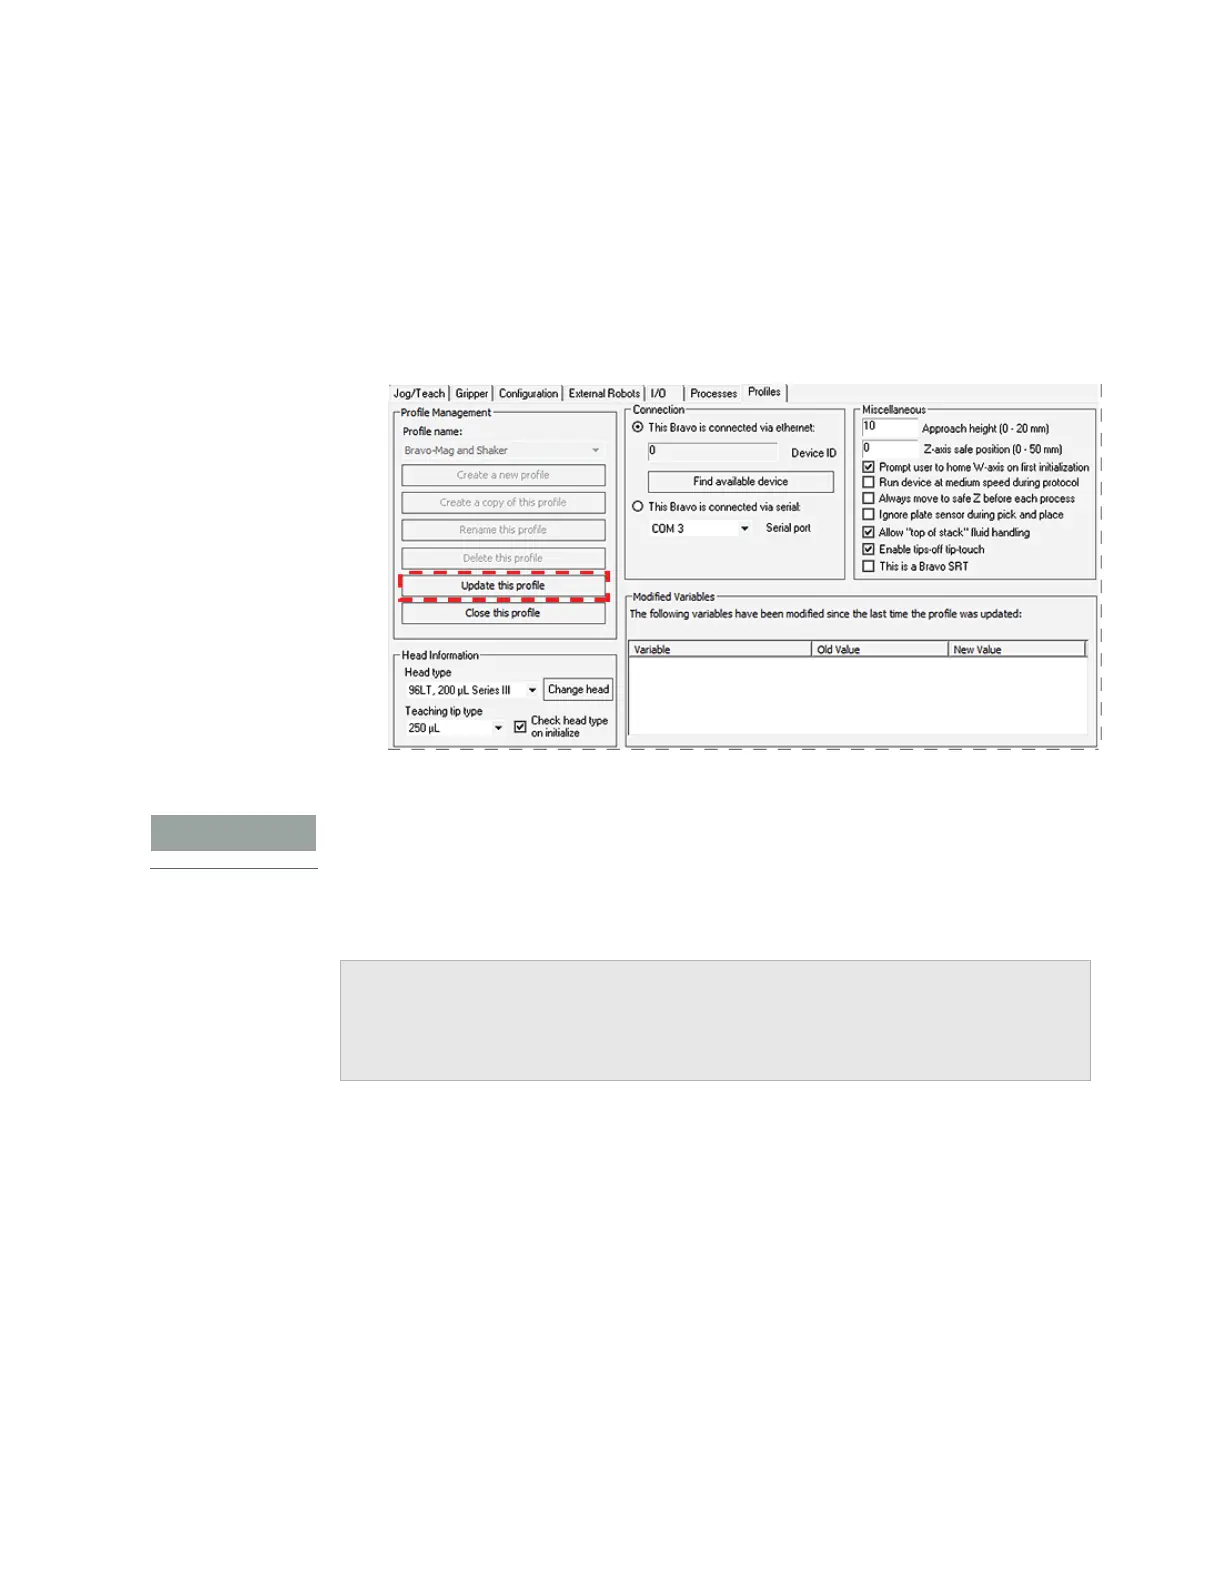
10 In the Profiles tab, click Update this profile to save the changes.
Verify the this accessory teachpoint for your microplate type using a full set of tips. For
guidance, contact Agilent Automation Solutions Technical Support.
Related information
For information about... See...
Bravo Platform hardware components “Hardware overview” on page 5
Editing teachpoints “Setting teachpoints” on page 34