64 Chapter 10: Recording
MPC500 Operator's Manual rev 1.0
Tip: While it is not necessary to name each sample, it is recommended, as it will make future organization much easier.
Tip: When you record a sample the first time after the MPC500 is powered on, the default sample name is "Sample01". If you change the
sample name, the new name is used as the default name for the next recording. For example, if you record a new sample and change the
name to "Snare", the next recording shows as the default name "Snare01". If you don't change the name and record next sample, sample
name is "Snare02". The last 2 characters are added as sequential number.
Recording the Main Out
In this section, you will learn how to record the same signal found on the STEREO OUT of the MPC500. With this feature, you can add the
effects to the recorded sample and re-record it, or you can record the phrase that you created with the sequence feature as one sample.
Preparing the recording
Prepare the system so that you can play the desired sound by hitting the pads or playing back the sequence.
The sound that the MPC500 will actually record is exactly the same as the sound from the STEREO OUT. Before going back to the
RECORD mode, set the program and sequence so that the desired sound will be output from the STEREO OUT.
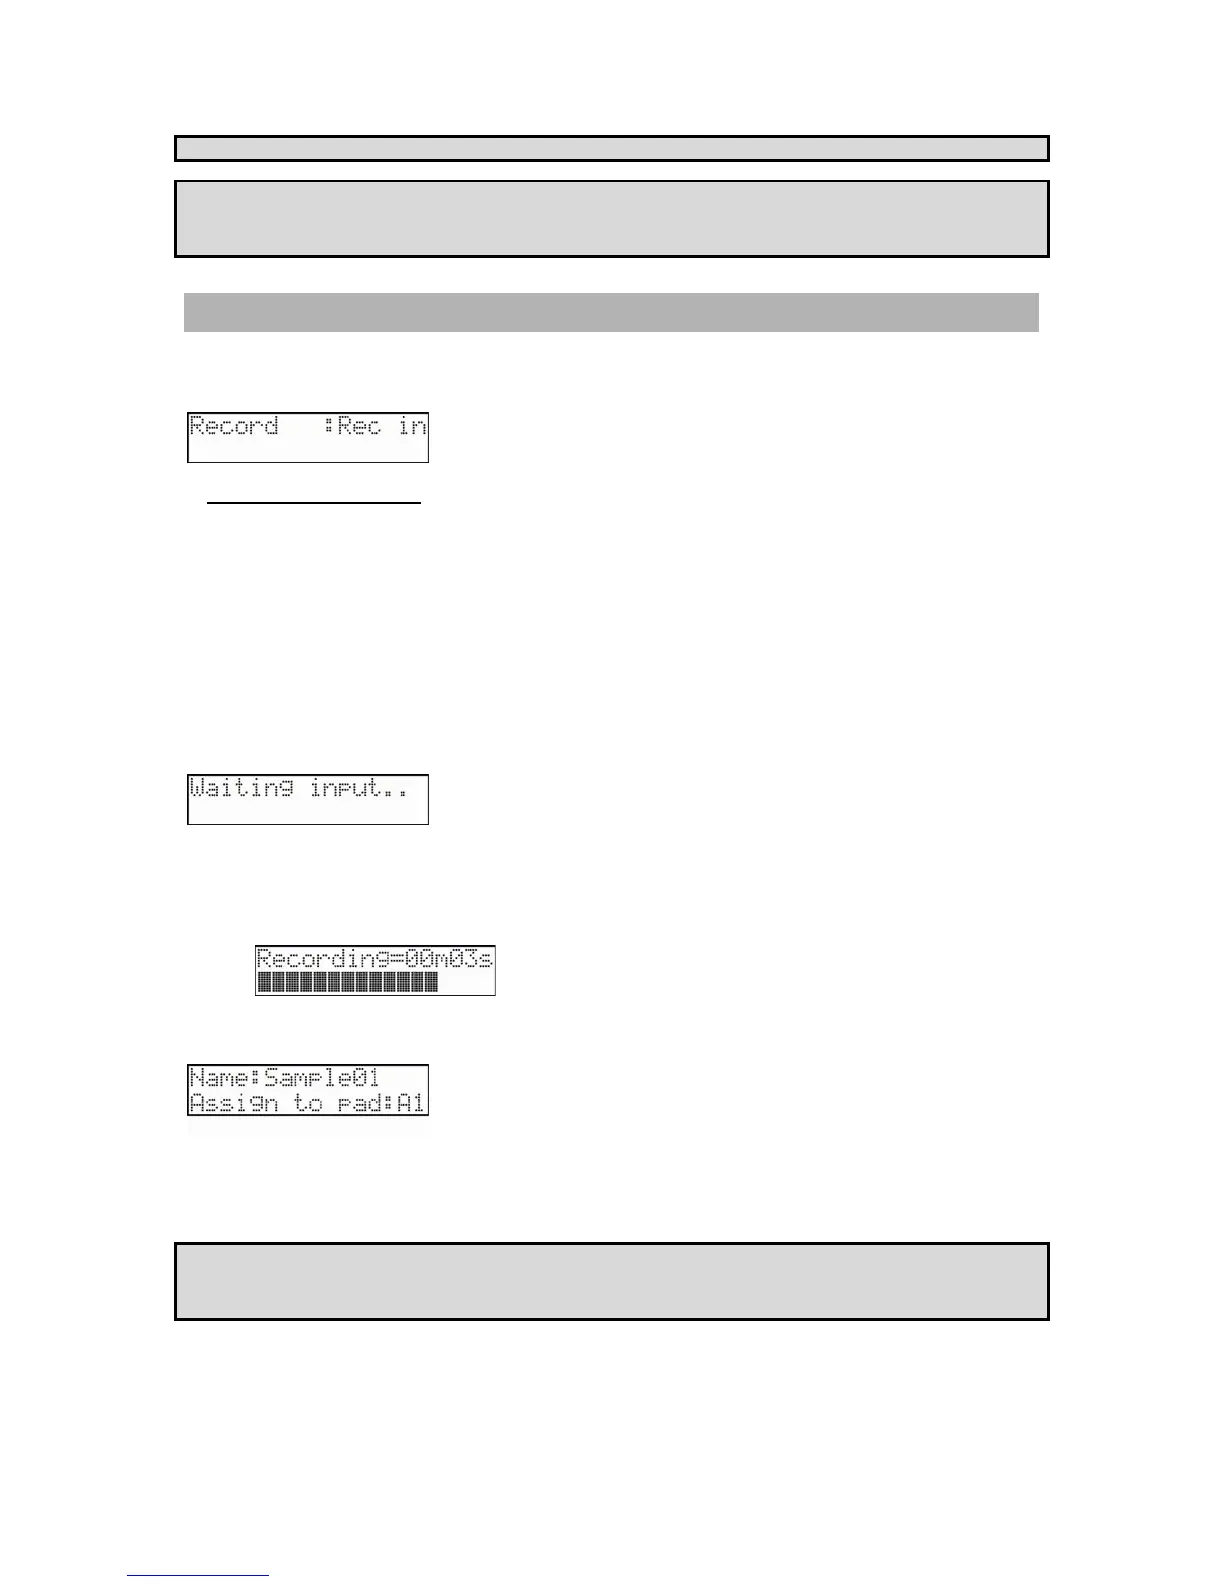
1. Press the [MODE] button and then [PAD 4] (RECORD) to display the RECORD page.
2. Using the [DATA] wheel, change the top parameter to select the 'Record' field.
3. In the 'Record' field, select MAIN OUT.
4. Press the [DO IT] button to start recording your sample. The MPC500 will be in the record ready mode, and the will
change as below.
This indicates that the MPC500 is waiting for the incoming signal. It starts the recording when the input signal exceeds the threshold level.
Pressing the [CANCEL] button cancels the record ready mode and resets the MPC500. Pressing the [DO IT] button again will start the
recording, even when the incoming signal does not exceed the threshold level.
5. Once recording begins, you will see the time display, showing how long the recording length is.
6. When you are satisfied with your recording, press the [DO IT] button. This will stop recording. The following will be
displayed.
In this screen, you can preview the sample you've recorded by pressing [PLAY]. You can also rename the sample on the top line using the
[DATA] wheel or typing with the Pads. You can also assign the sample to a pad. To assign the sample to a pad, simply select the pad you
would like the sample to play from. You can even select Pads in different banks by pressing the [BANK] buttons. If you just wish to keep
the recorded sample in the MPC500’s memory and not to assign to the pad, select OFF (OF) with the [DATA] wheel.
Note: you cannot adjust the recording level when the MAIN OUT is selected. The recording level is decided by the setting of Master level in
OTHER mode. The initial setting of the Master level is –12dB as the output sound will not distort when many samples are played back
simultaneously. If you record one sample through MAIN OUT with this setting, the recorded sample level is lower than the original sample
level. In this case, if you set the Master level to 0dB, the recorded sample level will be the same as the original sample.