4 Chapter 1: Introduction
MPC500 Operator's Manual rev 1.0
29. [Stop] Button:
This button stops playback and recording. Quickly pressing this button three times sends an "all notes off" MIDI command stops all
sounds from playing back.
Note: If your MPC500 has a "stuck note" or if a sample is ringing due to improper programming, you can always stop all
sounds by quickly tapping the [STOP] button three times.
30. [Play] Button:
This button starts playback of a sequence from its current position. While a sequence is playing, pressing [SHIFT] + [PLAY] starts
playback from the beginning of the sequence.
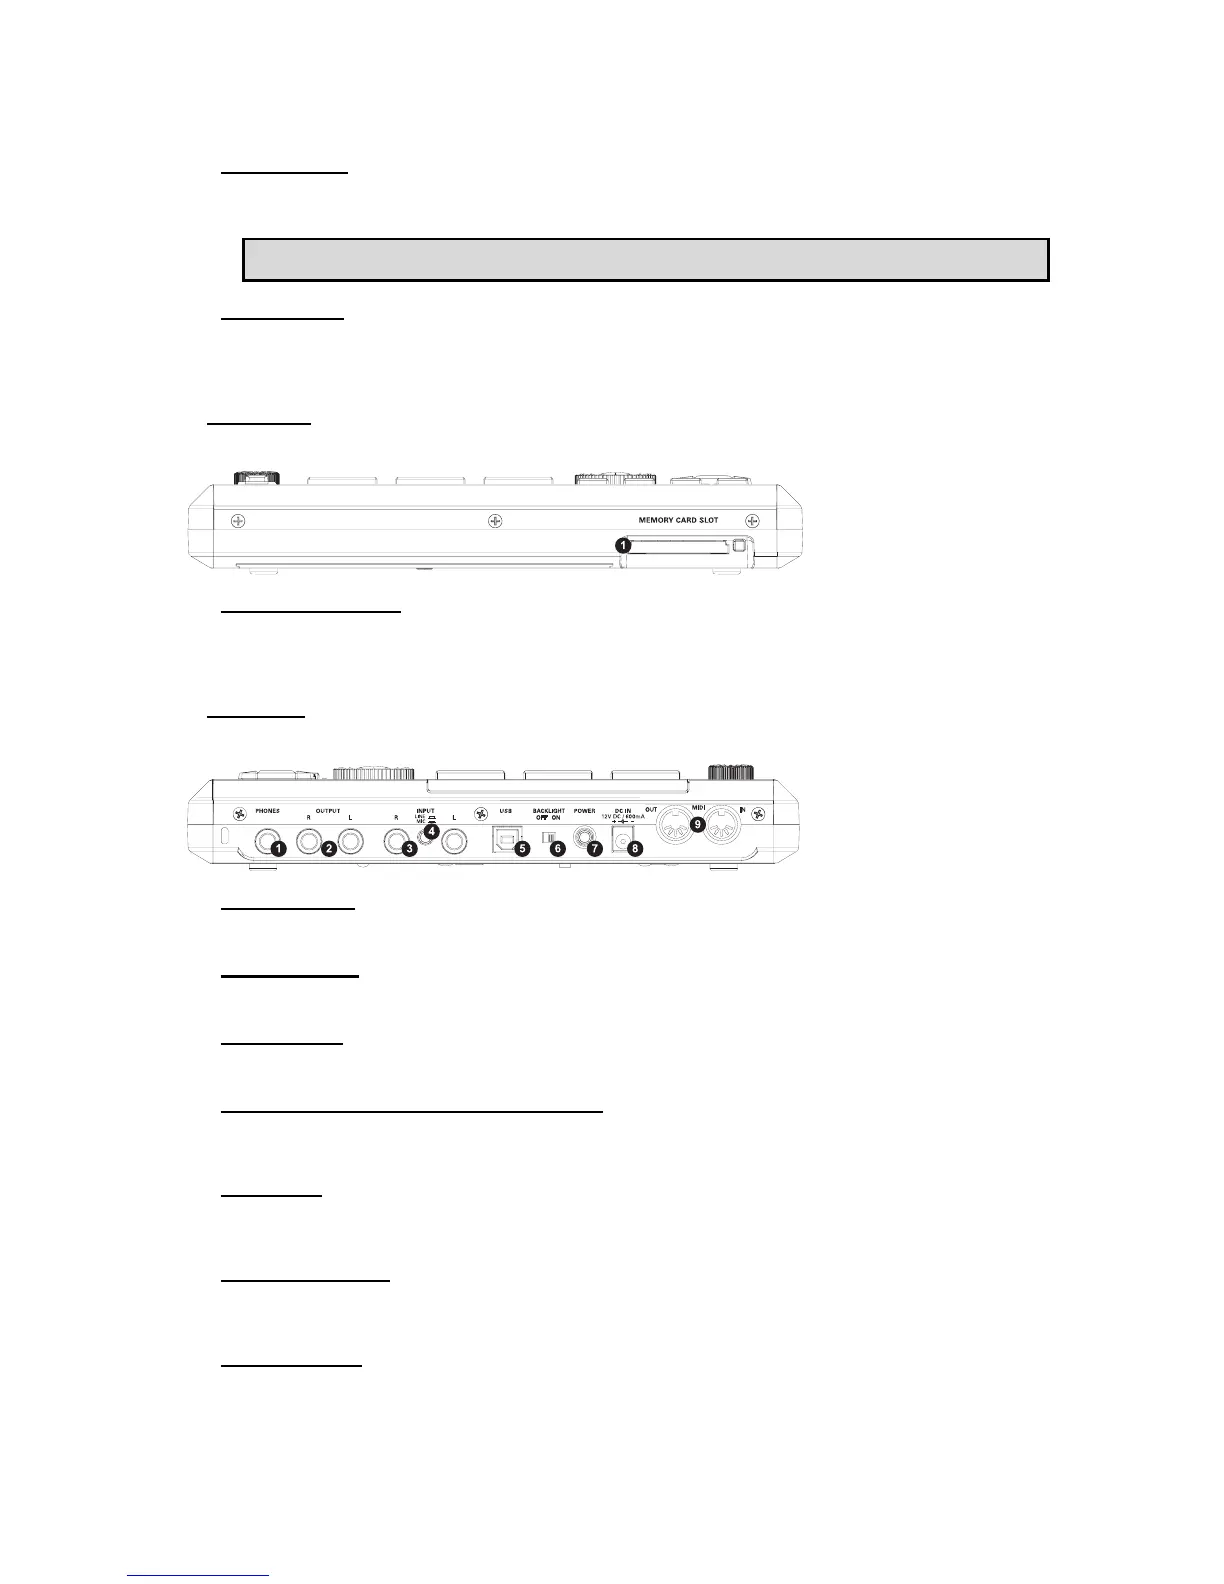
Front Panel
The MPC500’s front panel only has one noteworthy feature:
1. [Memory Card Slot]:
The MPC500’s [MEMORY CARD SLOT] accepts "Type I" and "Type II" Compact Flash memory cards. These cards are used to
store your audio and song data.
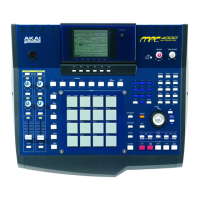
Rear Panel
All of the MPC500’s inputs and outputs can be found on the rear of the unit. They are as follows:
1. [Phones] Jack:
Connect your stereo headphones to this jack. This jack mirrors the signal from the [OUTPUT] jacks.
2. [Output] Jacks:
These are your MPC500’s main outputs. Connect these jacks to your recorder, mixer, or speakers.
3. [Input] Jacks:
Use these inputs to record samples into your MPC. For best performance, be sure to set the [INPUT] mic/line switch properly.
4. [Input] Mic/Line Switch ("Mic" And "Line"):
This switch sets the sensitivity of your MPC500’s [INPUT] jacks. Set this switch to the "up" position, for sampling a line-level source
(CD player, DJ mixer, Minidisk, etc.) and to the "down" position for recording with a microphone.
5. [USB] Port:
Connect your MPC500 to a computer using a standard USB cable. See "Chapter 15 Connecting the MPC500 to your computer" page
103 for more about this port.
6. [Backlight] Switch:
In order to conserve battery power, the LCD backlight can be turned off. This switch engages and disengages the backlight for the
LCD display.
7. [Power] Switch:
This switch powers the unit on and off.