Publication 0160-5.18 - June 2003
3-8 Installation and Wiring
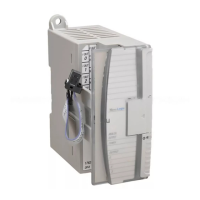
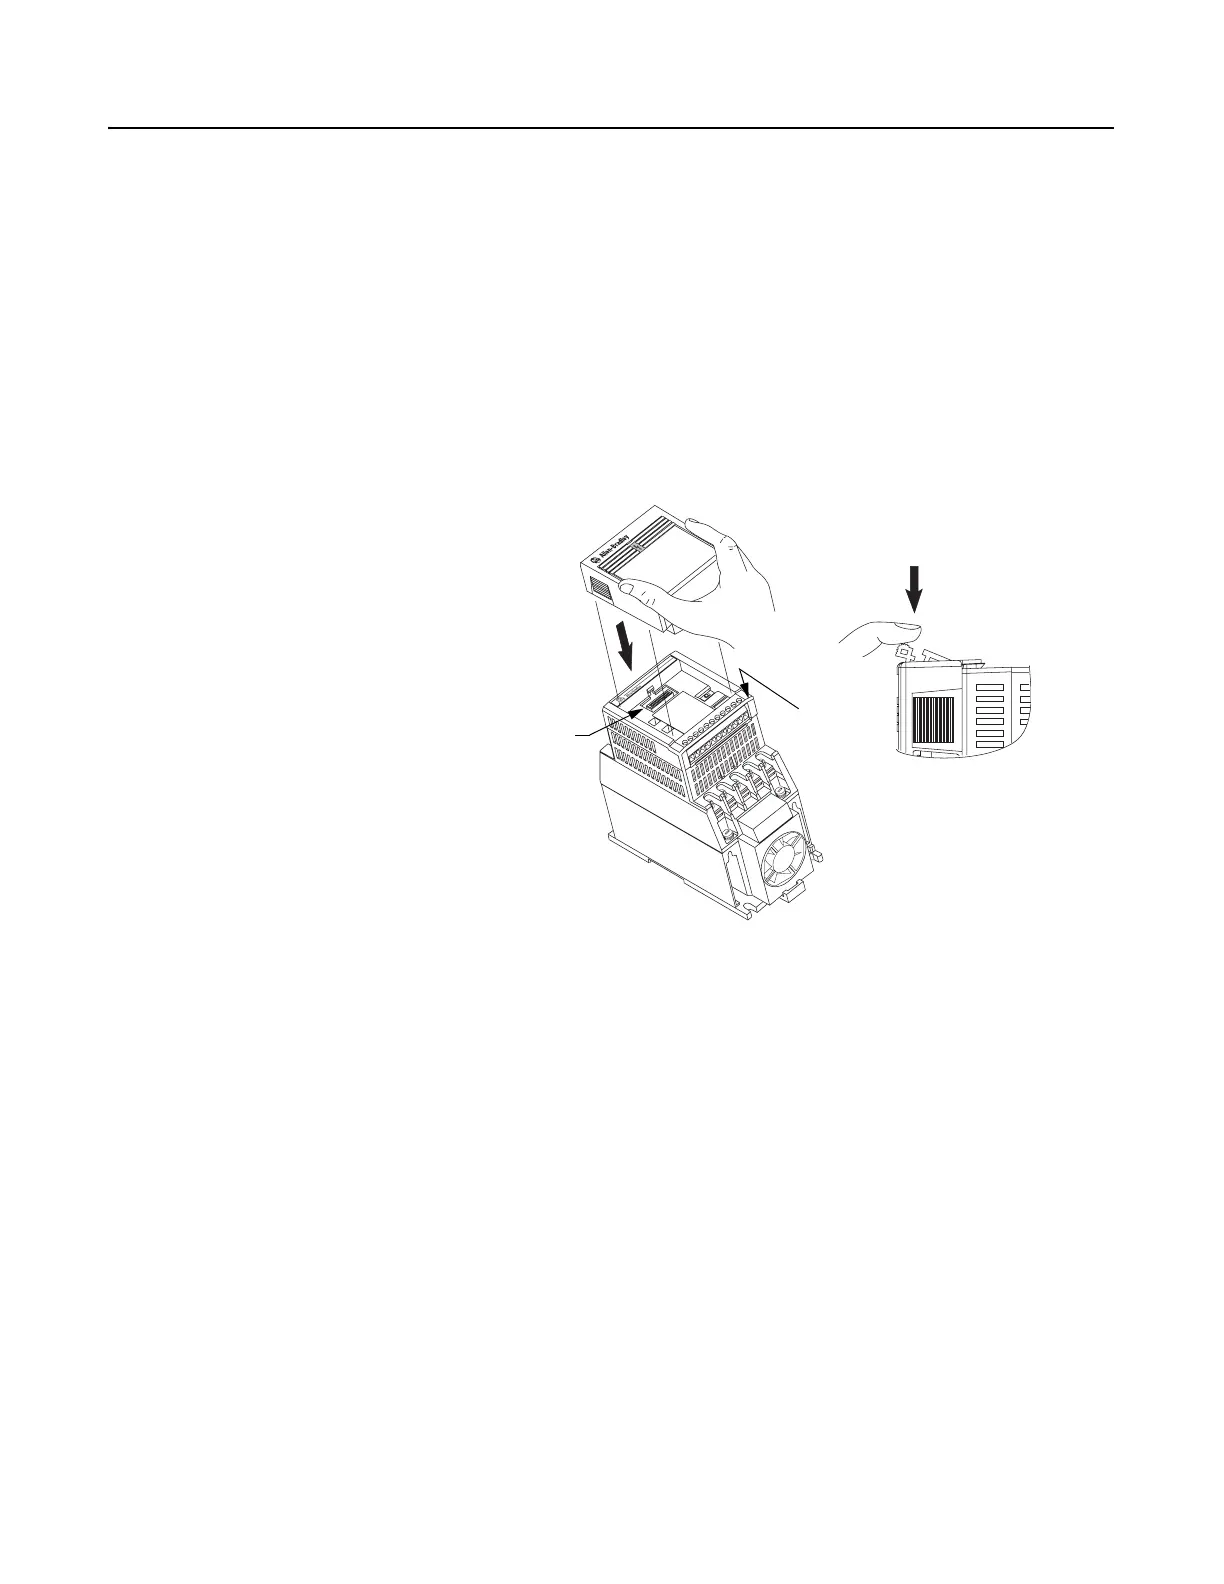
Installing the Communication
Module
After setting the DIP switches, secure the Communication Module to
the drive by following these steps:
1. Insert the module, ensuring that the pins on the back of the
module line up with the drive’s expansion port.
2. Press down on the module until it is fully seated. The module is
fully seated when its sides are resting on the drive’s face.
3. Press down on the latch until it snaps into place.
Figure 3.8
Installing the Communication Module
1 2 3 4
5 6 7
8 9 10 11
T
1
U
T
3
W
–
D
C
+
D
C
T
2
V
Expansion
Port
Drive’s
Face
 Loading...