Publication 0160-5.18 - June 2003
Using 160-DN2 with DeviceNet Scanner 6-11
Configuring the Scanner
(Continued)
Setting Up the Scan List
For the scanner to communicate with a drive, the scanner must be
configured and the drive’s node number must be added to its scan list.
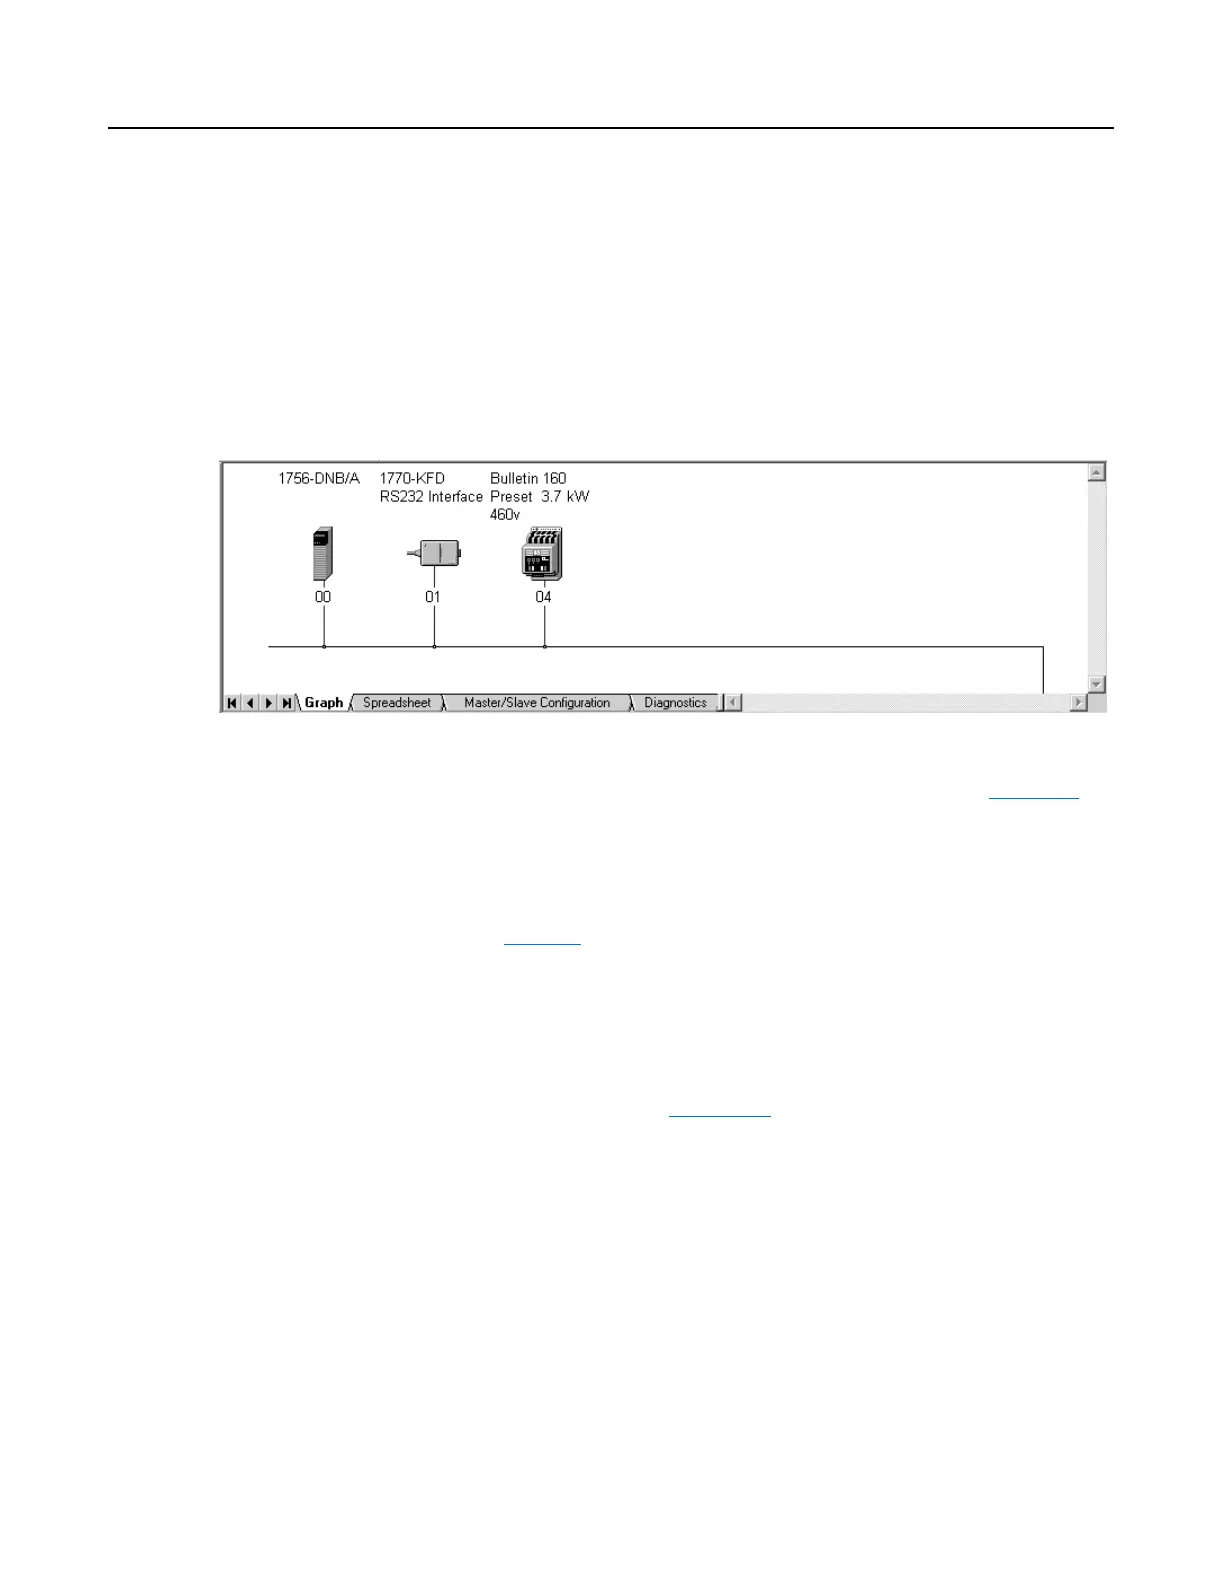
1. Go online with RSNetWorx for DeviceNet. The devices on the
network are displayed in the configuration view.
Figure 6.9
Configuration View (Graph)
2. Right-click the DeviceNet scanner (MAC ID 00 in Figure 6.9)
and select Properties. The Scanner Module dialog box appears.
Important: If your scanner is an unrecognized device, you must
create an EDS file for it and then configure the scanner. Create an
EDS file by following the instructions using the EDS Wizard (see
Page 6-3
for details). Configure the scanner using the General and
Module tabs. If you need more information, click Help or refer to
your scanner documentation.
3. Click the Scanlist tab. A message box prompts you to upload.
4. Click Upload. Data is uploaded from the scanner, and then the
Scanlist page (Figure 6.10
) appears.
5. Click the Automap on Add box (a check mark will appear).
6. In the “Available Devices” list, select the drive, and then click >
(Right Arrow) to move it to the “Scanlist.”
 Loading...