Copyright © 1996 General Motors Corp. 7–5
ASSEMBLY OF TRANSMISSION
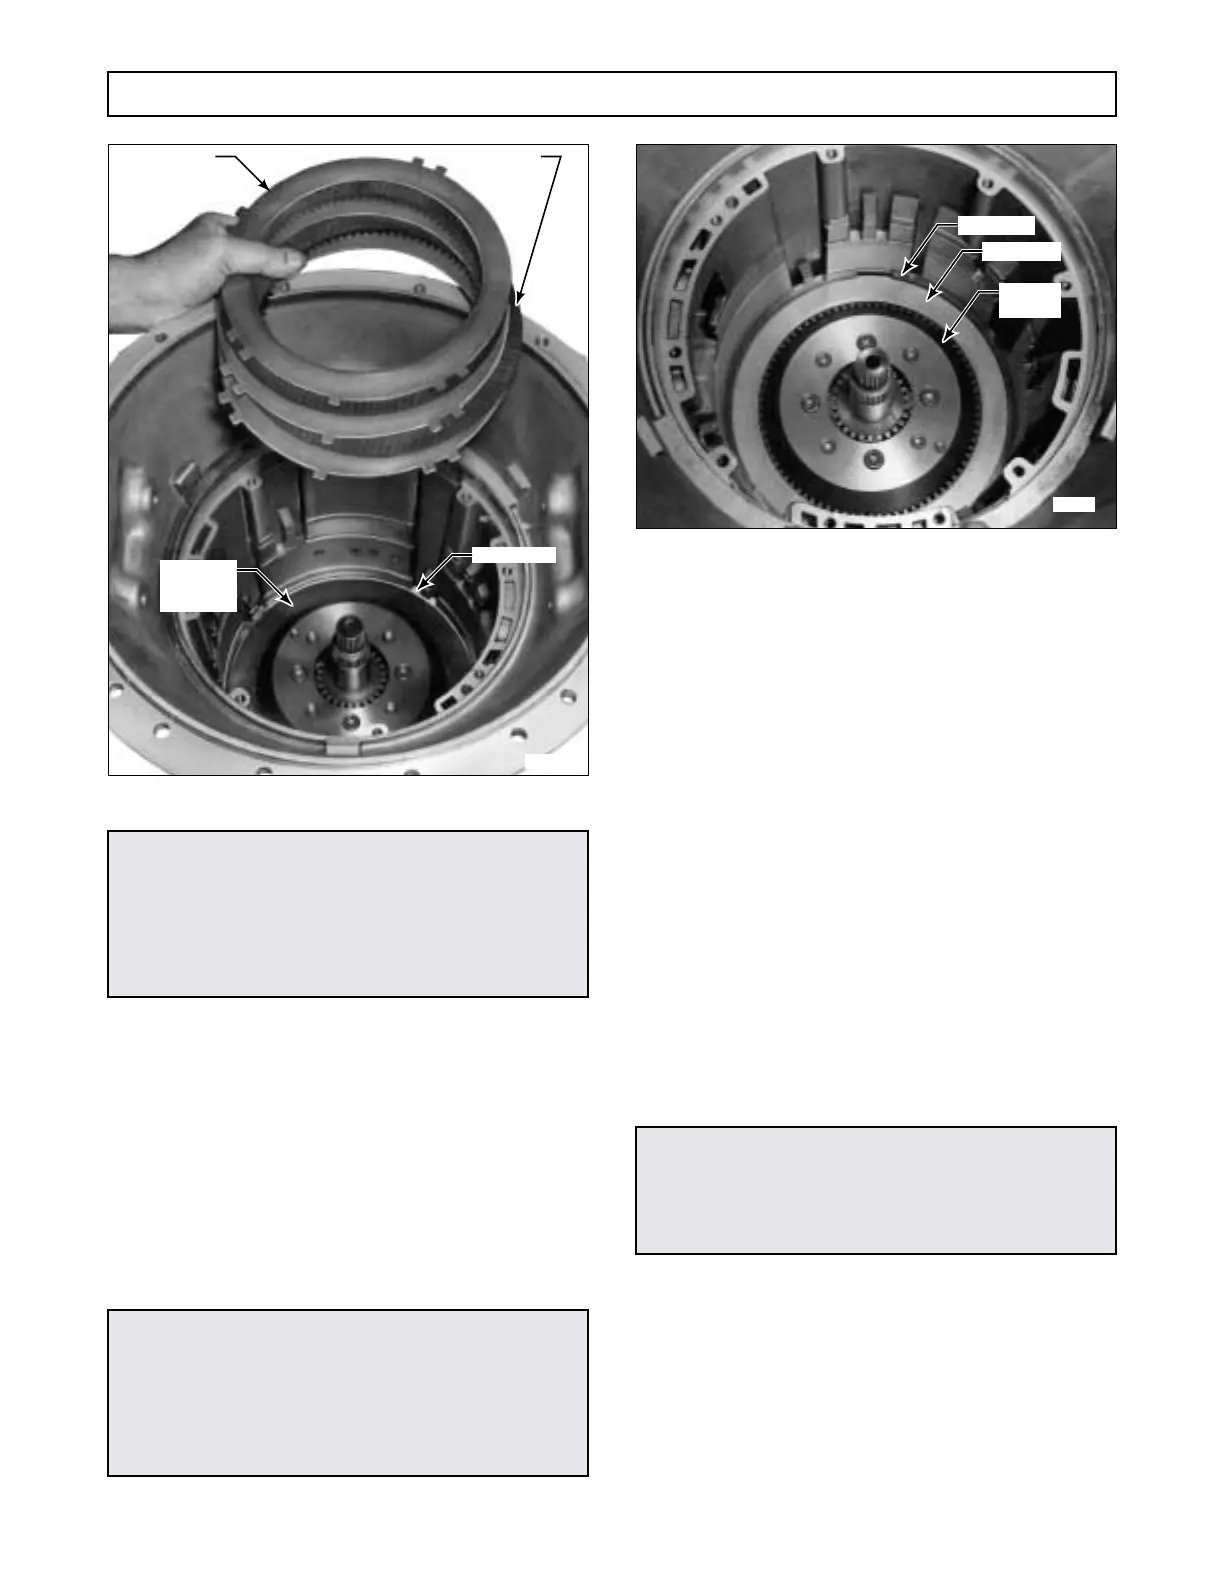
Figure 7–8. Installing Second Clutch Plates
(4) Install the 0.155–0.157 inch (3.94–3.99
mm) thick green snapring that retains the second clutch
plates (Figure 7–9). The snapring gap must be located
at the 12 o’clock position (at the top of the transmission
housing), and must be fully seated in its groove.
b. Center Support and Pistons
(Foldout 9,B)
(1) Place center support assembly 13 on a
work table and clean the piston bores of all foreign
matter.
Figure 7–9. Second Clutch Snapring Installed
(2) Be sure the lips of the sealrings of both
pistons each face (what will be after installation) the
bottom of the respective piston cavity in the center sup-
port. (Refer to sealring cross-sections on Foldout 9,B.)
(3) Lubricate the sealrings of the second and
third clutch pistons. Lubricate the piston bores in the
center support.
(4) Install the third clutch piston and its at-
tached parts in the front bore of the center supports,
engaging the small lug on the third clutch spring re-
tainer with the slot in the center support.
(5) Install the second clutch piston and its at-
tached parts in the rear bore of the center support, en-
gaging the small lug on the second clutch spring
retainer with the slot in the center support.
(6) Attach center support lifting bracket
J 23643 to the center support and carefully lower the
support into the transmission case. During installation,
align the threaded anchor bolt hole in the support with
the hole in the bottom of the transmission housing. In-
stall the plain washer and a new anchor bolt into the
support. Tighten the bolt finger tight.
CAUTION:
When installing the second clutch snapring, do
not allow the snapring to drag across the ma-
chined surface (surface with four holes through
it). Dragging the snapring may result in leaks be-
tween the passages and/or leaks to the sump.
CAUTION:
Both the second and third pistons have been pre-
set in Paragraph 6–13
c
, (3) through (6). Do not
disturb the piston spring retainer lockrings when
installing the pistons into the piston bores in the
center support.
H02979
EXTERNAL-
TANGED
PLATE (3)
INTERNAL-
SPLINED
PLATE (2)
INTERNAL-
SPLINED
PLATE
BACKPLATE
CAUTION:
Some models use a
3
⁄
8
-16 center support anchor
bolt; some use a
7
⁄
16
-20 bolt. Take care to install
the same size bolt as was removed.
H02980
SNAPRING
GEAR SET
CLUTCH
PLATES
 Loading...


