Copyright © 1996 General Motors Corp. 5–3
DISASSEMBLY OF TRANSMISSION
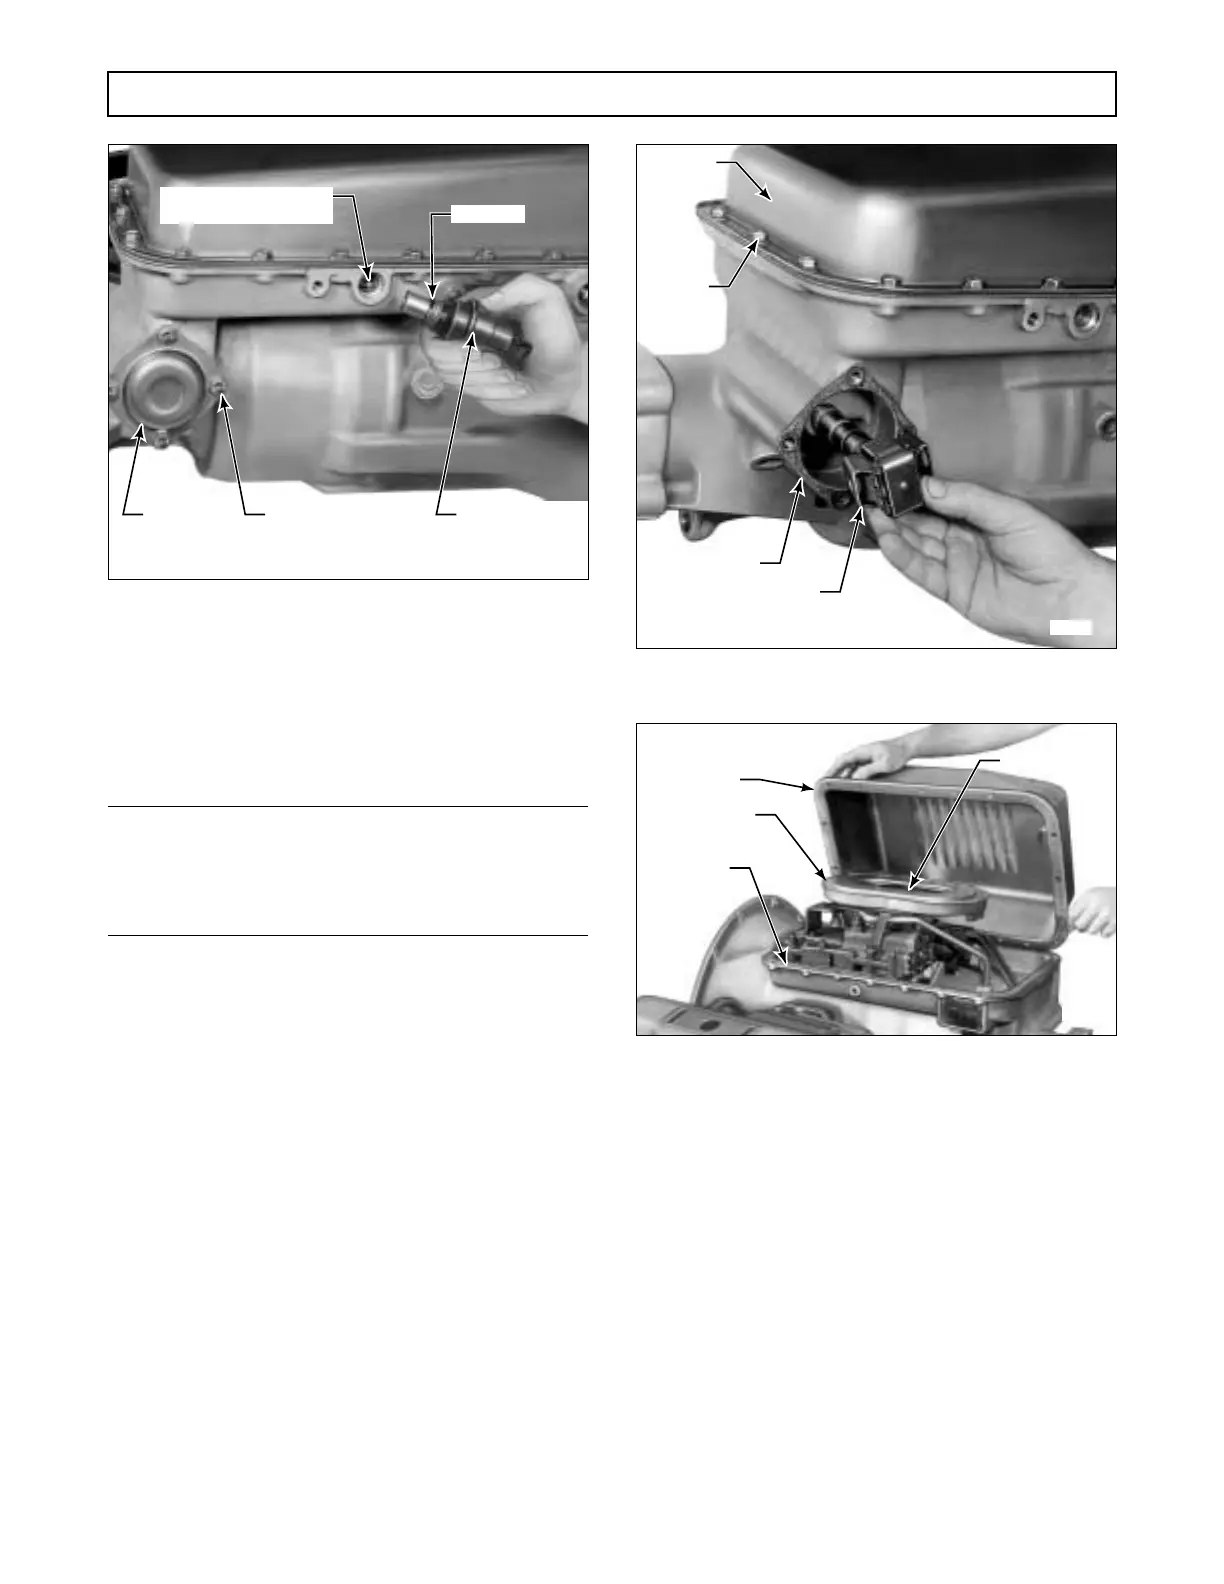
Figure 5–4. Removing Vacuum Modulator
(3) Firmly holding the end of the wrench op-
posite the breather, tap upward on the flat of the
wrench, as near to the breather as possible. In most
cases, two or three firm taps will release breather 7
from the transmission housing.
NOTE:
If the breather is being removed so that a remote
breather can be installed, use Allison-recommended
breather adapter P/N 6884028.
e. Removal of Governor
(1) Remove the four bolts that retain the
governor cover (Figure 5–4). Remove the cover.
(2) Remove the governor assembly (Figure
5–5), rotating it clockwise to disengage the drive
gears. Refer to Paragraph 6–5 for governor assembly
inspection and rebuild.
(3) Remove the governor cover gasket.
f. Removal of Oil Pan
(1) Remove the twenty-one screws that re-
tain the oil pan.
(2) Remove the oil pan (Figure 5–6). Re-
move the pan gasket.
Figure 5–5. Removing Governor Assembly
Figure 5–6. Removing Oil Pan
g. Removal of Filter
(1) Remove washer-head screw 23 or 35
(Foldout 12,B), or bolt 42 and washer 43 that retains
the filter (Figure 5–6). Remove the filter.
(2) Remove the intake tube and sealring
(Figure 5–7).
h. Removal of Main Control Valve Body
(1) Remove the bolt that retains the detent
spring (Figure 5–7). Remove the spring.
H02895
VALVE ACTUATING ROD
(EARLIER MODELS)
SEALRING
VACUUM
MODULATOR
GOVERNOR
COVER
BOLT,
5
⁄16-18 x
9
⁄16 in. (4)
H02896
OIL PAN
SCREW
(21)
GOVERNOR
ASSEMBLY
GASKET
H02897
OIL PAN
OIL FILTER
SCREW
GASKET
 Loading...


