RS2310002 Rev. 1 24
Installation Instructions for Freestanding Ranges
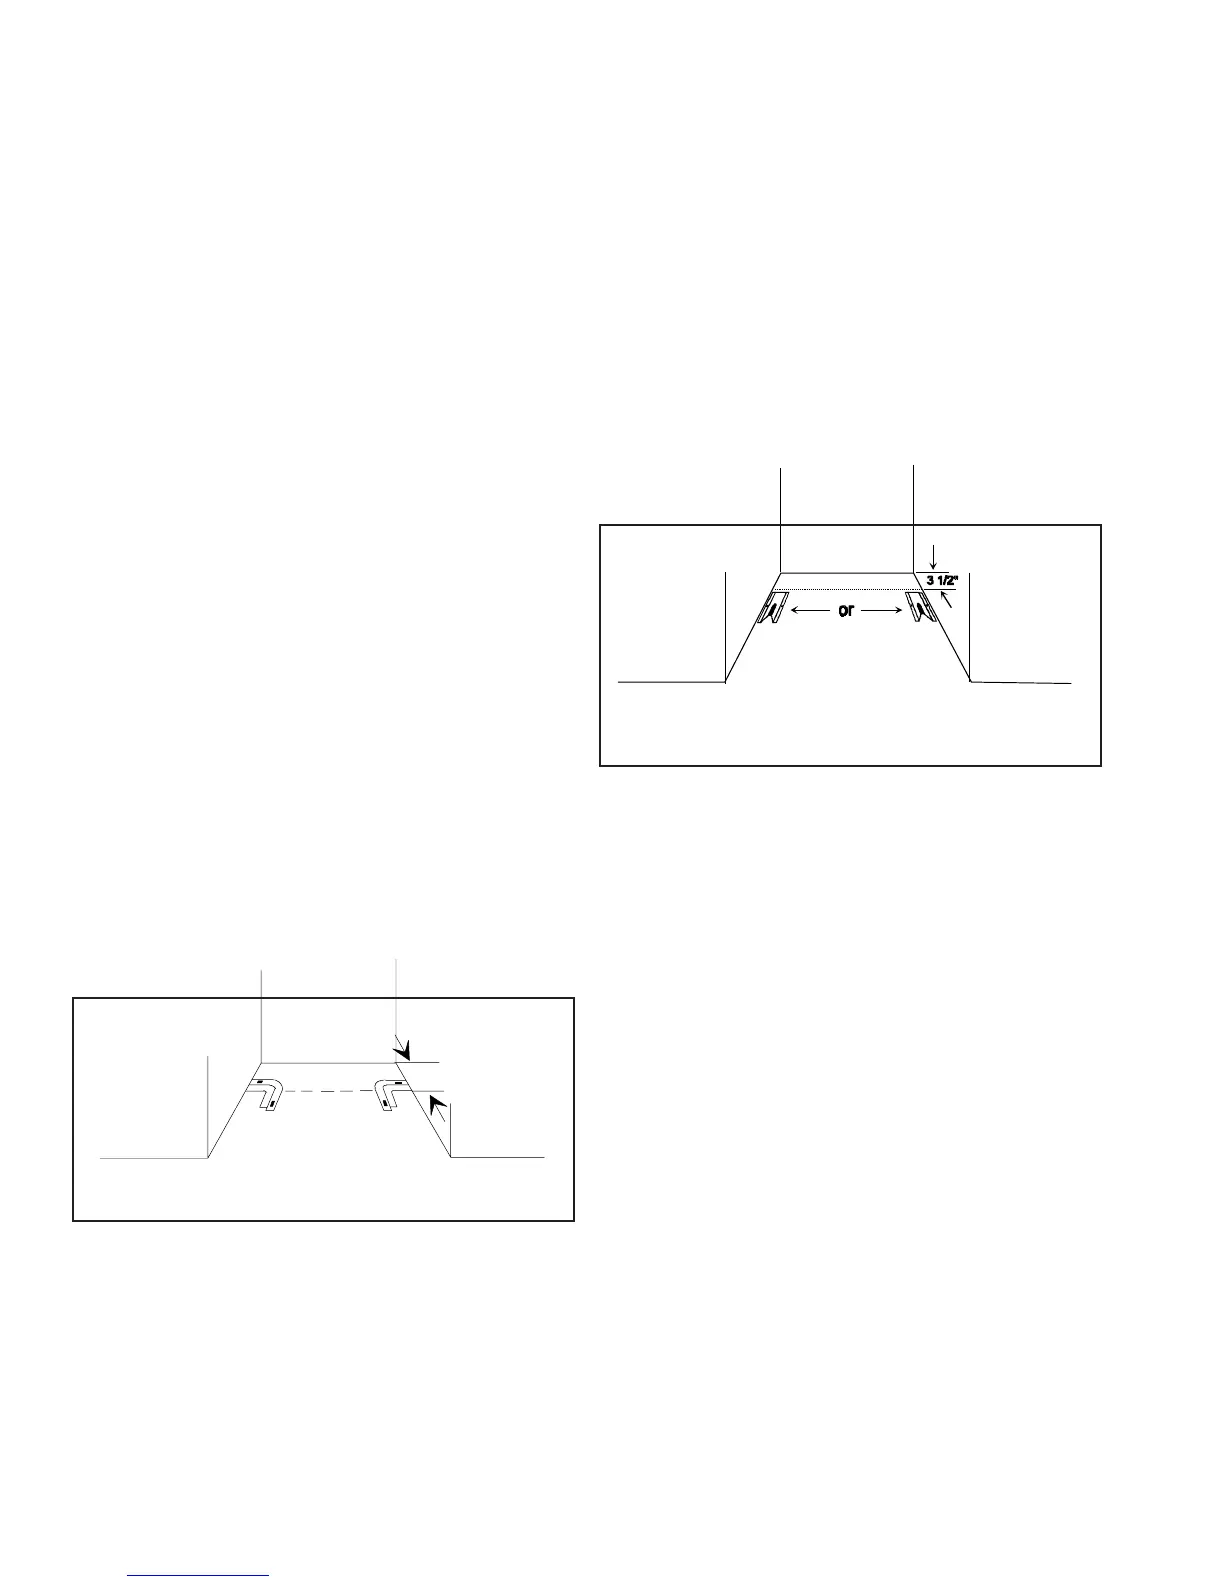
side of cabinet cutout. Mark measurements on floor
and draw a straight line connecting marks.
2. Position anti-tip bracket.
• If range is installed beside cabinet(s), place anti-tip
bracket with back edge on line drawn on floor and
side of bracket against cabinet.
• If range is not installed beside cabinet(s), position
range where it will be installed. Draw a line along
side of range on floor from front to back. Remove
range. Place anti-tip bracket with back edge over
line drawn 3
1
/2 inches from back wall and side of
bracket over line drawn along side of range on floor.
• Anti-tip bracket can be installed on either right or
left side.
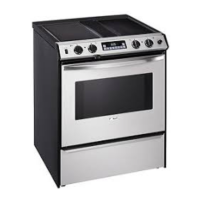
3. Mark 2 hole locations in anti-tip bracket.
4. Drill 2 holes.
• If drilling into wood, use a
3
/32 inch drill bit.
• If drilling into concrete, use a
3
/16 inch masonry drill
bit and insert plastic anchors.
5. Secure bracket to floor using screws supplied.
6. Slide range into position.
7. Remove range storage drawer and confirm anti-tip
bracket is engaged with range leveling leg.
Electrical Connection Requirements
Special Counter Top Conditions
Countertops such as ceramic tile tops cause cabinet and
counter top to be higher than 36 inches. Follow
instructions below when counter top is higher than 36
inches.
1. Raise leveling legs to maximum level.
2. Measure from floor to side trim. If measurement is
less than height of countertop floor must be shimmed.
3. Shim floor using a piece of plywood same size as
range opening. Secure plywood to floor. Plywood
must be as secure as original flooring.
4. Install anti-tip bracket(s) and slide range into place.
Anti-tip Bracket Installation
To reduce risk of range tipping, secure range with a
properly installed anti-tip bracket(s). Use either
rectangular or L-shaped anti-tip bracket(s) packed with
range. Follow appropriate instructions.
L-shaped Anti-tip Brackets
1. Measure 5
1
/8 inches from back wall on right and left
side of cabinet cutout. Mark measurements on floor
and draw a straight line connecting marks.
2. Position anti-tip brackets with inside edge over line
drawn on floor and end of bracket against cabinet.
• If range is not installed beside cabinet(s), position
range where it will be installed. Draw a line along
side of range on floor from front to back. Remove
range. Place anti-tip brackets with inside edge over
line drawn 5
1
/8 inches from back wall and end of
bracket over line drawn along side of range on floor.
• Anti-tip bracket must be installed on both right and
left side.
5
1/8"
3. Mark hole locations in each anti-tip bracket.
4. Drill holes.
• If drilling into wood, use a
3
/32 inch drill bit.
• If drilling into concrete, use a
3
/16 inch masonry drill
bit and insert plastic anchors.
5. Secure brackets to floor using screws supplied.
6. Slide range into position.
7. Remove range storage drawer and confirm anti-tip
brackets is engaged with range leveling leg.
Rectangular Anti-tip Bracket
1. Measure 3
1
/2 inches from back wall on right and left