17 RS2310002 Rev. 1
Installation Instructions for Slide-In Ranges
Testing for Gas Leaks
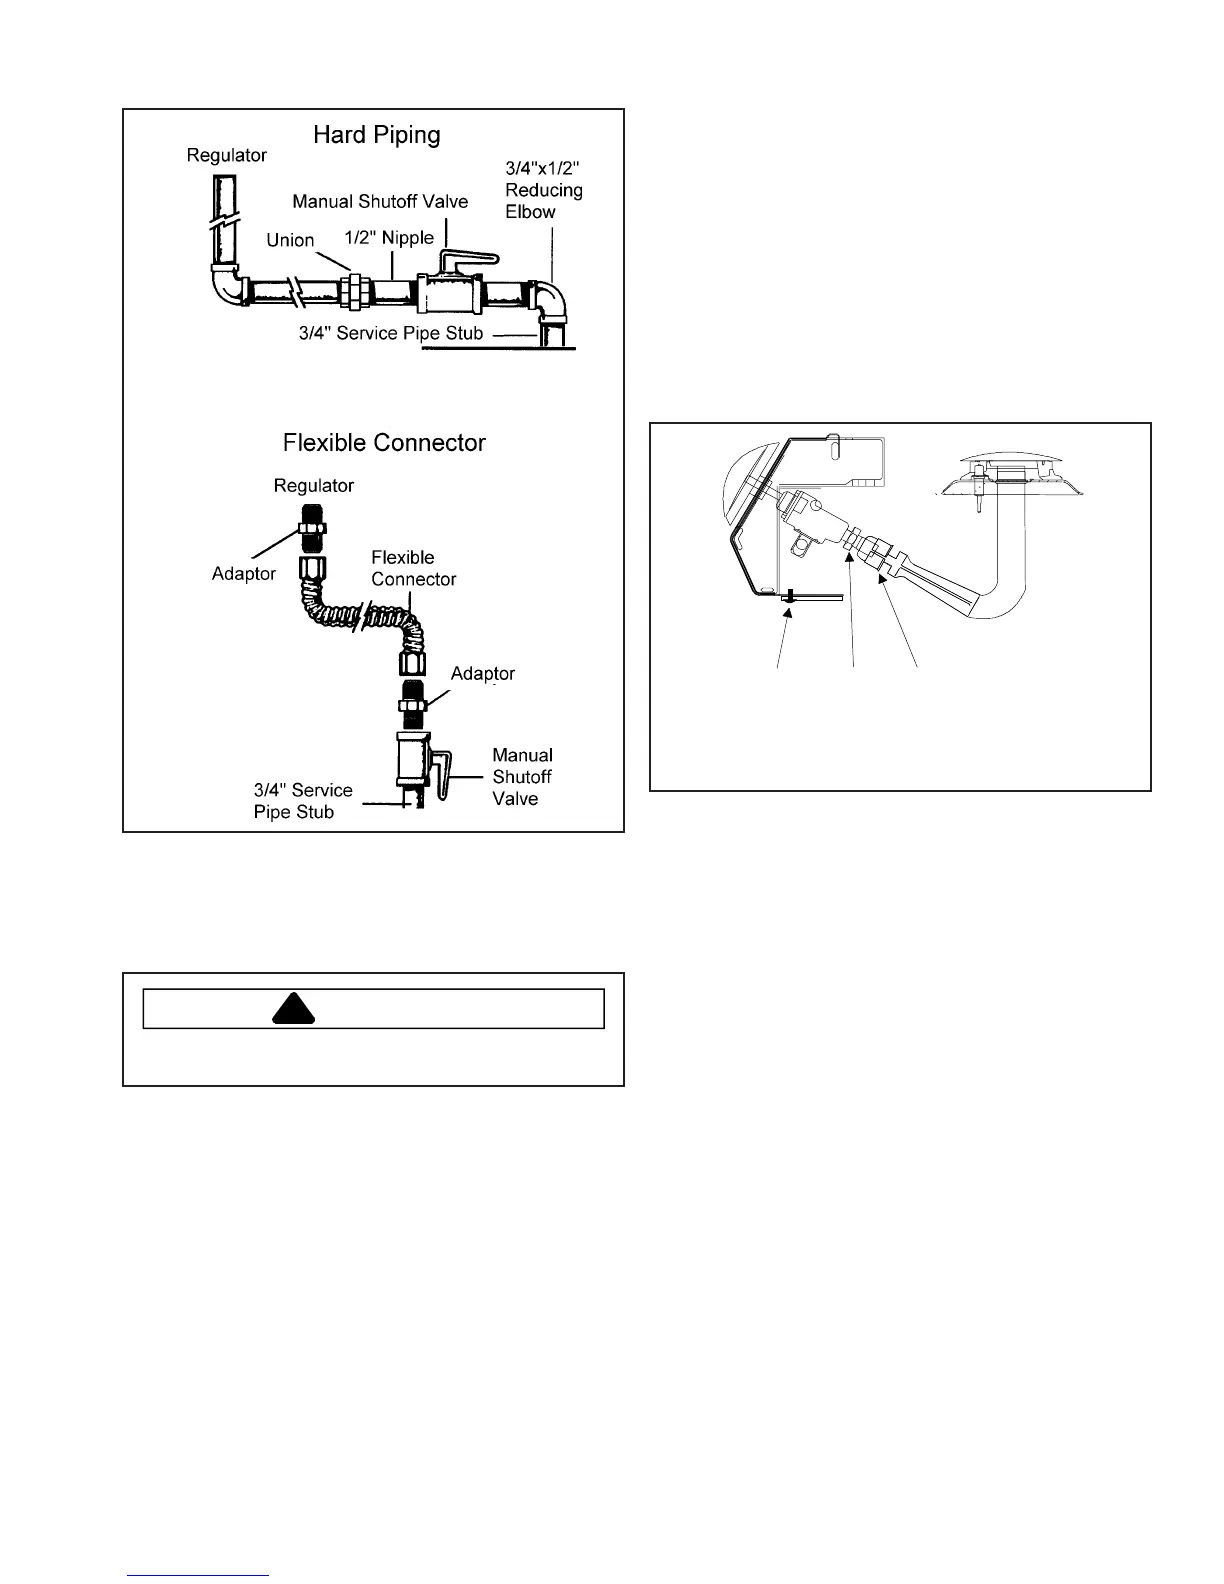
After final gas connection is made, turn on manual gas
valve and test all connections in gas supply piping and
range for gas leaks.
WARNING
To avoid property damage or serious personal injury,
never use a lighted match to test for gas leaks.
1. Place soap suds on connection.
• Bubbles appear if leak is present.
2. If bubbles appear, shut off gas supply valve.
3. Tighten joint if leak is at factory fitting.
• If leak is not at factory fitting, unscrew, apply more
joint compound, and tighten to correct leak.
4. Retest connection for leak after tightening.
• Retest any connections that were disturbed.
Converting Surface Burners for Use with
LP/Propane
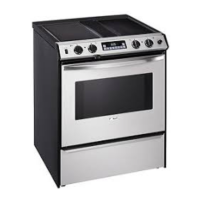
1. Remove access covers located under burner control
panel.
• Each cover is attach with a screw.
2. While facing range front, turn orifice hoods
counterclockwise 1½ to 2 turns or until snug.
• Use ½ inch open end or 90° offset open end
wrench.
• Do not over tighten orifice hoods. If orifice hoods
are over tightened, gas supply can be cut off or
orifice hoods can strip.
A
B
C
A—Access cover and screw
B—Orifice hood
C—Air shutter
3. Adjust air shutter using small screw driver.
• Slide air shutter until shutter is fully open. See
“Adjusting Surface Burner Flame”.
4. Replace access cover and screw.