The tested sample now has to be removed and replaced by the next sample to be
tested.
The second test is started by pressing on the green "START TEST" button at the bottom
right hand side of the screen.
If a pretest question has been defined, the dialog will be displayed requesting this
information. Enter the relevant information then press on the "OK" button.
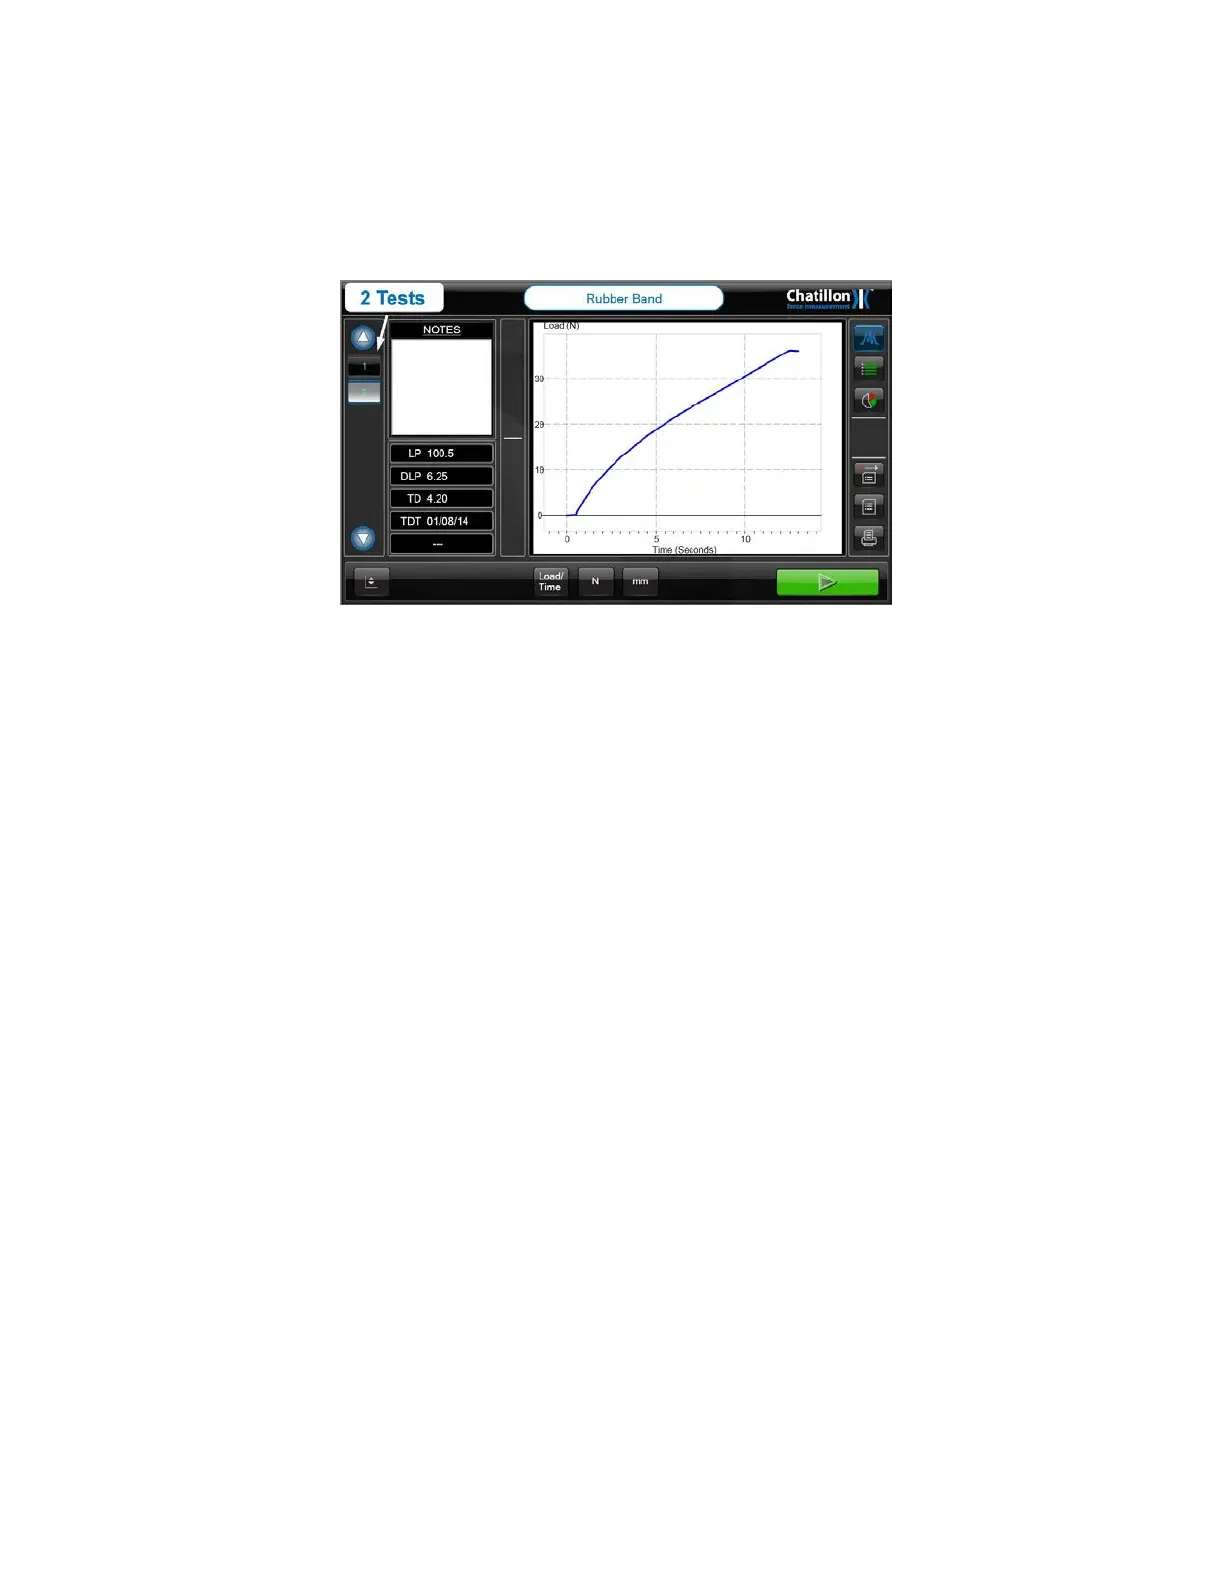
When this second test has finished, the new test graph is displayed in the "Graph Area" and
the selected results are displayed in the "Test Results" area to the left of the graph.
The left hand vertical area of the screen now displays two buttons, marked "1" and "2", to
show that 2 tests have been performed. Both numbers are shown in green because the
measured values are within the optional pass/fail parameters. A number will be shown in red
if the relevant test fails the pass/fail parameters.
Note that every test will pass by default if no pass/fail parameters are specified.
At the end of test number 2, the graph and selected results are displayed for test number 2.
The graph and results for tests number 1 can be displayed by pressing on the button marked
"1" at the left hand area of the screen.
Continue testing until the required number of samples has been tested.
82 CS User Manual
 Loading...