User Manual - Rev AV AMETEK Programmable Power
MX Series 178
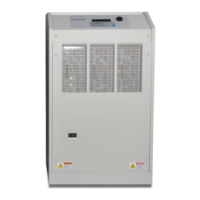
6.5 Non-Routine Calibration
The non-routine calibration may involve removing the front or top cover of the power source.
Use extreme caution when performing any of these tasks while the system is connected to AC
mains and/or powered up.
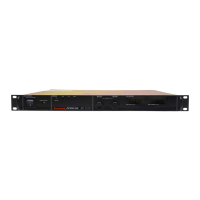
6.5.1 Power Source Gain Adjustment
For any MX configuration that requires two or more amplifiers to be operated in parallel for
increased current output, the amplifier gains have to matched as closely as possible to ensure
equal current sharing. If an unbalance exists between amplifier outputs, one or the other
amplifier will deliver more current and may run into its current limit protection before full output
power can be attained.
This procedure details the gain adjustment. Generally, MX units are shipped with the gains
already set correctly so this task should only be undertaken if an amplifier has been replaced or if
two MX units are to be combined that were not originally shipped from the factory as such.
To make this adjustment the front cover must first be removed in order to get access to the
power module output terminals. If the power system to be adjusted is an MX45-1, the procedure
involves matching the output voltage of the B and C power modules to the A module. Proceed as
follows:
1. Verify the controller is indeed set for 1-phase operation.
2. Shut off all power to the cabinet. Disconnect the two wires going to Terminal 6 and Terminal
7 on the lower front of the power modules. Do this to module B and C only. Place some
temporary insulation over the lug ends.
3. Connect a DMM between terminals 6 and 7 on the A module. Power up the cabinet. Set the
controller to the 300V range, program 230V at 60Hz. Enable the output by pressing the
OUTPUT ON/OFF key.
4. Measure the A module output voltage and write it down. Press the OUTPUT ON/OFF key to
disable the output.
5. Move the DMM leads to the B module terminals 6 and 7. Press the OUTPUT ON/OFF key
again to enable the output. Verify the phase B module output is within 50mVolts of the A
module. If it is not, adjust the pot behind the hole in the upper left corner of the module so the
B output matches the A output within 50mVolts. Press the OUTPUT ON/OFF key to disable
the output.
6. Move the DMM leads to the C module terminals 6 and 7. Press the OUTPUT ON/OFF key
again to enable the output. Verify the phase C module output is within 50mVolts of the A
module. If it is not, adjust the pot behind the hole in the upper left corner of the module so the
C output matches the A output within 50mVolts.
7. Power down system and replace the wires to terminals 6 and 7 on the B and C modules.