8
Installation, Operation and Maintenance Manual
OXYvisor Optical Oxygen Analyzer
LIST OF FIGURES 8
Figure 1 - Light Transmission 15
Figure 2 - O
2
Quenching Intensity vs Time 15
Figure 3 - O
2
Quenching AC Modulation 15
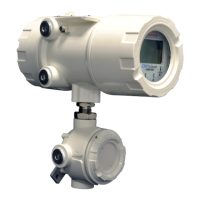
Figure 4 - OXYvisor overview of hardware features 17
Figure 5 - OXYvisor Overall Dimensions 17
Figure 6 - OXYvisor Product Label / Name Plate 19
Figure 7 - Examples of OXYvisor Product Label / Name Plate 20
Figure 8 - OXYvisor Vertical Pipe Mount Examples 27
Figure 9 - OXYvisor Horizontal Pipe Mount Example 27
Figure 10 - OXYvisor Direct Mount - 28
Figure 11 - OXYvisor Optional Wall Mount Kit 28
Figure 12 - OXYvisor Protective Ground Screws 29
Figure 13 - AC Terminal Board - Located in Rear (Wiring) Compartment 30
Figure 14 - DC Terminal Board - Located in Rear (Wiring) Compartment 30
Figure 15 - BOS Sensor With Integral RTD Through Junction Box 32
Figure 16 - BOS Sensor And External RTD through Junction Box 33
Figure 17 - BOS Sensor And External RTD or Zone 1 33
Figure 18 - Zone 1 HazLoc - Installation Control DWG - 2P0345 (p.1) 34
Figure 19 - Zone 1 HazLoc - Installation Control DWG - 2P0345 (p.2) 35
Figure 20 - Zone 1 HazLoc - Installation Control DWG - 2P0345 (p.3) 36
Figure 21 - Zone 2 HazLoc - Installation Control DWG - 2P0346 (p.1) 37
Figure 22 - Zone 2 HazLoc - Installation Control DWG - 2P0346 (p.2) 38
Figure 23 - Zone 2 HazLoc - Installation Control DWG - 2P0346 (p.3) 39
Figure 24 - Class I Div. 2 HazLoc - Installation Control DWG - 2P0335 (p.1) 40
Figure 25 - Class I Div. 2 HazLoc - Installation Control DWG - 2P0335 (p.2) 41
Figure 26 - Class I Div.2 HazLoc - Installation Control DWG - 2P0335 (p.3) 42
Figure 27 - OXYvisor HMI Keypad and LED Display 44
Figure 28 - Main Display (Four Viewing Options) and Sub-Menu Options 46
Figure 29 - Programming Menu Flowchart 48
Figure 30 - Sub-Menu Measurement & Units Flow Diagram 50
Figure 31 - Sub-Menu Calibration 54
Figure 32 - Temperature Sensor - Smart Calibration 58
Figure 33 - Pressure Sensor - Smart Calibration 58
Figure 34 - Sub-Menu Input/Output Flow Menu 59
Figure 35 - Sub-Menu Diagnostic Test Security Flow Menu 62
Figure 36 - Sub-Menu Datalogging Flow Menu 64
Figure 37 - Installation of Junction Box 69
Figure A.4. 38 - AutoCal General Arrangement & Wiring 73
Figure A.34 - Modbus Connection 75
LIST OF FIGURES
LIST OF TABLES 8
LIST OF TABLES