To modify a value:
1) press the item’s button (e.g. straw-yellow or clear),
2) edit the text,
3) when you set the new name, press the
OK button, which takes you back
to the list.
The modified items will be marked with an orange background.
To accept the changes, press the
Apply button.
To restore the original list, press the Restore Default button.
11.12 Ethernet interface configuration (Pro only)
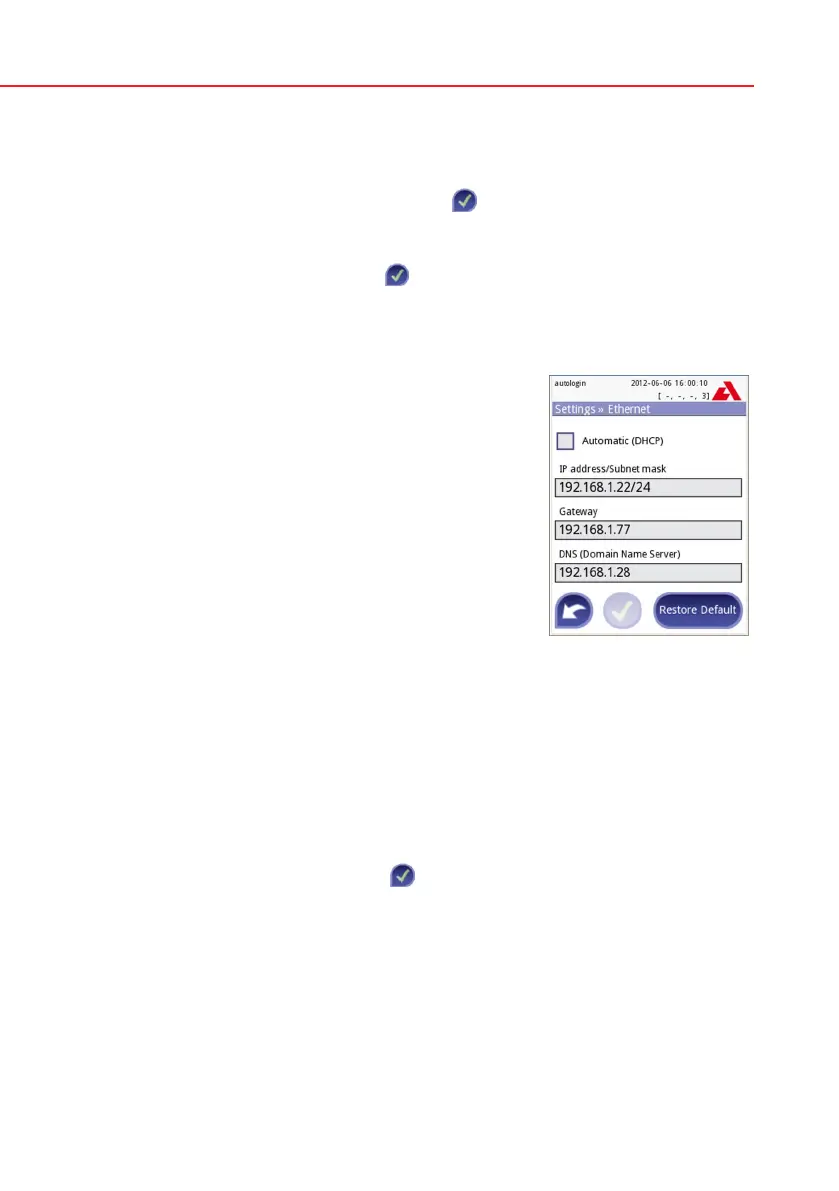
To connect the Urilyzer 100 Pro analyzer to the net-
work via Ethernet interface through TCP/IP, you have
to configure the Ethernet interface.
The values should be provided by your facility’s IT
system administrator.
The configuration can be performed:
• automatically(DHCP),
• manually.
For automatic configuration select the auto
(DHCP) checkbox.
By using DHCP, TCP/IP configuration is done dy-
namically and automatically when the analyzer is
started. Dynamic configuration requires a properly
configured DHCP server on your network.
For manual configuration uncheck the auto (DHCP) checkbox and manually
assign
• theIPaddress/subnetmask
(i.e. 192.168.1.5/24 or 192.168.1.5/255.255.255.0),
• thegateway,
• theDNSserver.
To confirm the changes, press the
Apply button after modification.
11.13 Update
The detailed description of the update procedure can be found in
4.3 Ana-
lyzer software updates.
Ethernet interface configu-
ration


 To Next Page