5. Use of the instrument
All inputs are done via the touch screen (if no external keyboard or barcode
reader is attached).
5.1 Screens
The touch screen guides you through the operation of the Urilyzer 100 analyzer.
The screen displays messages, instructions and options to which you respond
by touching the appropriate area on the screen.
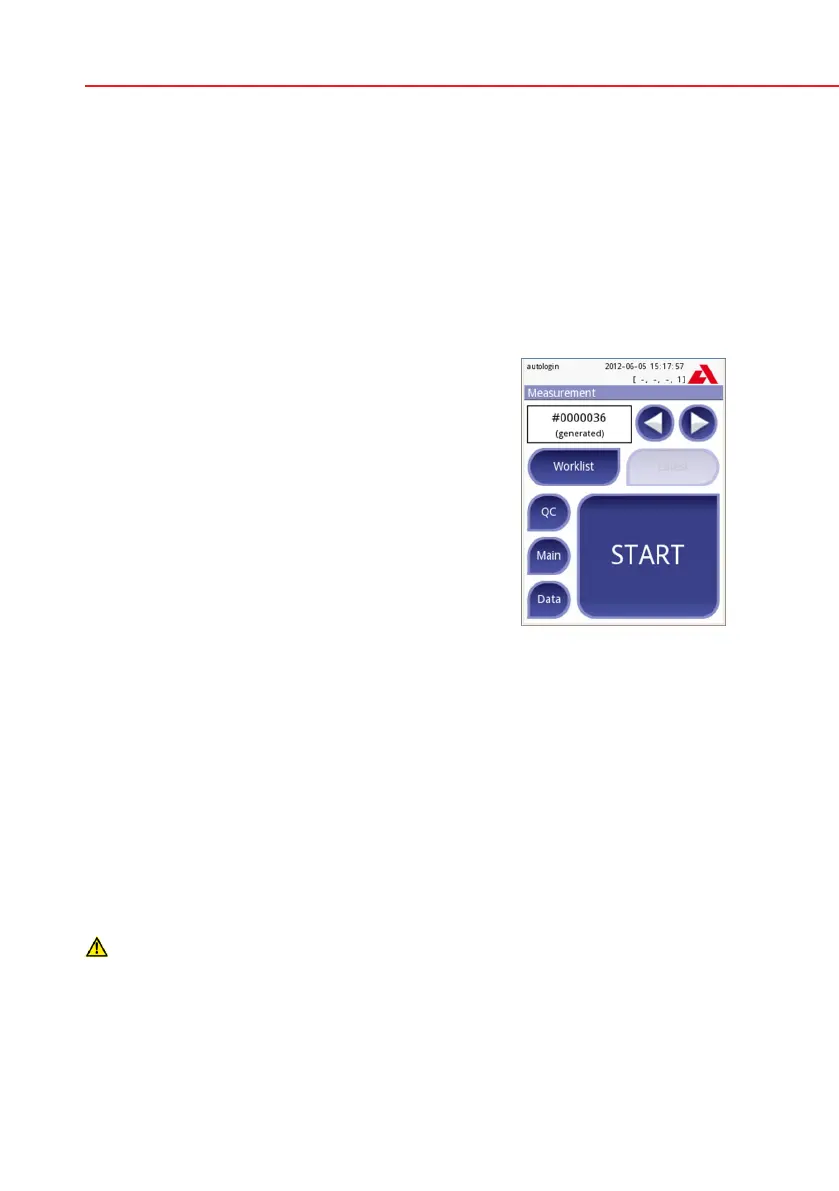
The screen layout can be divided into three main areas:
(1) Header: Displays important system information,
like date&time, user ID (Pro), queue and status line
messages.
The color background of the status bar changes
with the state of the system. Yellow means warn-
ing, red means error.
The active errors and warnings can be listed by
pressing the status bar area.
(2) Content navigation: Indicates the main and sub-
sections in which you are working. It gives you a way
to keep track of your location within the program.
The
»
sign serves as hierarchy separator.
(3) Content area: Main operation area
The first main screen you see is the Measure screen.
In the work area you can facilitate a measurement, review the last result, handle
the worklist, cycle through the worklist items and go to the QC, Main and Data
screens.
In some cases, the screen will also display instructions, messages or error mes-
sages.
5.2 Interacting with the touch screen
How to touch the display
The screen needs to be touched gently, but firmly in the touch-sensitive area to
activate a response. The touch-screen can be operated while wearing gloves.
Never use a hard or sharp object to operate the touch screen as they
can damage the screen.
A separate foil layer is attached to screen in order to prevent liquid leakage into
the system.
By default the sound is switched on. A successful touch event is also con-
firmed with a short beep signal.
Layout


 To Next Page