4. Unpacking & Set Up
4.1 Unpacking
Read the Urilyzer 100 Operator’s Manual carefully before installation,
so as to ensure proper operation of the analyzer from the outset.
Follow the specified installation instructions carefully. Otherwise, inac-
curate results or damage to the analyzer may occur.
Check the carton and instrument for visible signs of damage; if seen, contact the
carrier immediately.
Carefully remove the contents of the shipping carton, remove each of the wrap-
pings and check for the following items:
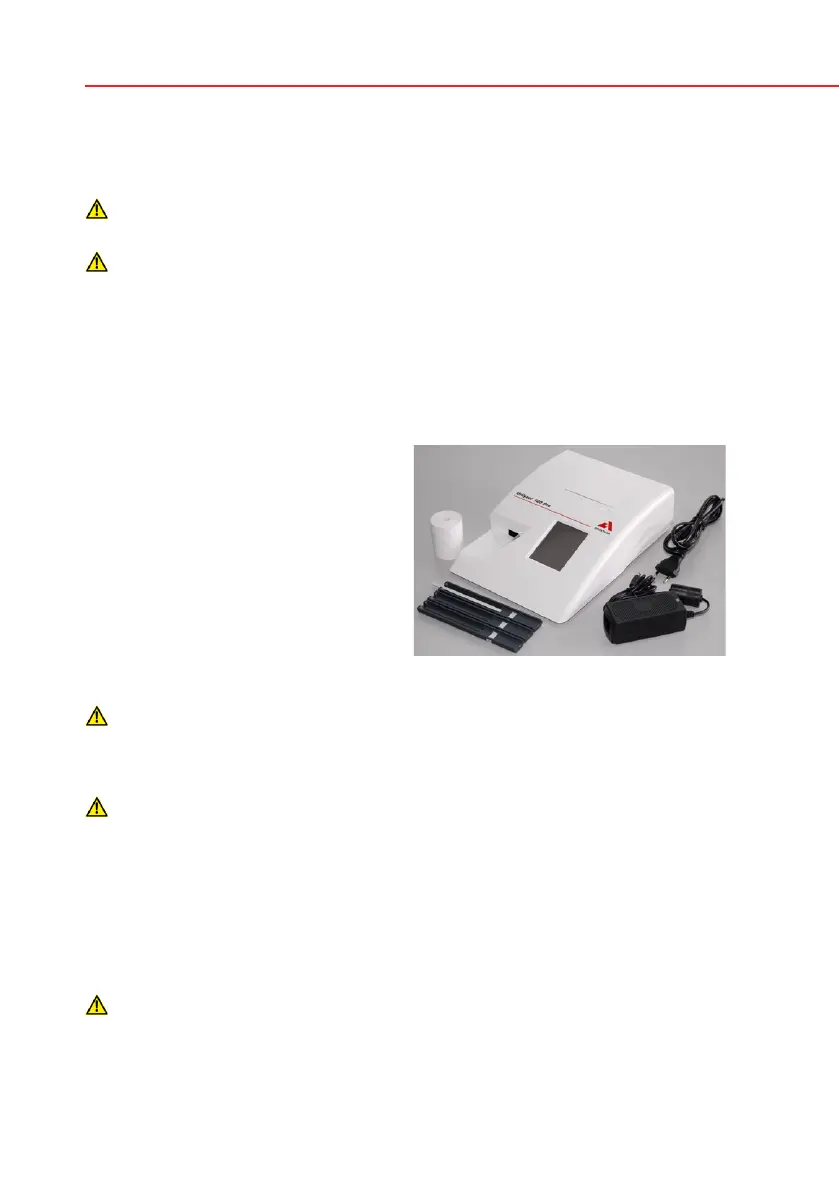
List of delivered parts:
• Urilyzer100analyzer
• Powersupply
(AC Adapter 100V–240V, 50/60 Hz)
• Powersupplycord
If the power cord is not the style you
need, contact your service repre-
sentative
• Operator‘sManualCD
• QuickReferenceGuide
• Teststriptray(2x)
Do not touch the reference pad
• Rollofprinterpaper
• Checkstrip(1x)
Do not touch the check area, hold it by the handle
4.2 Setting up
Place the instrument on a solid, level surface where the temperature and humid-
ity are fairly constant.
Make sure the instrument is allowed to acclimatize to room temperature prior
to use.
Make sure that you
• Donotplacetheinstrumentincloseproximitytosourcesofstrongelec-
tromagnetic radiation or vibration sources
•
Do not place the instrument near heater devices, ovens or air conditioners
Contents


 To Next Page