PAGE 21
Section 6 - Menu StructureSection 6 - Menu Structure
Section 6 - Menu StructureSection 6 - Menu Structure
Section 6 - Menu Structure
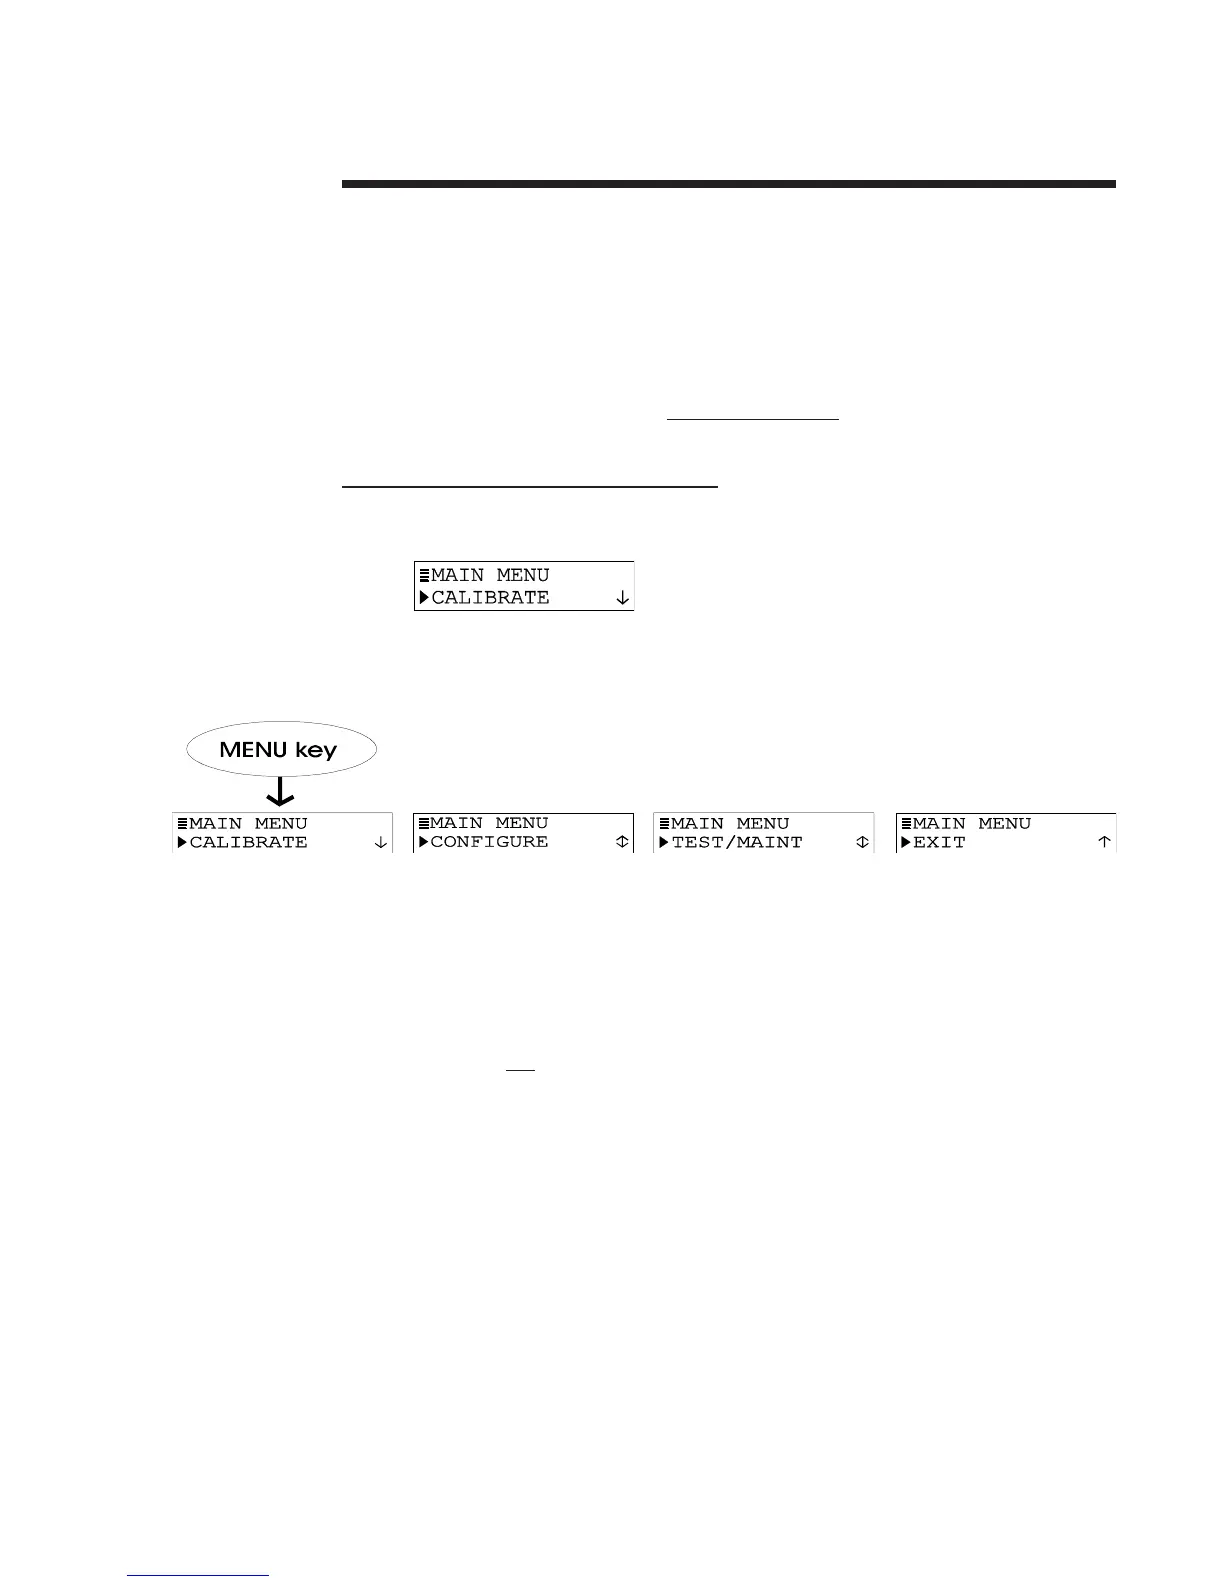
The transmitter menu tree is divided into three main branches: CALIBRATE, CONFIGURE, and
TEST/MAINT. Each main branch is structured similarly in layers with top-level screens, related
lower-level submenu screens and, in many cases, sub-submenu screens.
Each layer contains an EXIT screen to return the display up one level to the previous layer of
screens.
Menu Structure Tip! For operating convenience, the layers within each main
branch are organized with the
most frequently used function screens at their
beginning, rather than the function screens used for initial startup.
6.1 Displaying Main Branch Selection Screens6.1 Displaying Main Branch Selection Screens
6.1 Displaying Main Branch Selection Screens6.1 Displaying Main Branch Selection Screens
6.1 Displaying Main Branch Selection Screens
1. With the MEASURE screen displayed, pressing the MENU key always shows the
branch selection screen. (Pressing the MENU key with any
other type of screen displayed always returns the display to the top of that respective
menu branch).
2. Press
ØØ
ØØ
Ø and
××
××
× keys to select between the three MAIN MENU branch selection
screens (CALIBRATE, CONFIGURE or TEST/MAINT), or the EXIT screen:
3. With the desired MAIN MENU branch selection screen displayed, press ENTER key to
display the
first top-level menu screen within that branch.