PAGE 47
8.4 TDS Calibration8.4 TDS Calibration
8.4 TDS Calibration8.4 TDS Calibration
8.4 TDS Calibration
When the transmitter is set to measure % concentration but you want to calibrate using a
conductivity reference solution, please refer to Section 8.3, subsection “COND CAL Method” and
follow steps 1 through 13.
When the transmitter is set to measure TDS, only the “TDS CAL” method is available to calibrate
sensor span. This method requires you to immerse the sensor into a properly prepared TDS
reference solution of known ppm value, or to keep the sensor installed in the process while
obtaining a process sample. In either case, enter the known reference solution or sample ppm
value.
1. Depending on the situation, do
one of the following:
• When Keeping Sensor Installed:
Obtain a sample of the process solution and determine its value using laboratory
analysis or a recently calibrated portable meter.
• When Immersing Sensor in Reference Solution:
A. Prepare a TDS reference solution using your normal method. To achieve accu-
rate calibration, the reference solution must have the same chemical compo-
sition as the process. Also, its value should be near the typical measured
process value. When the value is between 100 and 72,710 ppm NaCl, the data in
step 1 and TABLE E of Section 4.3, subsection “COND CAL Method” can be used
to prepare the reference solution.
B. Thoroughly rinse the clean sensor in de-ionized water. Then immerse the sensor in
the prepared reference solution. Important: Allow the sensor and solution
temperatures to equalize. Depending on their temperature differences, this may
take up to 30 minutes.
NOTE: Suspend the sensor to prevent it from touching the container. Simply laying it into
the container will produce calibration error. If the sensor is tee-mounted, use a
smaller container. Ideally, convert a tee of the same size and material as the
mounting tee into a calibration container by sealing two of its ends.
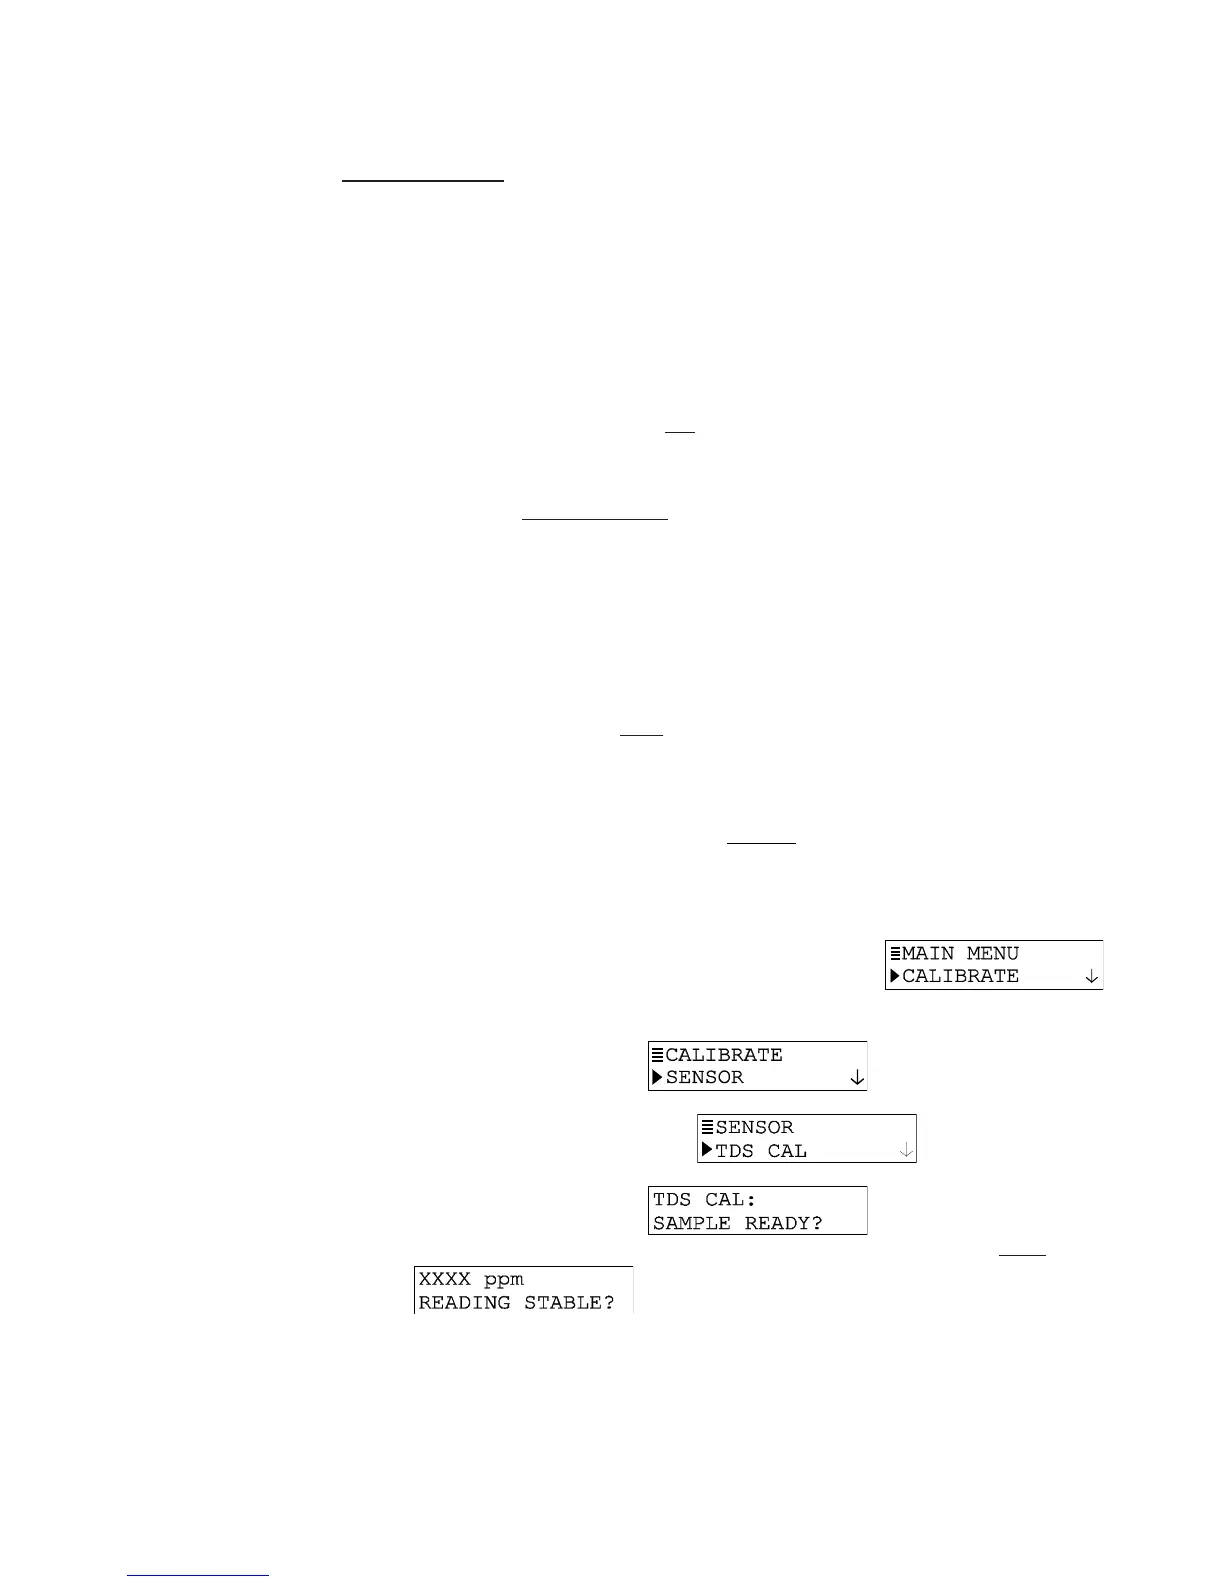
2. Press MENU key to display a “MAIN MENU” screen. If the
screen is not showing, use
ØØ
ØØ
Ø or
××
××
× key to display it.
3. Press ENTER key to display
.
4. Press ENTER key again to display
.
5. Press ENTER key to display
. With the sensor in the
process (or reference solution), press ENTER key again to confirm. This active
screen appears showing the measurement reading.
NOTE: During calibration, the analog output is automatically “held” at the last measured
value.
6. Wait for the reading to stabilize which may take up to 30 minutes. Then press ENTER
key. The “PLEASE WAIT” screen may appear if the reading is still too unstable. After