PAGE 40
Section 8 - TSection 8 - T
Section 8 - TSection 8 - T
Section 8 - T
ransmitter Calibrationransmitter Calibration
ransmitter Calibrationransmitter Calibration
ransmitter Calibration
8.1 Important Information8.1 Important Information
8.1 Important Information8.1 Important Information
8.1 Important Information
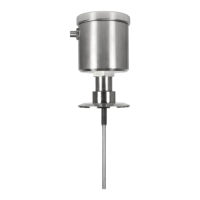
Each electrodeless conductivity sensor has a unique zero point and span. Consequently,
always zero the sensor when calibrating it for the first time (Section 8.2). Zeroing provides
the best possible measuring accuracy. After zeroing, calibrate for sensor span using one of the
available methods, and periodically thereafter to maintain best measurement accuracy. Over
time, some processes such as heavy slurries may plug the sensor hole, causing minor
measurement errors. The time between calibrations, and the rate of measurement drift can vary
considerably with each application and its specific conditions.
Calibration Tip! Establish a maintenance program to keep the sensor relatively
clean and the measuring system calibrated. The weekly or monthly intervals
between performing maintenance will be influenced by the characteristics of the
process solution, and can only be determined by operating experience.
Since the inherent ohm value of each sensor’s Pt 1000 RTD temperature element
varies slightly, each element is tested to provide a unique, factory-certified
temperature T FACTOR shown etched on the sensor housing. If this factor was
not previously entered during configuration in Section 7.2, subheading “SET T
FACTOR,” enter it now before zeroing or calibrating to provide the best
possible measuring accuracy.
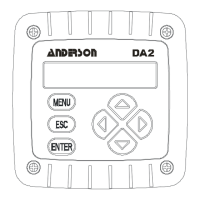
NOTE: When the passcode feature is enabled (Section 7.5), you must successfully enter the
passcode before attempting to calibrate the transmitter.
An in-progress calibration can always be aborted by pressing the ESC key. After the
“ABORT: YES?” screen appears, do one of the following:
• Press ENTER key to abort. After the “CONFIRM ACTIVE?” screen appears, press
ENTER key to return the analog output to its active state (MEASURE screen appears).
• Press
××
××
× or
ØØ
ØØ
Ø key to choose “ABORT: NO?” screen, and press ENTER key to
continue calibration.
In addition to zeroing and calibrating sensor span, the analog output loop can also be calibrated.
Refer to Section 4.6 for details.
Zeroing/Calibration Tip! If a “CONFIRM FAILURE?” screen appears during
zeroing or calibration, press ENTER key to confirm. Then, use
××
××
× or
ØØ
ØØ
Ø key to
select between “CAL: EXIT” or “CAL: REPEAT” and do
one of the following:
• With “(CAL: EXIT)” selected, press ENTER key. Then, after the “CONFIRM
ACTIVE?” screen appears, press ENTER key to return the analog output to its
active state (MEASURE screen appears).
• With “(CAL: REPEAT)” selected, press ENTER key to repeat zeroing or calibration.