PAGE 22
6.2 Displaying T6.2 Displaying T
6.2 Displaying T6.2 Displaying T
6.2 Displaying T
opop
opop
op
-Level Menu Screens-Level Menu Screens
-Level Menu Screens-Level Menu Screens
-Level Menu Screens
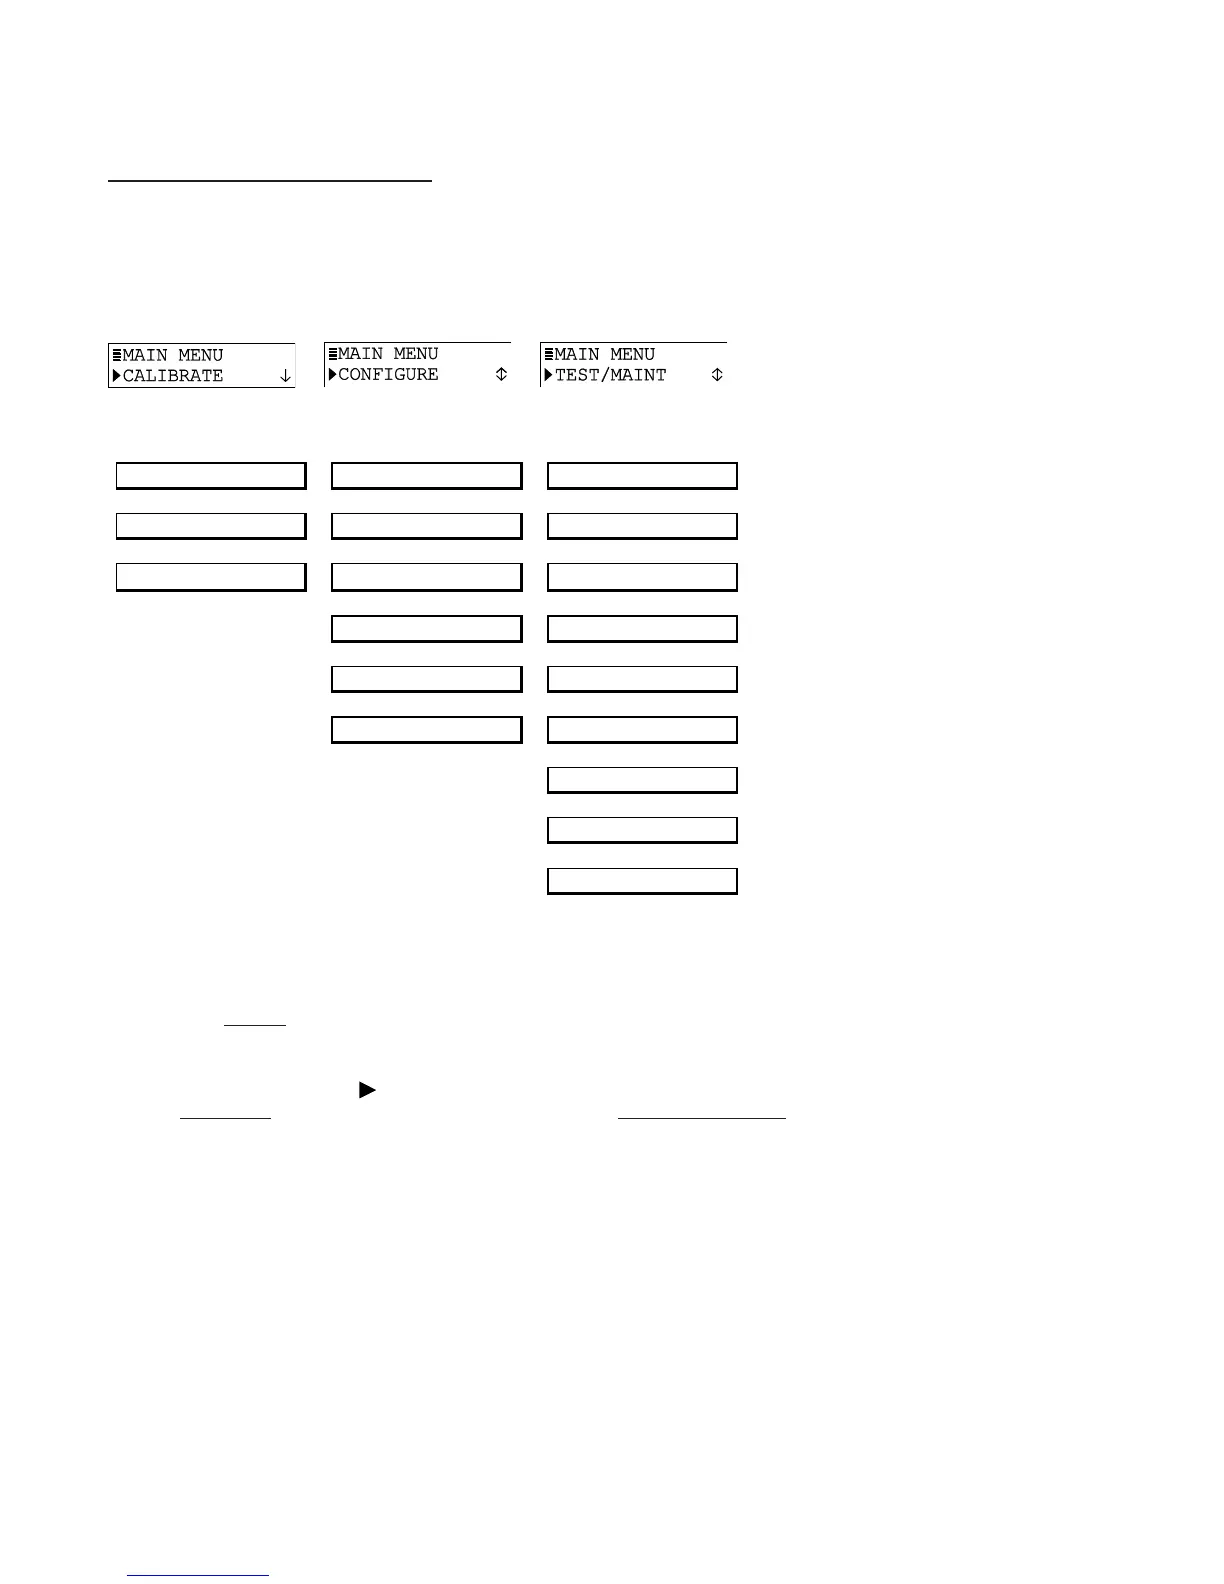
With the first top-level menu screen of the desired main branch displayed, use the
ØØ
ØØ
Ø and
××
××
×
keys to scroll through other top-level screens to access a desired screen.
The top-level menu screens for each main branch are:
SENSOR SET OUTPUT STATUS
CAL OUTPUT SET PASSCODE HOLD OUTPUT
EXIT
SET °C OR °F
OUTPUT
LANGUAGE EPROM VERSION
SENSOR SELECT SIM
EXIT SIM SENSOR
RESET CONFIGURE
RESET CALIBRATE
EXIT
Menu Structure Tip! A menu screen with a horizontal bar symbol ( | ) at the start
of its first line indicates there is a related submenu or edit/selection screen.
A menu screen with a
symbol at the start and a “È” symbol at the end of its
second line indicates that you can select other screens within the same layer by
pressing the
ØØ
ØØ
Ø key. A “
RR
RR
R“ symbol at the end of the second line indicates that
you can move up or down between screens by respectively pressing the
××
××
× or
ØØ
ØØ
Ø key. When a “Ç” symbol appears, it indicates you have reached the end of
the screens in that layer. You can select previous screens using the
××
××
× key.