PAGE 44
5. Press
ØØ
ØØ
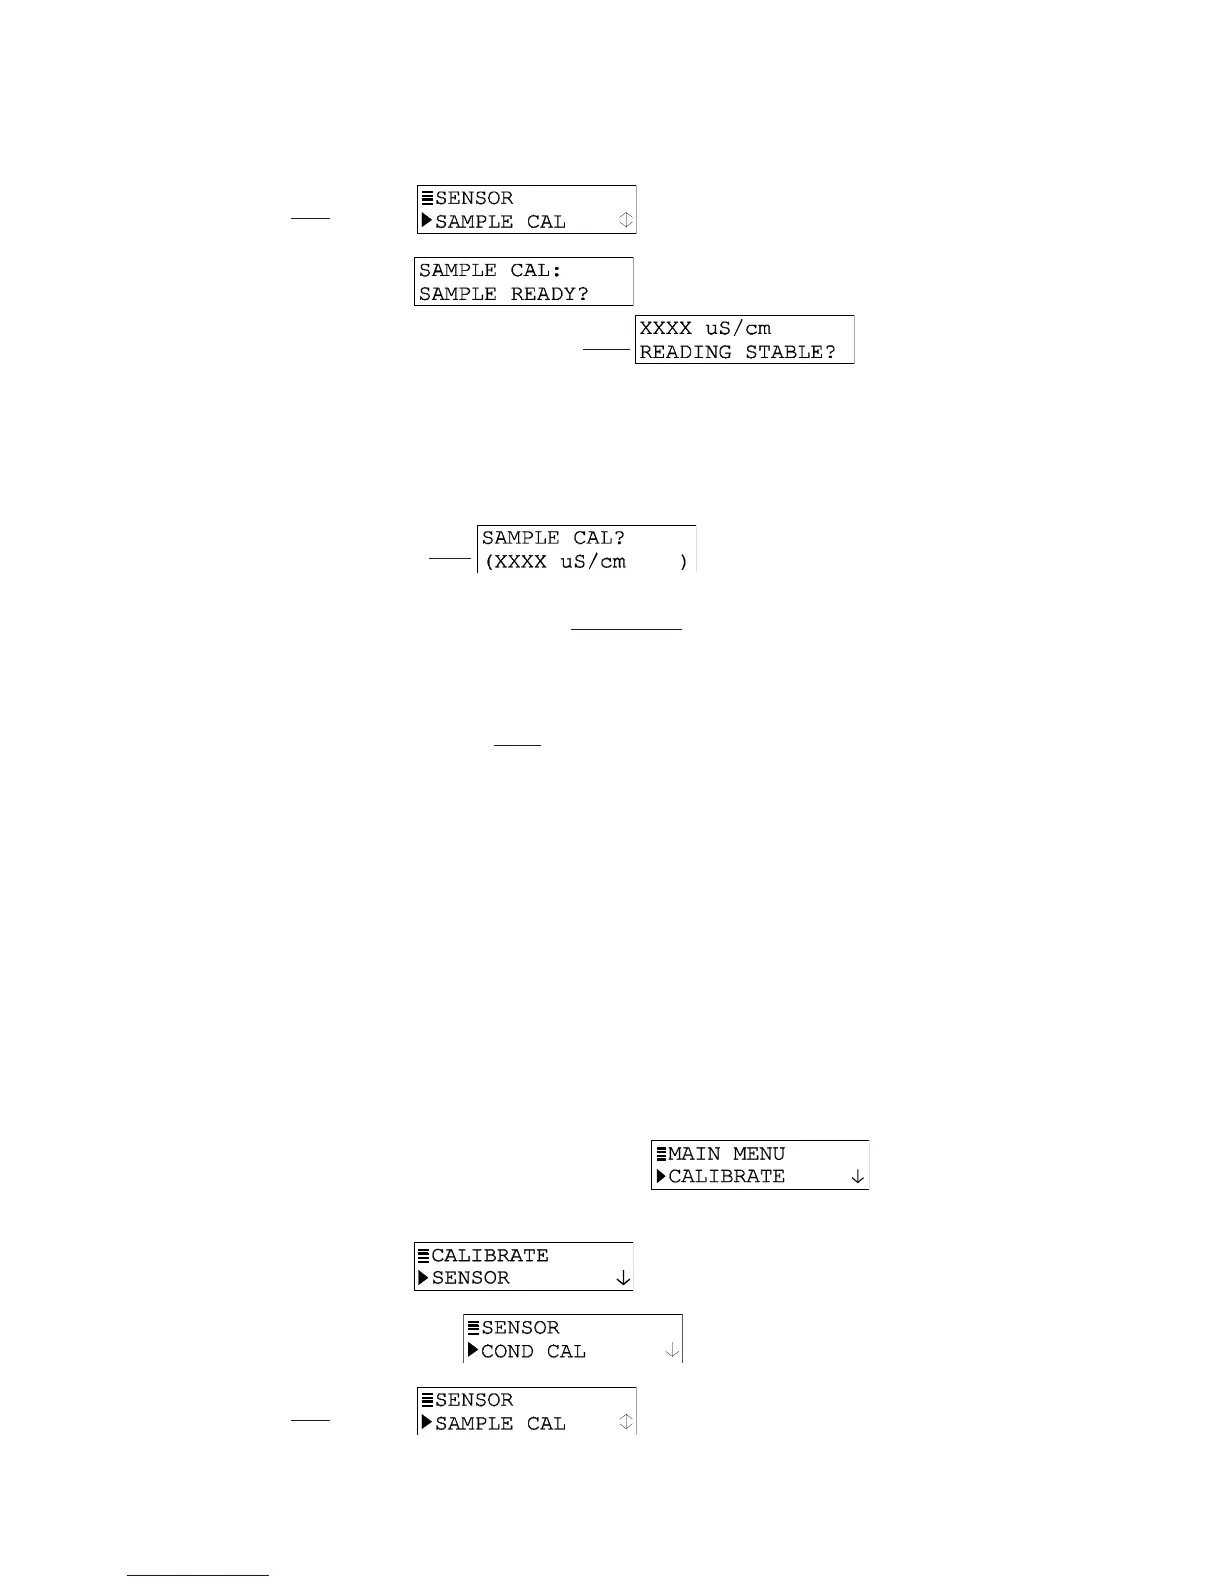
Ø key once to display .
6. Press ENTER key to display
. With the sensor in the
process, press ENTER key again to confirm. This
active
screen appears showing the measurement reading.
NOTE: During calibration, the analog output is automatically “held” at the last measured
value.
7. Wait for the reading to stabilize which may take up to 30 minutes. Then press ENTER
key. The “PLEASE WAIT” screen may appear if the reading is still too unstable. After
the reading has stabilized, this
static screen appears
showing the “last measured” value.
8. Use arrow keys to adjust the displayed value to exactly match the known value of the
process sample.
9. Press ENTER key to enter the value and complete calibration (“CONFIRM CAL OK?”
screen appears).
10. Press ENTER key again to display the active measurement reading on the “CONFIRM
ACTIVE?” output status screen. When the reading corresponds to the actual typical
process value, press ENTER key again to return the analog output to its active state
(MEASURE screen appears).
This completes SAMPLE CAL calibration.
ELECTRONIC CAL Method (only to be used after consulting with the factory)
The “ELECTRONIC CAL” method requires that the sensor be removed from the process and
utilizes a decade resistance box to simulate conductivity rather than an actual solution.
1. Determine the typical conductivity in µS/cm for the application.
2. Calculate the required loop resistance by dividing 470 million by the desired conductiv-
ity in µS/cm (or 470 divided by the desired conductivity in S/cm)
3. Wrap (9) nine loops of wire (18-22 AWG) around and through the center of the sensor.
4. Connect this wire to a 1% or better decade resistance box (the decade box forms a
10th loop). Set the decade box to the value calculated above.
5. Press MENU key to display a “MAIN MENU” screen. If the
screen is not showing, use
ØØ
ØØ
Ø or
××
××
× key to display it.
6. Press ENTER key to display
.
7. Press ENTER key again to display
.
8. Press
ØØ
ØØ
Ø key once to display .