1.
Power o, then unplug the QuantStudio
™
6 or 7 Flex System. Allow it to cool for
15 minutes.
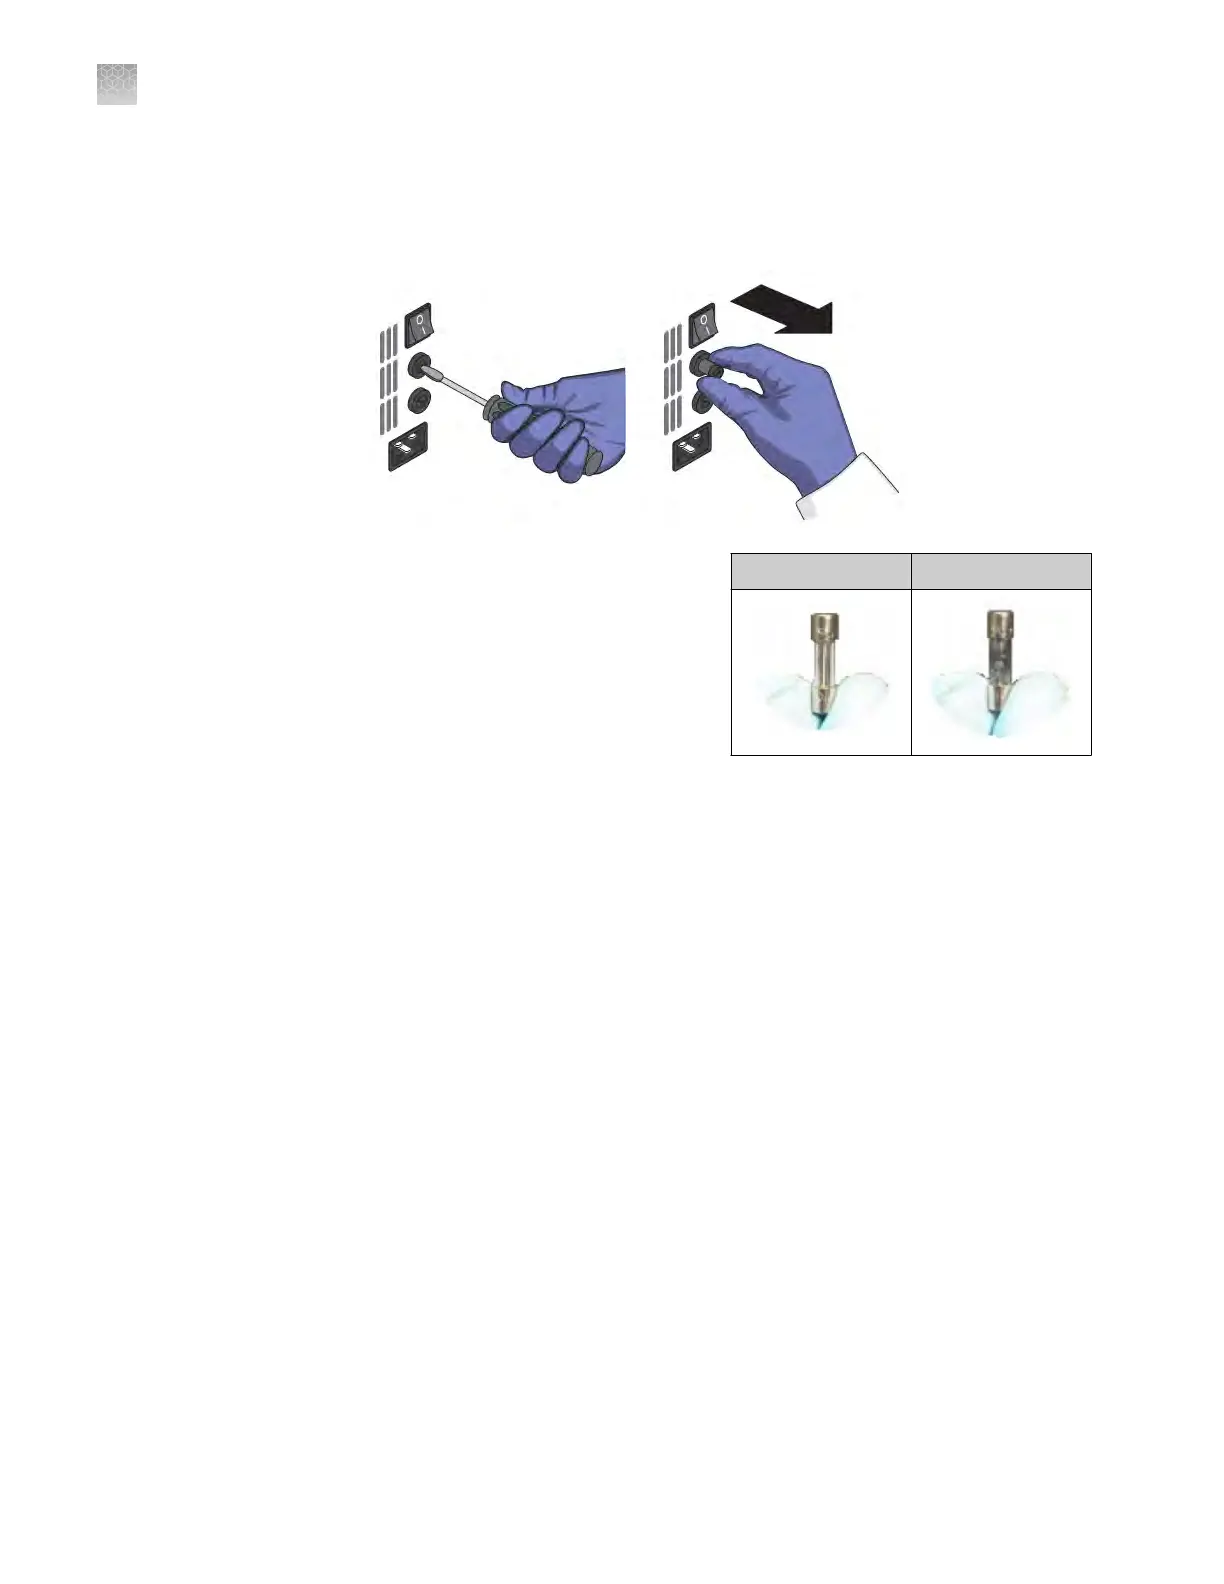
2.
Using a at-head screwdriver, unscrew and remove the fuse holder.
3.
Remov
e each fuse from its fuse
holder and inspect it for damage.
Carbon typically coats the inside of
failed fuses.
4.
Replace each failed fuse with a
12.5A, Time-Lag T, 250VAC, 5 ×
20-mm Fuse.
Note: The voltage and amperage ratings are on the fuse holder.
Note: For AU/NZ only, replace each failed fuse with a 6.3A, Time-Lag T,
250VAC, 5 × 20-mm Fuse.
5.
Install the fuse holder.
6.
Plug in, then power on the QuantStudio
™
6 or 7 Flex System. The installation is
successful if the instrument powers on.
Note: Fuse failure can result from uctuations in the supplied power to the
QuantStudio
™
6 or 7 Flex System. To prevent further failures, consider installing an
electrical protective device, such as a UPS or a surge protector.
Install the QuantStudio
™
Real‑Time PCR Software
See “Computer requirements“ on page 22 for a list of hardware and operating system
requirements for the QuantStudio
™
6 and 7 Flex Real-Time PCR System Software.
1.
Go to thermosher.com/qpcrsoftware.
2.
In the Real-Time PCR section, click Applied Biosystems QuantStudio 6 & 7 Flex
Real-Time PCR Systems.
3.
Click Download, then follow the instructions.
Replace the fuses
Good Failed
Computer
r
equirements
Install the
software
Appendix B Maint
enance
Install the QuantStudio
™
Real‑Time PCR Software
B
104
QuantStudio
™
6 and 7 Flex Real-Time PCR Systems v1.6 Maintenance and Administration Guide