4.
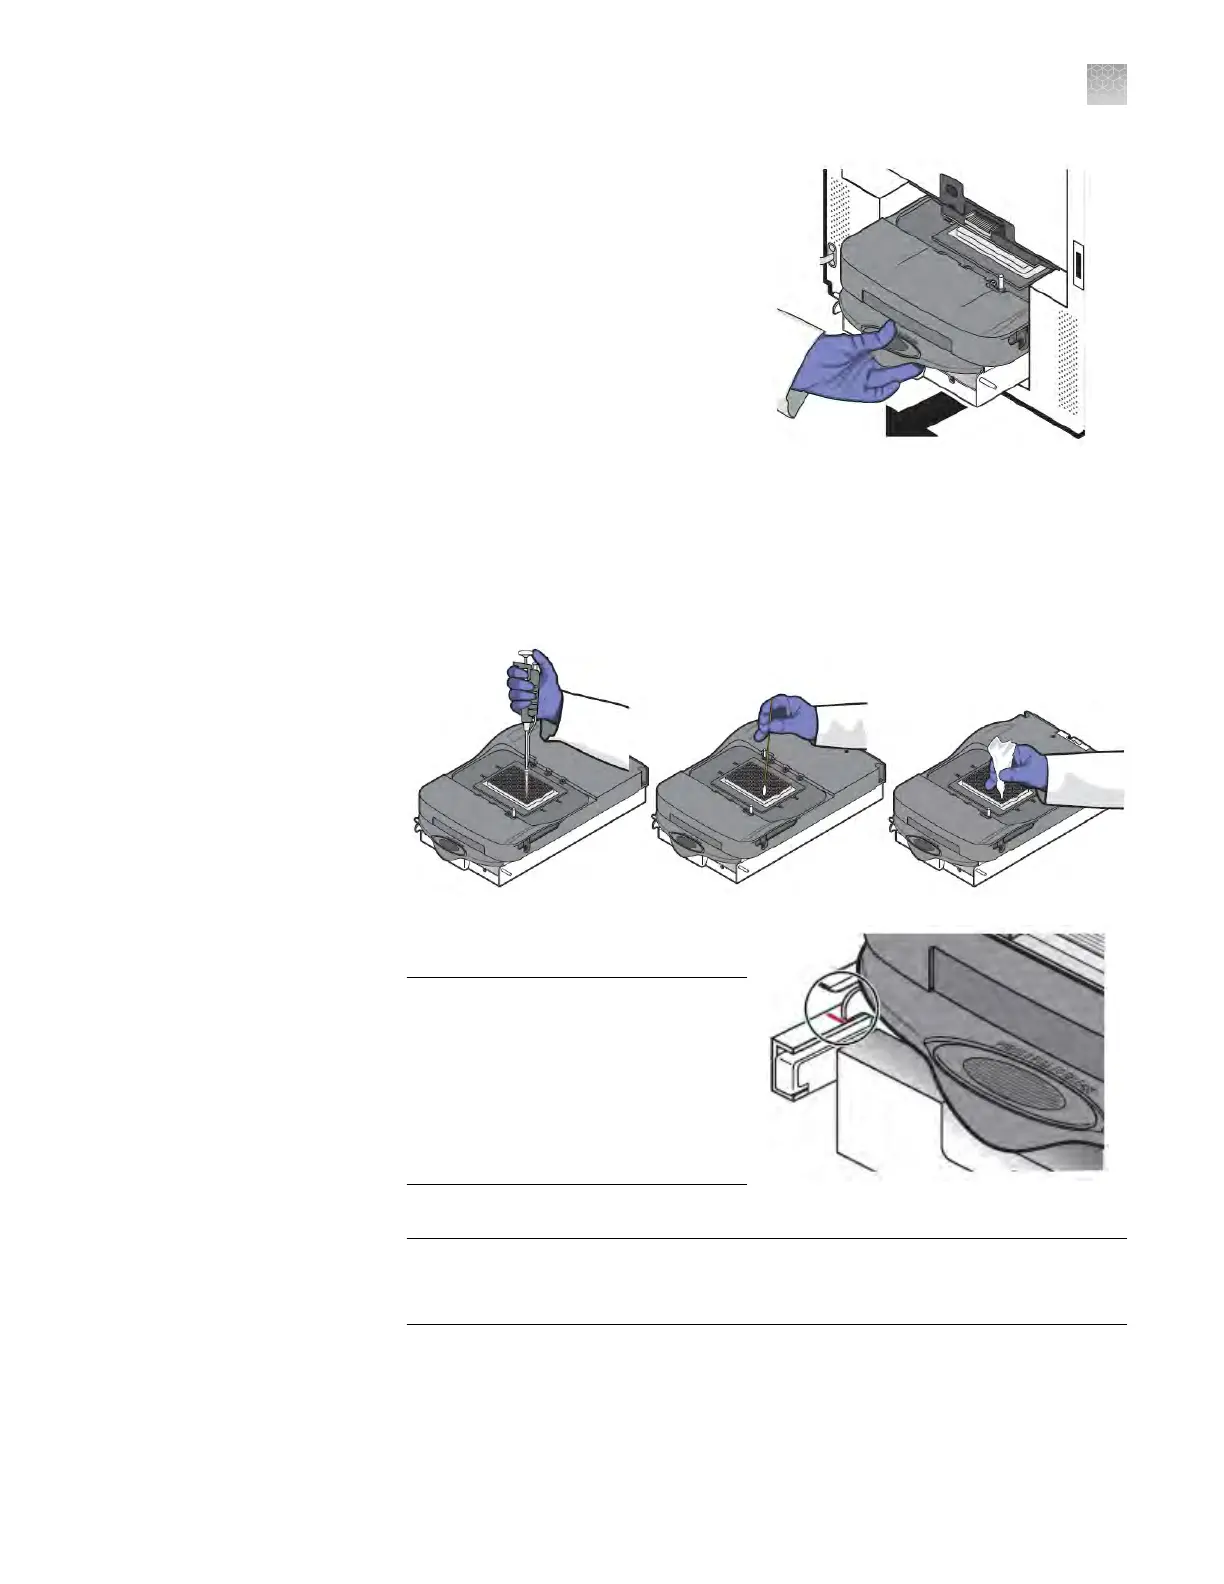
Firmly press down on the handle of
the sample block, then remove it
from the system. Place the sample
block on a clean, dry surface.
5.
Clean the contaminated wells of the
sample block using deionized water:
a.
Pipet a small volume of
deionized water into each
contaminated well.
b.
In each well, pipet the water up
and down several times to rinse the well.
c.
Pipet the water to a waste beaker.
d.
Use a coon swab to scrub inside of each contaminated well.
e.
Use a lint-free cloth to absorb the excess deionized water.
6.
Load the sample block into the
system, then close the access door
.
IMPORTANT! After installing the
sample block, conrm that the
indicator on the left side of the
sample block is positioned behind
the red line on the instrument rail. If
the indicator is forward of the red
line, push the sample block into the
system until it is seated correctly.
7.
Close the access door
.
IMPORTANT! Conrm that the access door is completely closed. The
QuantStudio
™
Real-Time PCR Software displays an error message if the door is
not completely closed and latched, or if the sample block is not seated correctly.
8.
Plug in, then pow
er on the QuantStudio
™
6 or 7 Flex Real-Time PCR System.
9.
Perform a background calibration to conrm that you have eliminated the
contamination.
Appendix B Maintenance
Decontaminate the sample block
B
QuantStudio
™
6 and 7 Flex Real-Time PCR Systems v1.6 Maintenance and Administration Guide
99