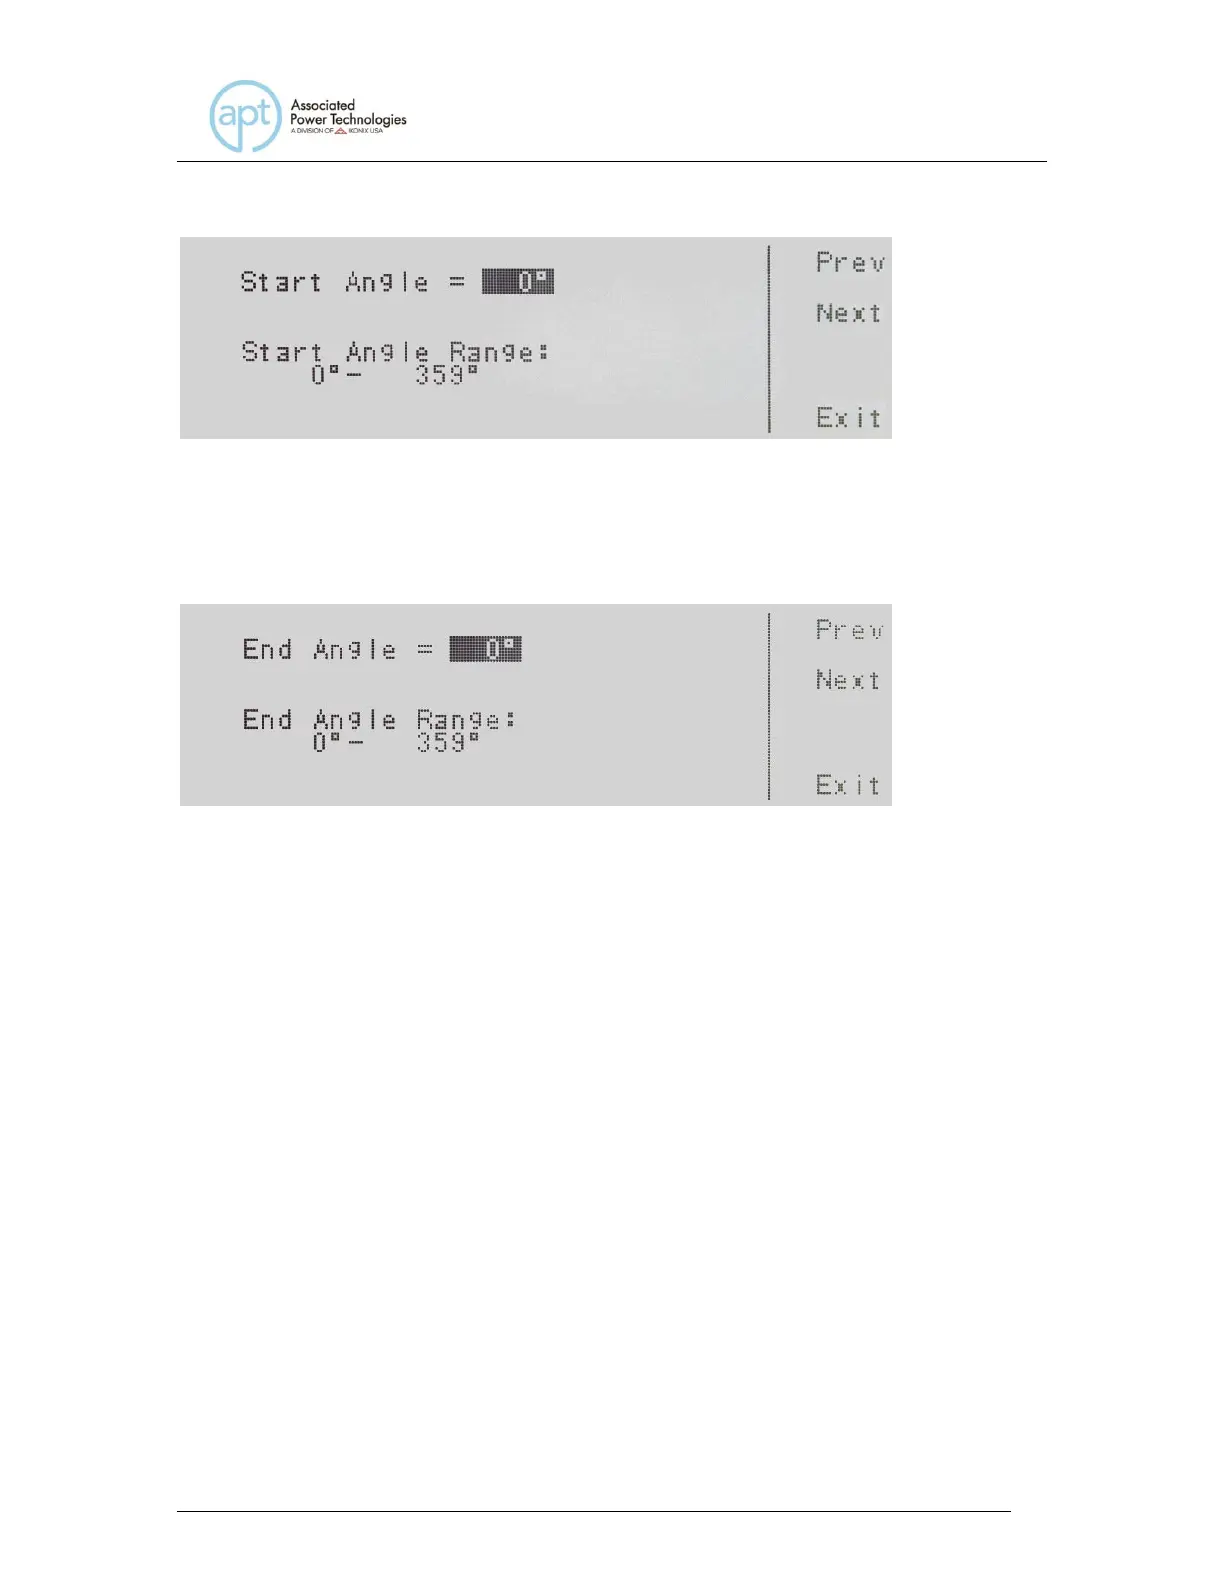
Start Angle = indicates the start angle that is programmed into the instrument.
Start Angle Range: indicates the start angle range that can be programmed into
the instrument.
End Angle = indicates the end angle that is programmed into the instrument.
End Angle Range: indicates the end angle range that can be programmed into
the instrument.
If you edit the start angle or end angle on a particular step, all 9 steps in that
memory location will automatically be set to the same start angle and end angle.
If several steps are connected together to form a sequence of tests, the start
angle will apply to the first step in the sequence and the end angle will apply to
the last step in that sequence.
If memories are connected together as part of a test sequence, the start angle
will apply to the first step in the sequence and the end angle will apply to the last
step in the sequence. For example, memory 1 step 7 is linked to memory 1 step
8, memory 1 step 9 and memory 2 step 1 to create a four step sequence of tests.
If the start angle is set to 90 degrees and the end angle is set to 180 degrees, the
output voltage waveform at memory 1 step 7 will have a start angle at 90
degrees and the output voltage waveform at memory 2 step 1 will end at a 180
degree angle.
To change the start angle or end angle use the numeric keypad and type the
 Loading...