Clutch System Argo Service Manual
Ontario Drive & Gear Limited www.argoutv.com
PH.(519)- 662-2840 FAX (519)- 662-2421
CS-5
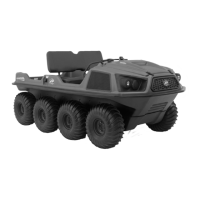
2. Locate the 6mm x 1.0 threaded hole in the
clutch face. This hole is provided to assist
in spreading the driven clutch sheaves
by threading a 6mm x 1.0 thread bolt in
through the face. This bolt should be a
least 2” in length with full thread.
3. Thread the bolt into the clutch face to
spread the sheaves.
4. Slip the belt o between driven and driv-
er clutch.
Installing The Drive Belt (Invance/CVTech)
CAUTION
If this procedure is not carried out as described, the edge of the xed face may cut or
damage the drive belt.
1. Position the belt around the driver clutch rst.
2. Ease the belt over the edge of the xed face on the driven clutch and at the same time,
turn the inside, movable face clockwise.
3. Remove the 6mm x 1.0 thread bolt from the clutch face to allow the driven clutch sheaves
to return to the closed position.
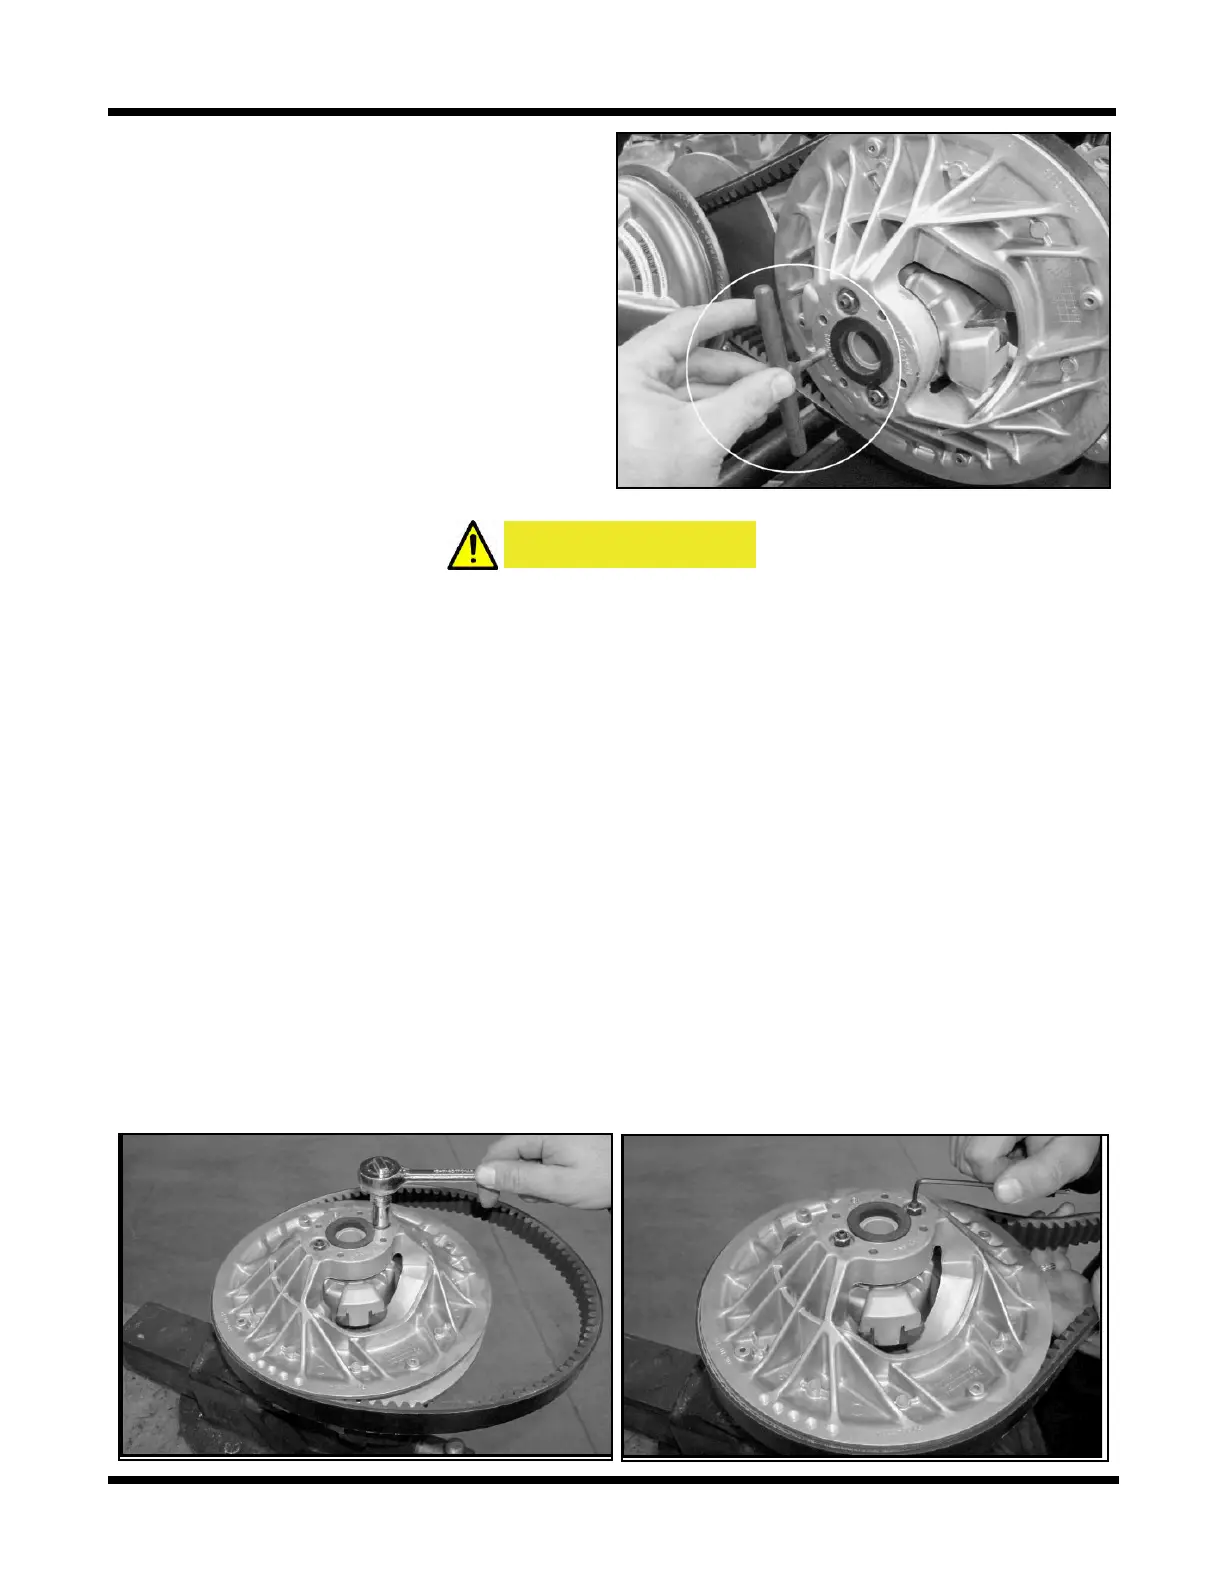
Invance Driven Clutch Drive Belt Adjustment
1. Perform the servicing procedure, Removing The Drive Belt (Invance Driven Clutch)
2. Perform the servicing procedure, Removing The Driven Clutch (Invance).
3. Remove the driven clutch from the vehicle and move to a clean work bench to loosen
both jam nuts located on the xed face of the clutch.
3. Using an allen wrench, turn the adjustment set screw either in (to lower the belt) or out
(to raise the belt) between the clutch sheaves.