ES-22
Electrical System Argo Service Manual
Ontario Drive & Gear Limited www.argoutv.com
PH.(519)- 662-2840 FAX (519)- 662-2421
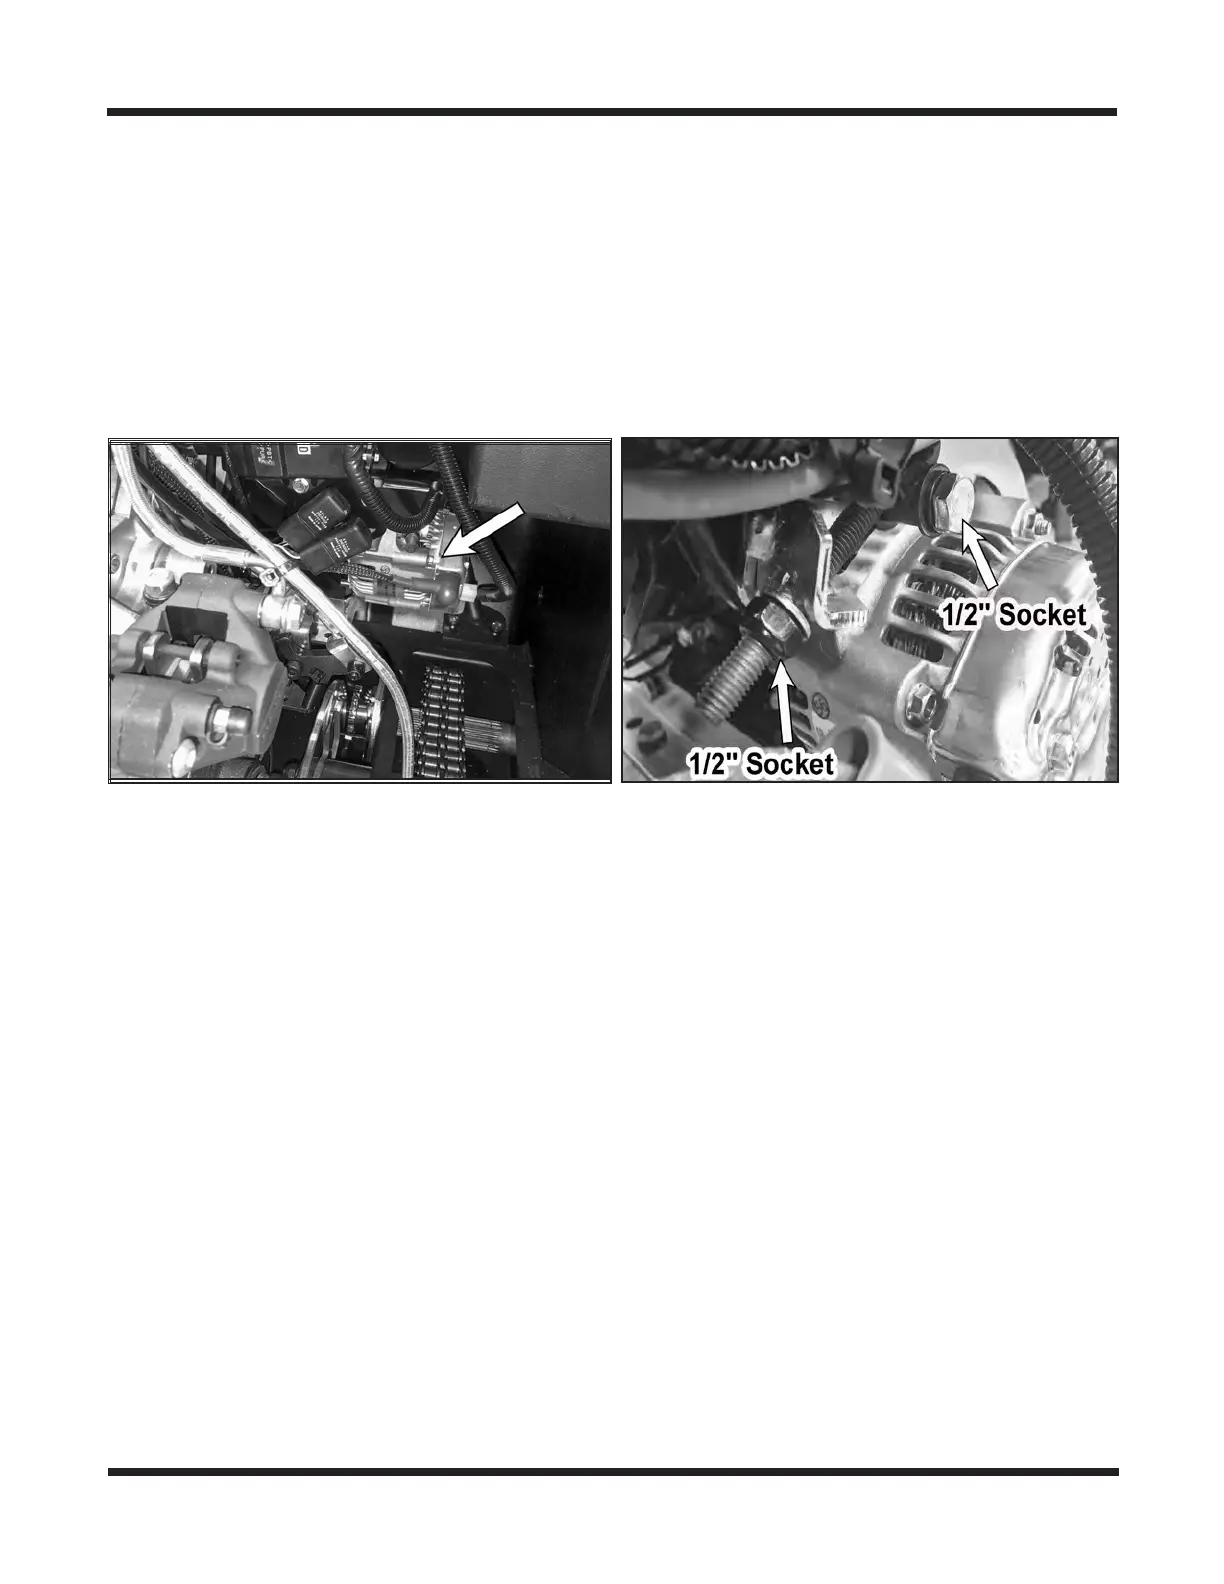
Replacing The Alternator V-Belt - 800 Kawasaki Models Only
1. Remove the vehicle rewall. See Removing The Firewall Panel in the Vehicle Body
section of this service guide.
2. Locate the alternator on the right side of the engine beneath the radiator.
3. Using a 1/2" socket, loosen the bolt securing the alternator to the adjustment bracket.
4. Using a 1/2" socket, thread the adjustment bolt counter-clockwise to slacken the alter-
nator V-Belt.
5. Slip the alternator belt o both engine and alternator pulleys
6. Slip the new V-Belt over both pulleys and tighten the adjustment bolt by turning it
clockwise. Do not overtighten the belt or allow it to be too loose. The V-belt should be
tightened enough that it deects no more then 1/8" with approx. 6 lbs. of force.
7. Once the belt is tensioned, re-tighten the bolt securing the alternator to the bracket.
Torque to 225.4 IN-LBS (Dry, Non-Lubricated Condition)
Removing The Alternator - 800 Kawasaki Models Only
1. Remove the vehicle rewall. See Removing The Firewall Panel in the Vehicle Body
section of this service guide.
2. Locate the alternator on the right side of the engine beneath the radiator.
3. Using a 1/2" socket, loosen the bolt securing the alternator to the adjustment bracket.
4. Using a 1/2" socket, thread the adjustment bolt counter-clockwise to slacken the alter-
nator V-Belt.
5. Slip the alternator belt o both engine and alternator pulleys.