USER’S MANUAL / bit Tune /
39
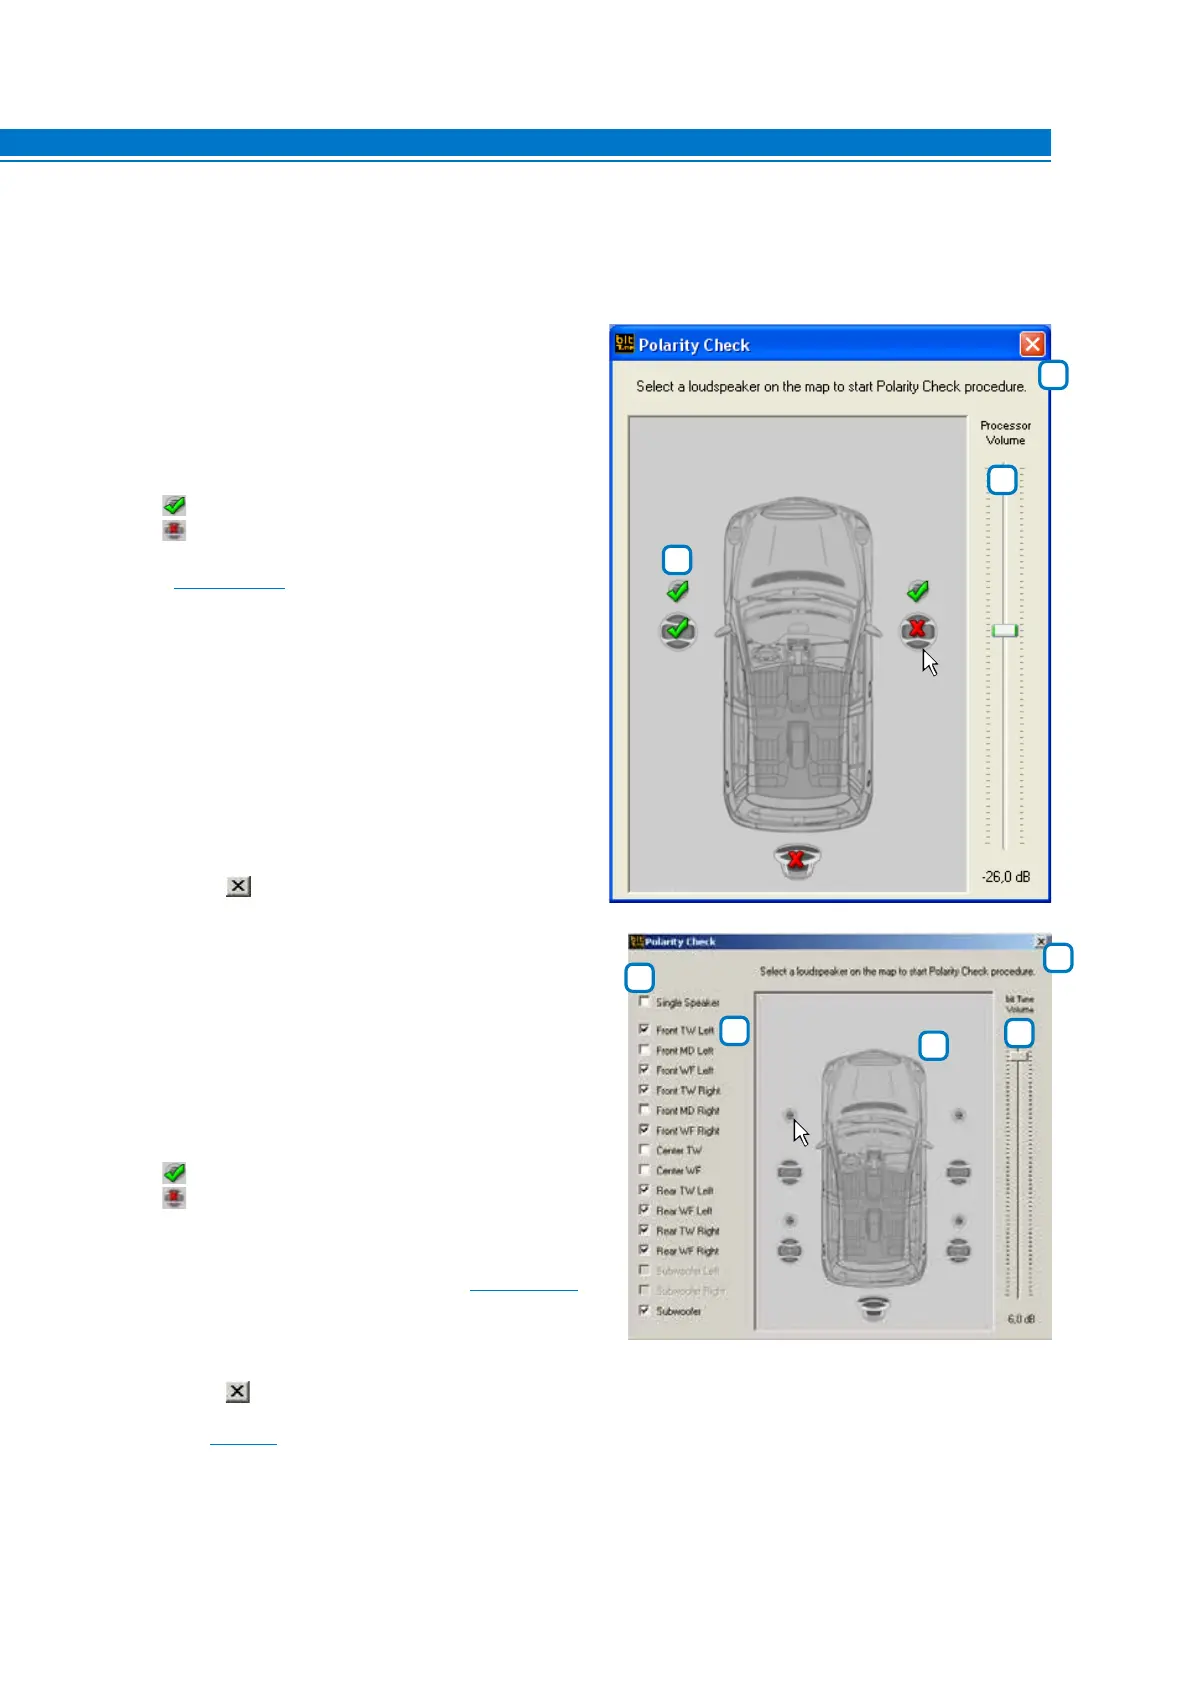
5. POLARITY CHECK
Using this tool you can check the electrical phase of the audio system speakers. The measurement is carried
out through guided steps using the LPM microphone placed at a distance of 15 - 20 cm from the loudspeaker.
Polarity Check in “bit Tune + Processor” mode:
1. Select a loudspeaker: At the end of the
measurement the following symbols will appear:
: Speaker in electrical phase.
: Speaker in electrical counter-phase.
Modify the installation by reversing the electrical phase
and repeat the operation for verification. All results of
Polarity Check measurement will be available in the
final measurement report Create a Report
(see sect. 6.2.4.9).
2. Processor volume: Test volume adjustment.
Set the starting measurement volume at about
-26 dB.
3. Close: Closes the Polarity Check window.
Polarity Check in “bit Tune” mode:
1. Single Speaker: Checks the electrical phase of a single
speaker of the system.
2. Select a Speaker: Select the speakers manually, laying
down your audio system by hand.
3. Channel Map: Select the speaker where to verify the
electrical phase in the audio system.
At the end of the measurement the following symbols will
appear :
: Speaker in electrical phase.
: Speaker in electrical counter-phase.
Modify the installation by reversing the electrical phase
and repeat the operation for verification. All results of
Polarity Check measurement will be available in the final
measurement report Create a Report
(see sect. 6.2.4.9).
4. bit Tune volume: Test volume adjustment. Set the
starting measurement volume at about -26 dB.
5. Close: Closes the Polarity Check window.
Refer to
section 7.3 with measurement examples.
1
3
2
1
5
3
4
2
6