- 6P10 PILOT MANUAL -
19
5.3.5 - Step 5 : Choosing the back-up
It is possible to select the electrical back-up, the back-up boiler or
not to declare a back-up.
5.3.4 - Step 4 : Purging the installation
During the cycle, check that the automatic purgers are open and
regularly activate the manual purgers.
If the pressure in the circuit becomes insu cient due to the volume
of air purged, the Pilot will indicate it and will pause the purging
cycle.
Activate the back ow prevention device or the lling valve to raise
the pressure. The purging cycle will resume automatically once there
is su cient pressure.
The purging cycle is launched for a duration of 30 minutes and will
automatically stop after that time is up.
At any time during the cycle, you can:
- Interrupt (or resume) the cycle by pressing on
.
- End the cycle and continue to the next step by pressing
During the purging cycle, the screen
indicates the countdown until the
automatic stop of the cycle as well as
the pressure in the circuit.
The purging cycle activates the circulator
pump at an alternating rhythm to allow
the displacement and purging of any
air bubbles accumulated at high points
of the installation using the Pilot’s
automatic purger.
AIR BLEED
Activate the back ow prevention device of the installation to ll the
heating circuit to just over 1.5 bars of pressure.
The Pilot automatically con rms the lling of the installation once
the pressure reaches 1.6 bars.
A manual con rmation (press
) is possible starting at 0.6
bars of pressure.
5.3.3 - Step 3 : Filling
During the filling stage, the Pilot
indicates the pressure measured in the
heating circuit.
FILLING
The Pilot will indicate when set-up has been achieved:
And will automatically put itself in standby mode.
The Pilot can be left in this state until rst use.
5.3.6 - Step 6 : Finishing set-up
5.4 - First use
To turn on the Pilot, press .
Long pressing
puts the Pilot in standby mode.
When the pilot is switched on for the rst time, if heating function
doesn’t work, maybe the pilot is not in «WINTER» mode. You can
verify in the «INSTALLER» menu and change it if necessary.
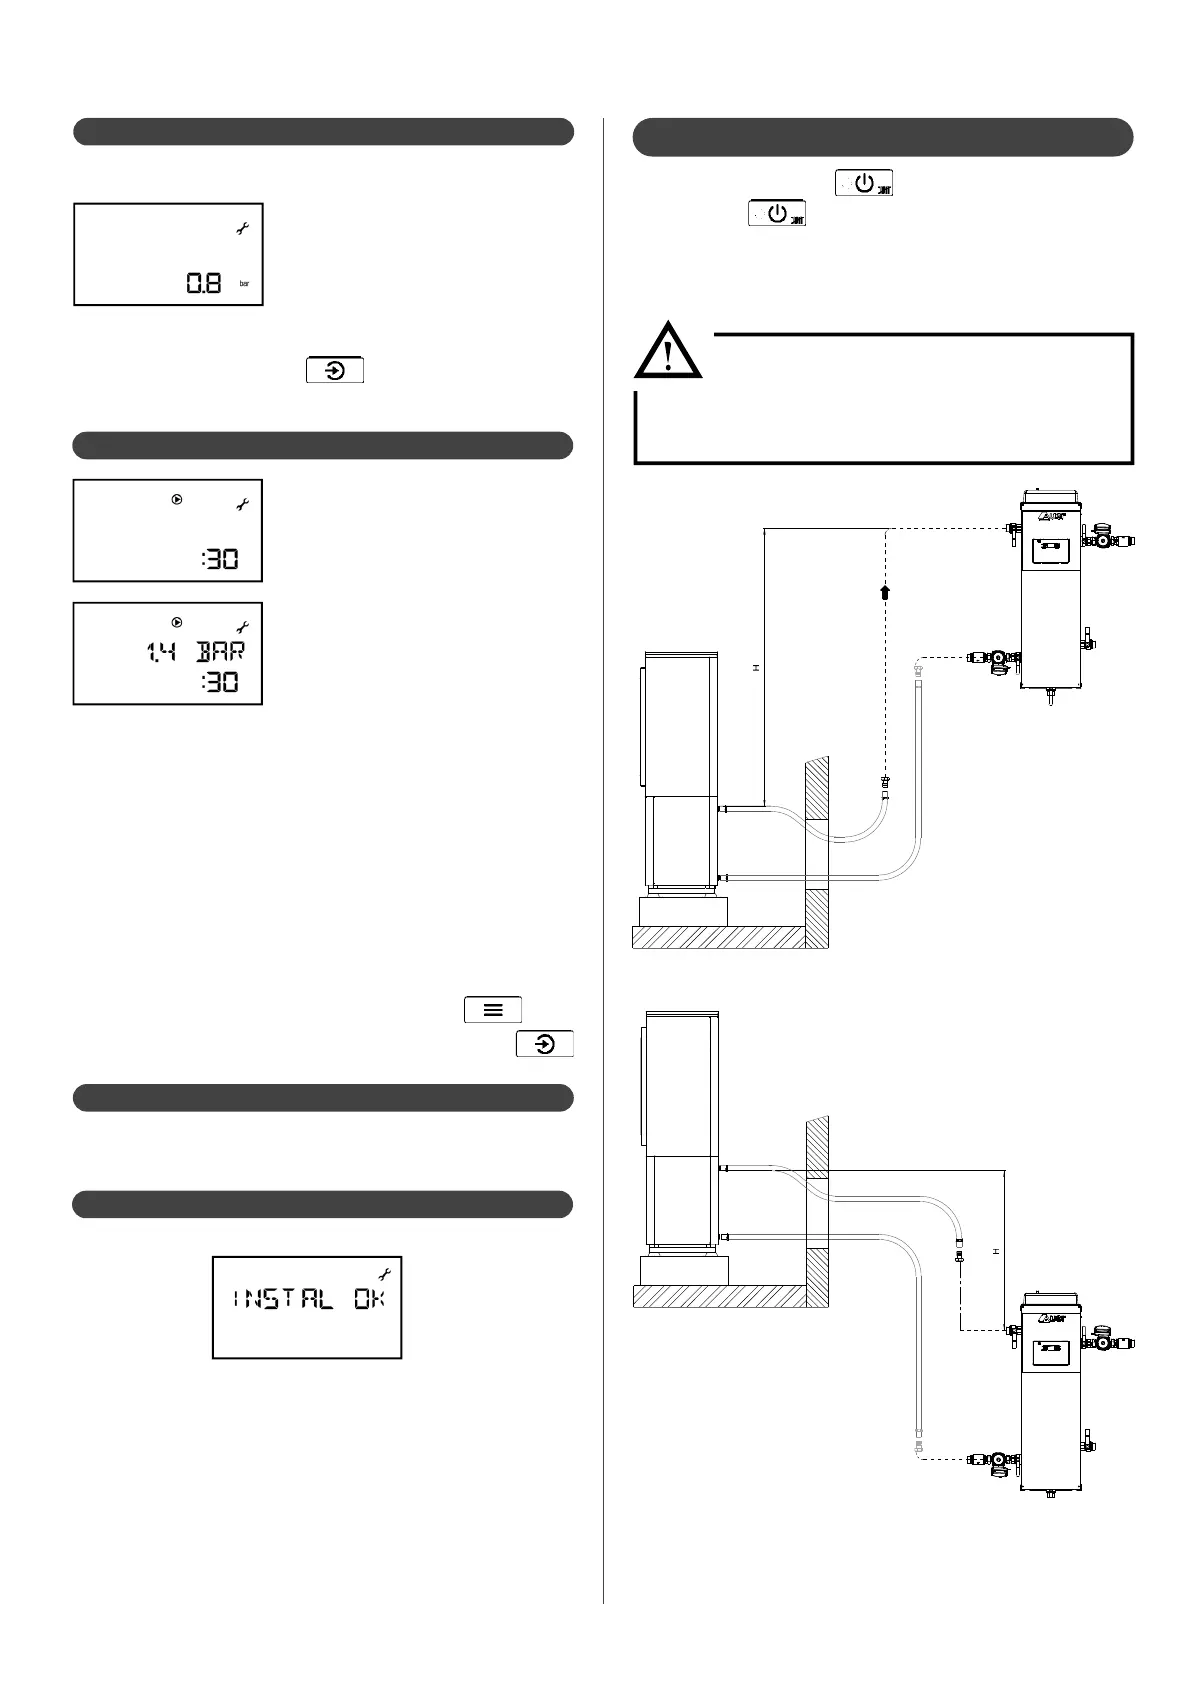
Do not leave a lling pressure upper than
1.6 bar + 0.1 x (height of the lowest heat
pump relative to the pilot) when the pilot
is standstill.
P
max
= 1,6 + 0,1 x (-2)
= 1,4 bar
=-2m
P
max
= 1,6 + 0,1 x 2
= 1,8 bar
=2m