3-39
Chapter 3 Starting and Stopping this Device
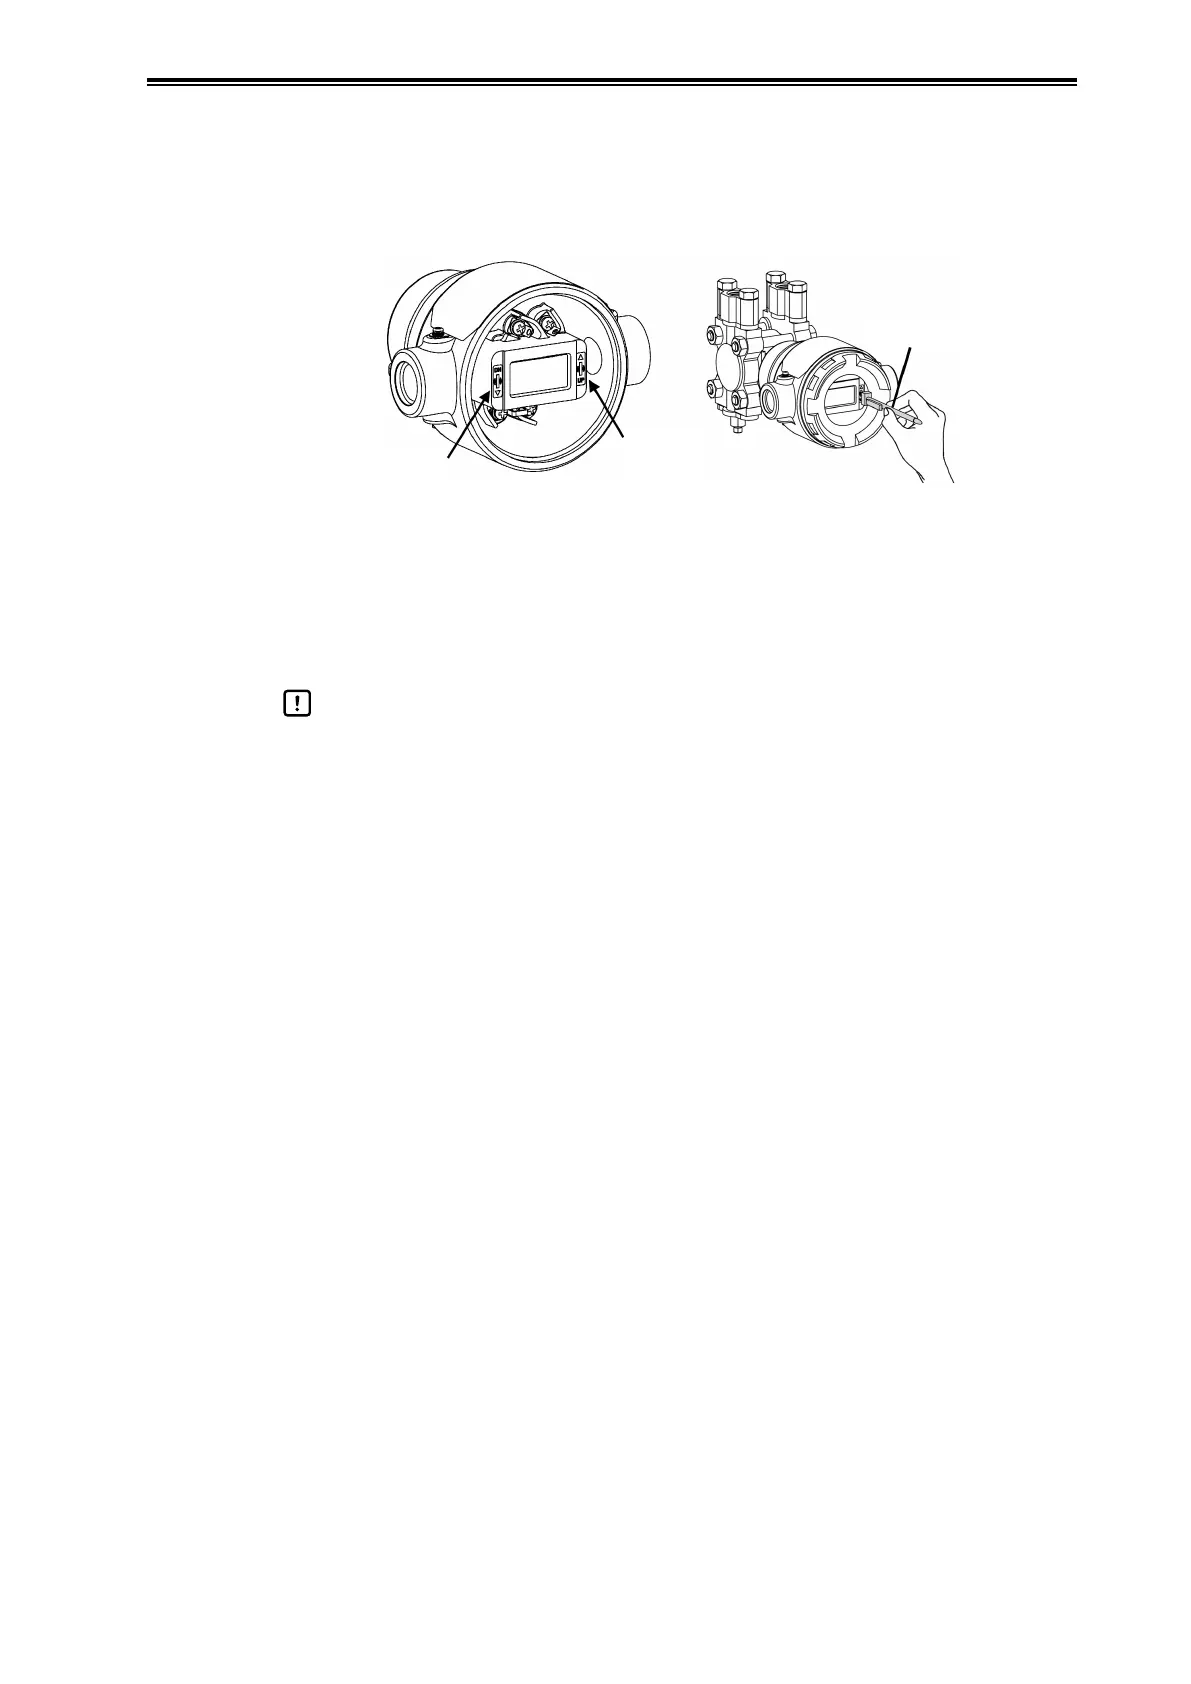
3-9 External Zero Adjustment (Optional Function)
(1) Introduction
When equipped with the external zero adjustment function, this device enables zero adjustment to
be performed on-site even if a communicator is not used.
Zero
Down
Zero
Up
Magnetic Stick
Figure 3-10. External Zero Adjustment
* External zero adjustment can be performed with the case cover attached. Fasten the case cover
securely, without any gaps between the device and the case.
(2) External Zero Adjustment Procedure
Handling Precautions:
• The procedure differs depending on the version of the software. The software version is
indicated on the nameplate on the transmitter.
Note:
If there is communication with the device from a communicator, etc., during external
zero adjustment, zero adjustment has priority. Therefore, changing of settings by the
communicator will be limited.
(i) Procedure for software versions earlier than 6.0
(1) Accurately apply the differential pressure that will serve as the reference for 0 % of the range to
the transmitter. In addition, check that there are no leaks.
(2) Touch “UP” or “DN” on the glass window with the magnetic stick for 2 seconds or more.
“ZERO ADJ” will be displayed, and the zero point can be adjusted.
(3) If the output of the transmitter is less than 4 mA, keep touching “UP” with the magnetic
stick until the output reaches 4 mA. If the output of the transmitter is more than 4 mA, touch
“DN” with the magnetic stick. When the output is reduced to 4 mA, remove the stick from
the window to complete zero point adjustment
(4) In adjustment for liquid level measurement, it is not necessary to actually drain the liquid to
the 0 % level. The output value (%) of the transmitter can be adjusted to the liquid level (%)
measured by a level gauge or the like.