Infusomat® compact
plus
P 1.0 3 - 1
EN
For internal use, only
3 Disassembly / Assembly
REMARKS ON DISASSEMBLY Safety notes
General
The steps required to remove or disassemble the unit are described
in full, from the complete unit down to the last spare part. Prereq
-
uisites that must be met are given at the beginning of each section.
Steps that are not necessary can be omitted.
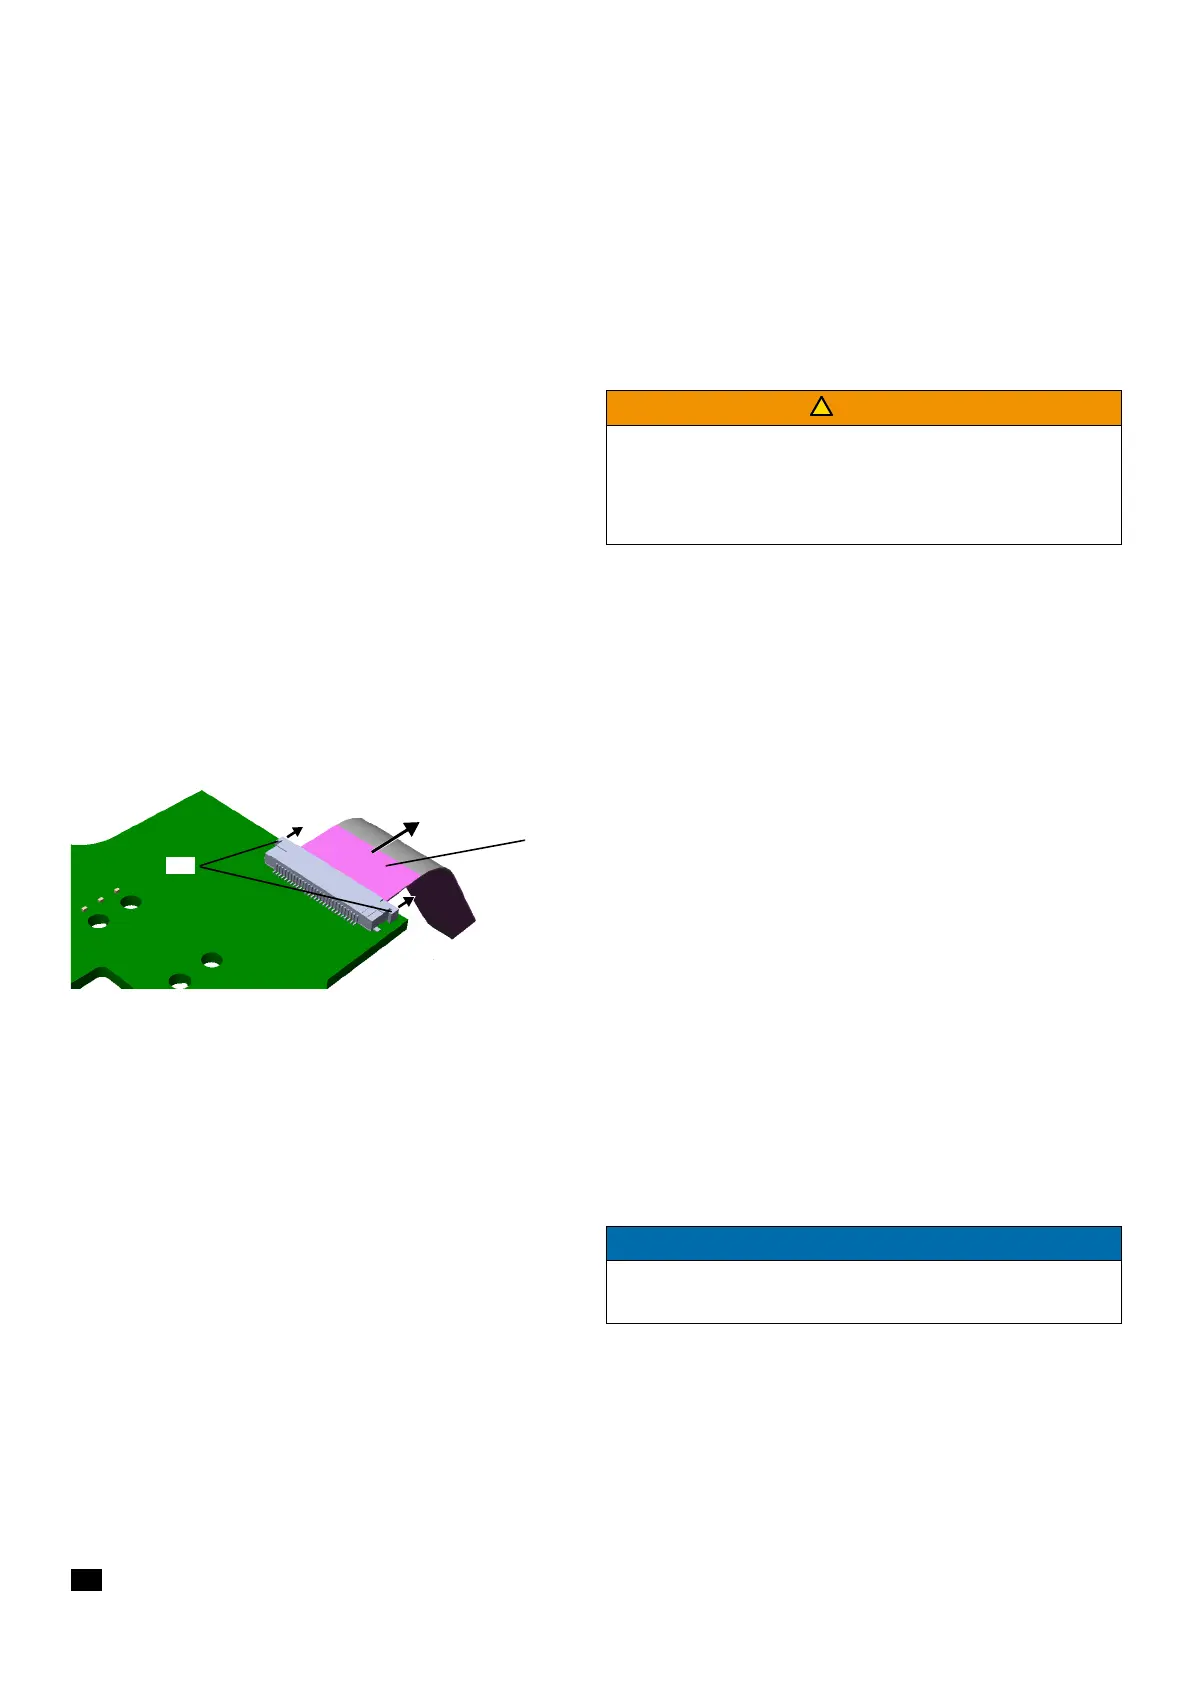
Zero force insertion connector
To disconnect the plug-in connection, the ribbon cable must be
unlocked completely:
1. Carefully push the locks of the connector (Fig. 3 - 1 / Item 1)
on the right and left toward the ribbon cable using a small
screwdriver or special tool.
2. Pull the ribbon cable (Fig. 3 - 1 / Item 2) out of the connector.
Sets of small parts
Some small parts of the Infusomat® compact
plus
P, such as cover
caps or screws, are grouped into sets.
Live parts of the device.
Danger of electric shock!
■ Comply with national and international safety regulations.
■ Pull out the power plug.
Fig. 3 - 1
1Lock
2 Ribbon cable
NOTICE
The content of service kits may vary based on experience from
repairs during the product life cycle.
32