3 Disassembly / Assembly
3 - 18 Infusomat® compact
plus
P 1.0
EN
For internal use, only
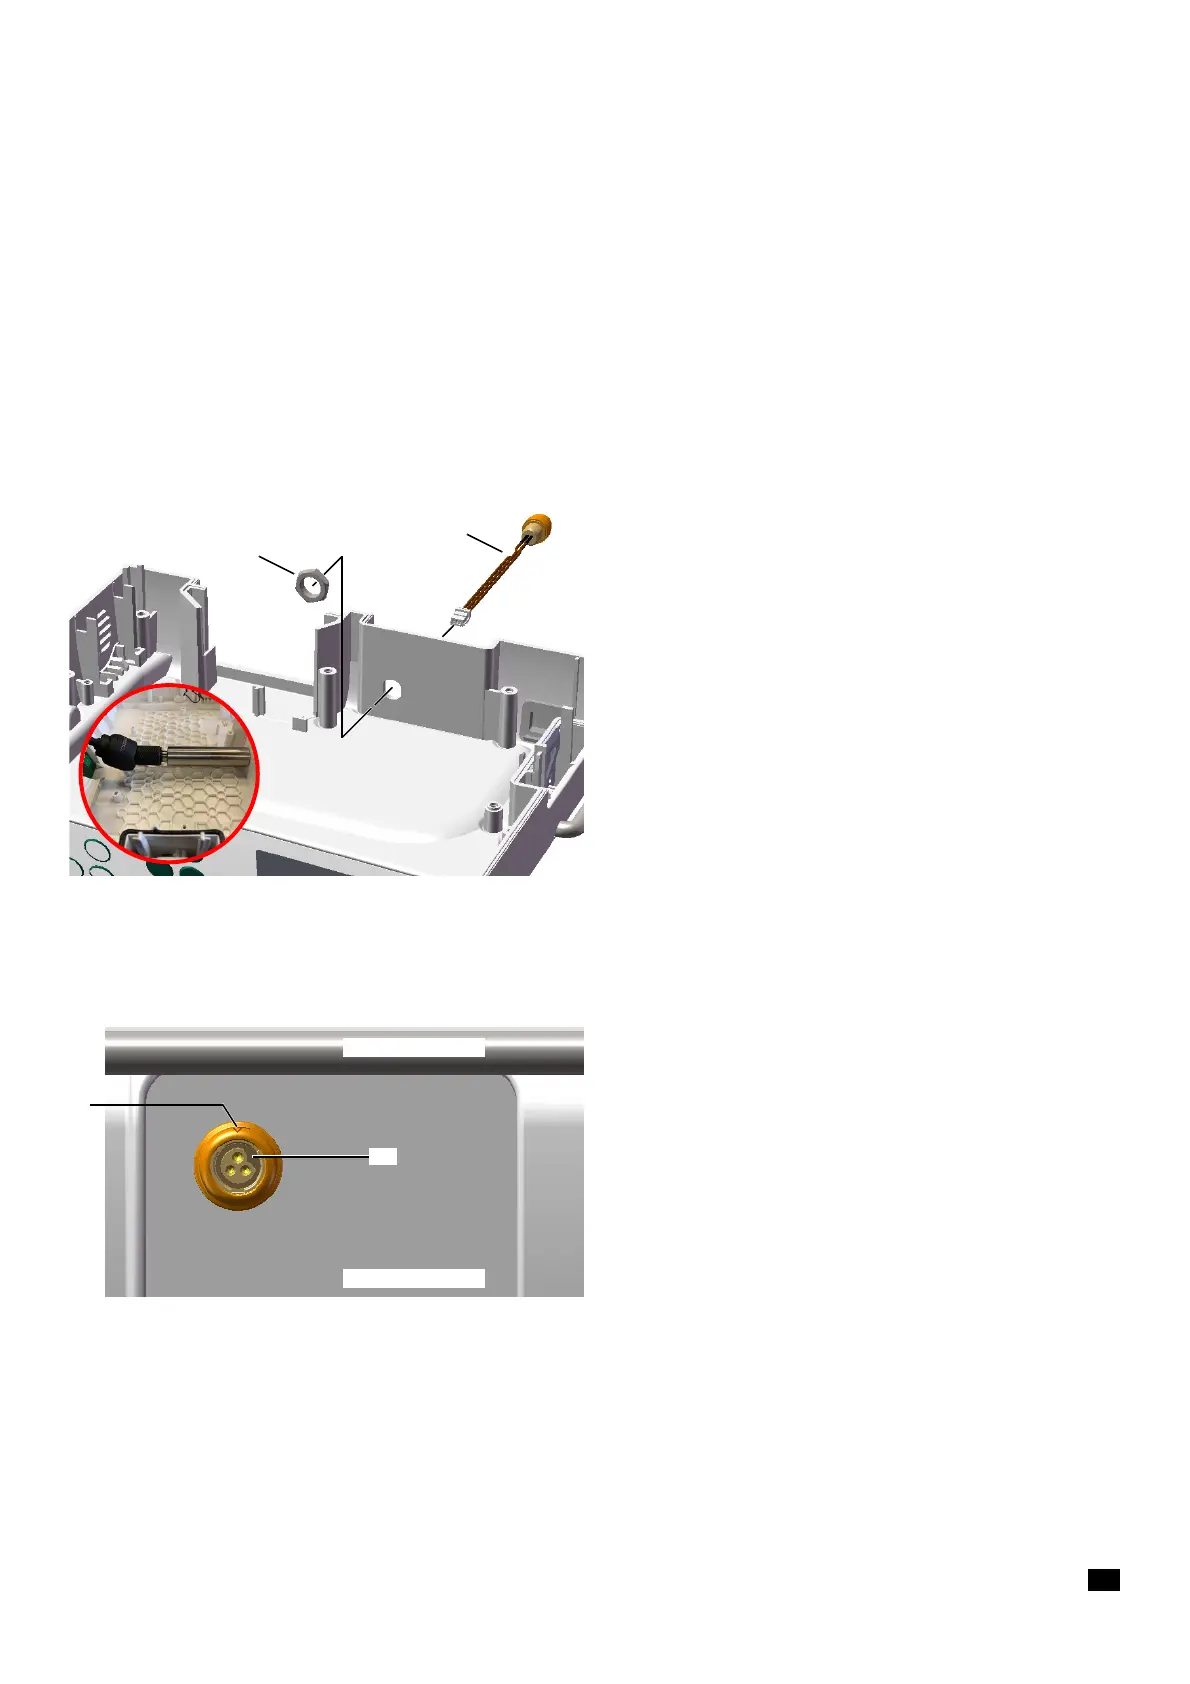
3.11 ACCESSORY CONNECTOR Designation Ord. No.
Accessory connector CP . . . . . . . . . . . . . . . . . . . . . . . . . . 34522002
Disassembly
✓ Processor board has been removed
1. Unscrew the hexagon nut (Fig. 3 - 22 / Item 1) using the angle
hinge & socket wrench accessory connector CP.
2. Remove the accessory connector (Fig. 3 - 22 / Item 2) from the
rear wall of the unit.
Assembly
1. Observe the alignment aids when mounting the connector (see
Fig. 3 - 23).
2. Fasten the hexagon nut carefully with a torque of 0.35 Nm
±
0.05 Nm (first and second screwing).
Fig. 3 - 22
1 Hexagon nut M8.5x1
2 Accessory connector
Fig. 3 - 23
1 Orientation triangle (marking the 12 o’clock position)
2 Coding notch (marking the 2 o’clock position)
▲ Top of unit
▼ Bottom of unit
1
2