3 Disassembly / Assembly
Infusomat® compact
plus
P 1.0 3 - 31
EN
For internal use, only
3.16 POWER SUPPLY Designation Ord. No.
Power supply CP . . . . . . . . . . . . . . . . . . . . . . . . . . . . . . . . .34522000
Housing, bottom part ICP. . . . . . . . . . . . . . . . . . . . . . . . . .34522208
Screws
(see "Sets of small parts" ➡ p. 3 - 1)
Disassembly
✓ Gasket for rubber connector has been removed
(see "Gasket for rubber connector" ➡ p. 3 - 5).
✓ Unit has been opened.
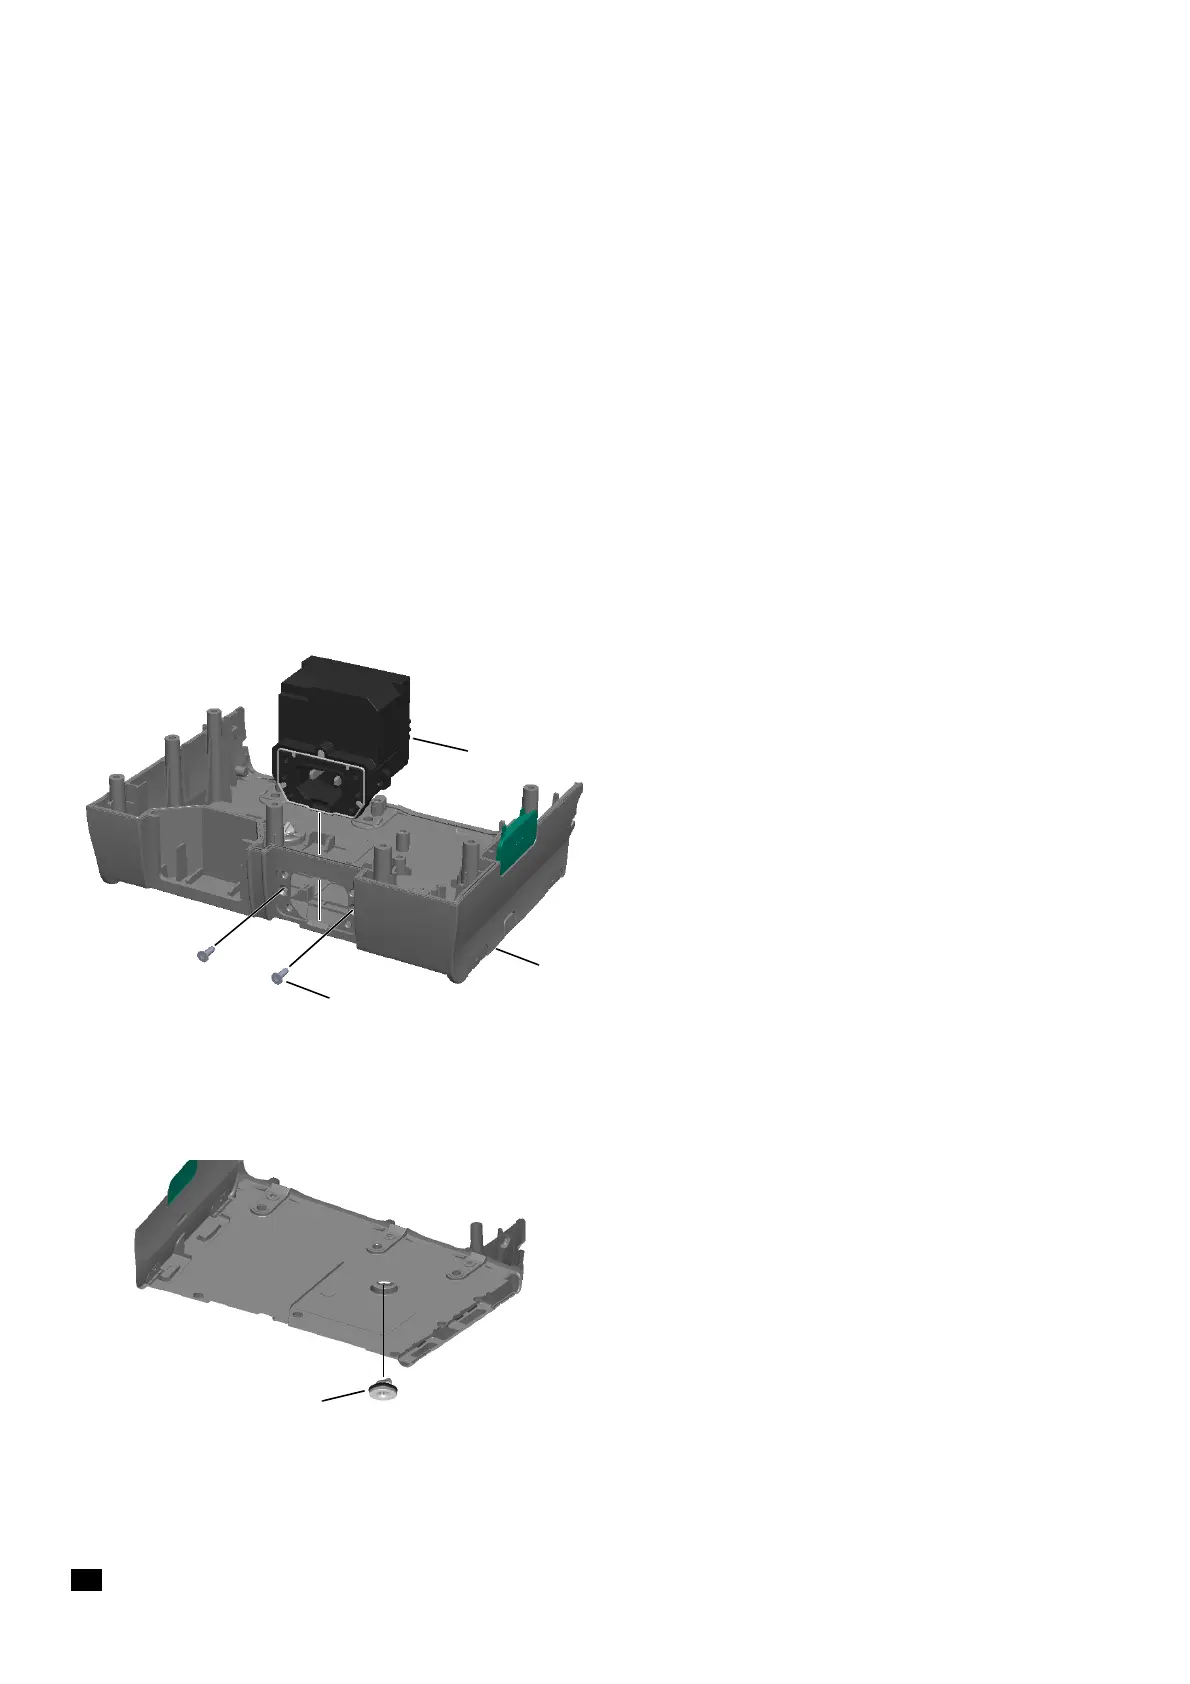
1. Unscrew the two screws (Fig. 3 - 44 / Item 1) using a 10IP
TORX plus screwdriver.
2. Remove the power supply (Fig. 3 - 44 / Item 2).
3. If the housing, bottom part (Fig. 3 - 44 / Item 3) has to be
replaced, additionally remove the housing front (see "Housing
front" ➡ p. 3 - 22) and the lock screw (Fig. 3 - 45 / Item 1).
Fig. 3 - 44
1 Screw DELTA PT 30x9 WN 5454
2 Power supply
3 Housing, bottom part