3 Disassembly / Assembly
Infusomat® compact
plus
P 1.0 3 - 7
EN
For internal use, only
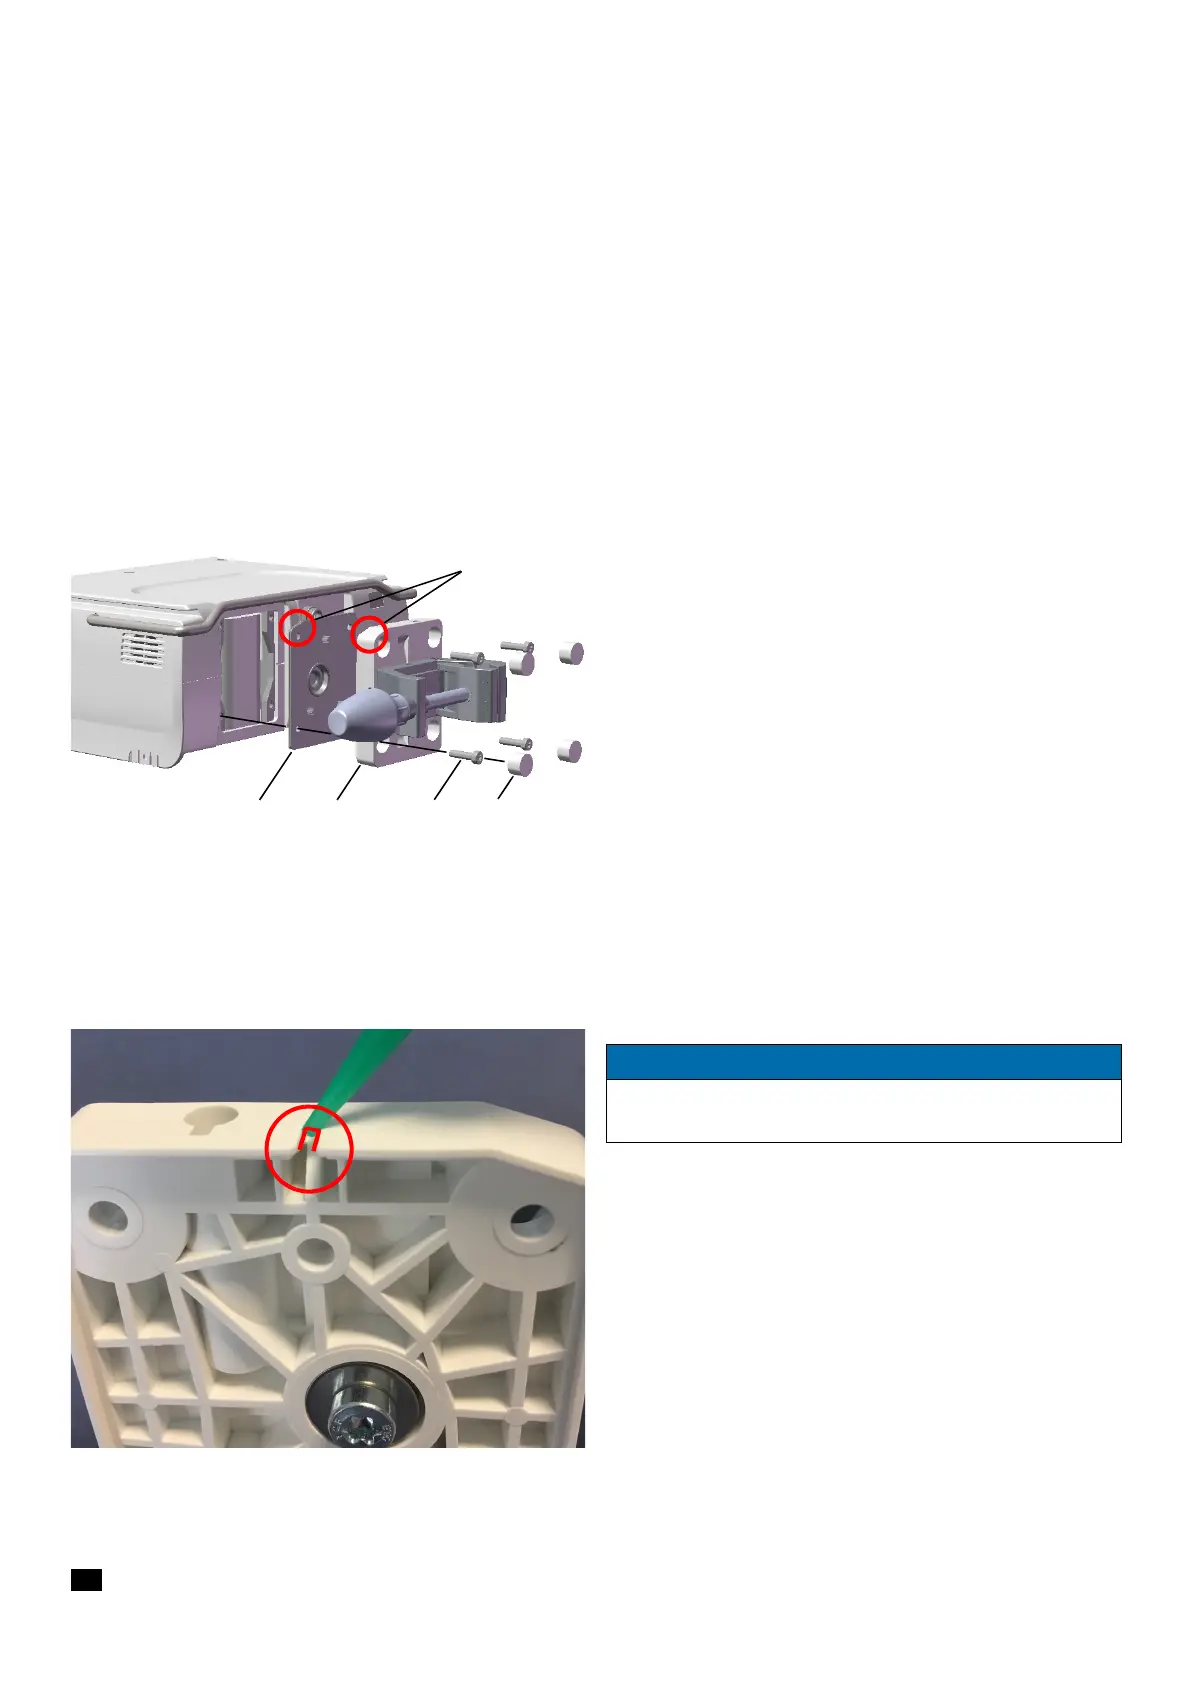
3.4 POLE CLAMP Designation Ord. No.
Pole Clamp complete CP. . . . . . . . . . . . . . . . . . . . . . . . . . .34522004
Cover plate CP. . . . . . . . . . . . . . . . . . . . . . . . . . . . . . . . . . .34522012
Screws and cover caps
(see "Sets of small parts" ➡ p. 3 - 1)
Disassembly
1. Pierce the four cover caps (Fig. 3 - 5 / Item 1) with a small
screwdriver or twist gimlet and remove them.
2. Unscrew the four screws (Fig. 3 - 5 / Item 2) using a T20 TORX
screwdriver.
3. Remove the pole clamp (Fig. 3 - 5 / Item 3) and the sealing
(Fig. 3 - 5 / Item 4).
Assembly
✓ Battery has been inserted and connected.
1. Before inserting the sealing, apply high-vacuum grease to the
pole clamp at the marked position (see
Fig. 3 - 6).
2. Attach the pole clamp and seal with the correct orientation
(Fig. 3 - 5 / Item 5).
Fig. 3 - 5
1Cover cap
2 Screw cylinder-head M4x16
3Pole clamp
4 Sealing
5 Orientation coding
NOTICE
Depending on the usage of the Infusomat® compact
plus
P, the
Cover plate CP may be mounted instead of the pole clamp..