3 Disassembly / Assembly
Infusomat® compact
plus
P 1.0 3 - 19
EN
For internal use, only
3.12 DISPLAY BOARD WITH DISPLAY Designation Ord. No.
Display board with display CP . . . . . . . . . . . . . . . . . . . . . . 34522116
(devices with serial number 1199 and lower)
Ribbon cable display CP . . . . . . . . . . . . . . . . . . . . . . . . . . .34774502
Disassembly
✓ Unit has been opened.
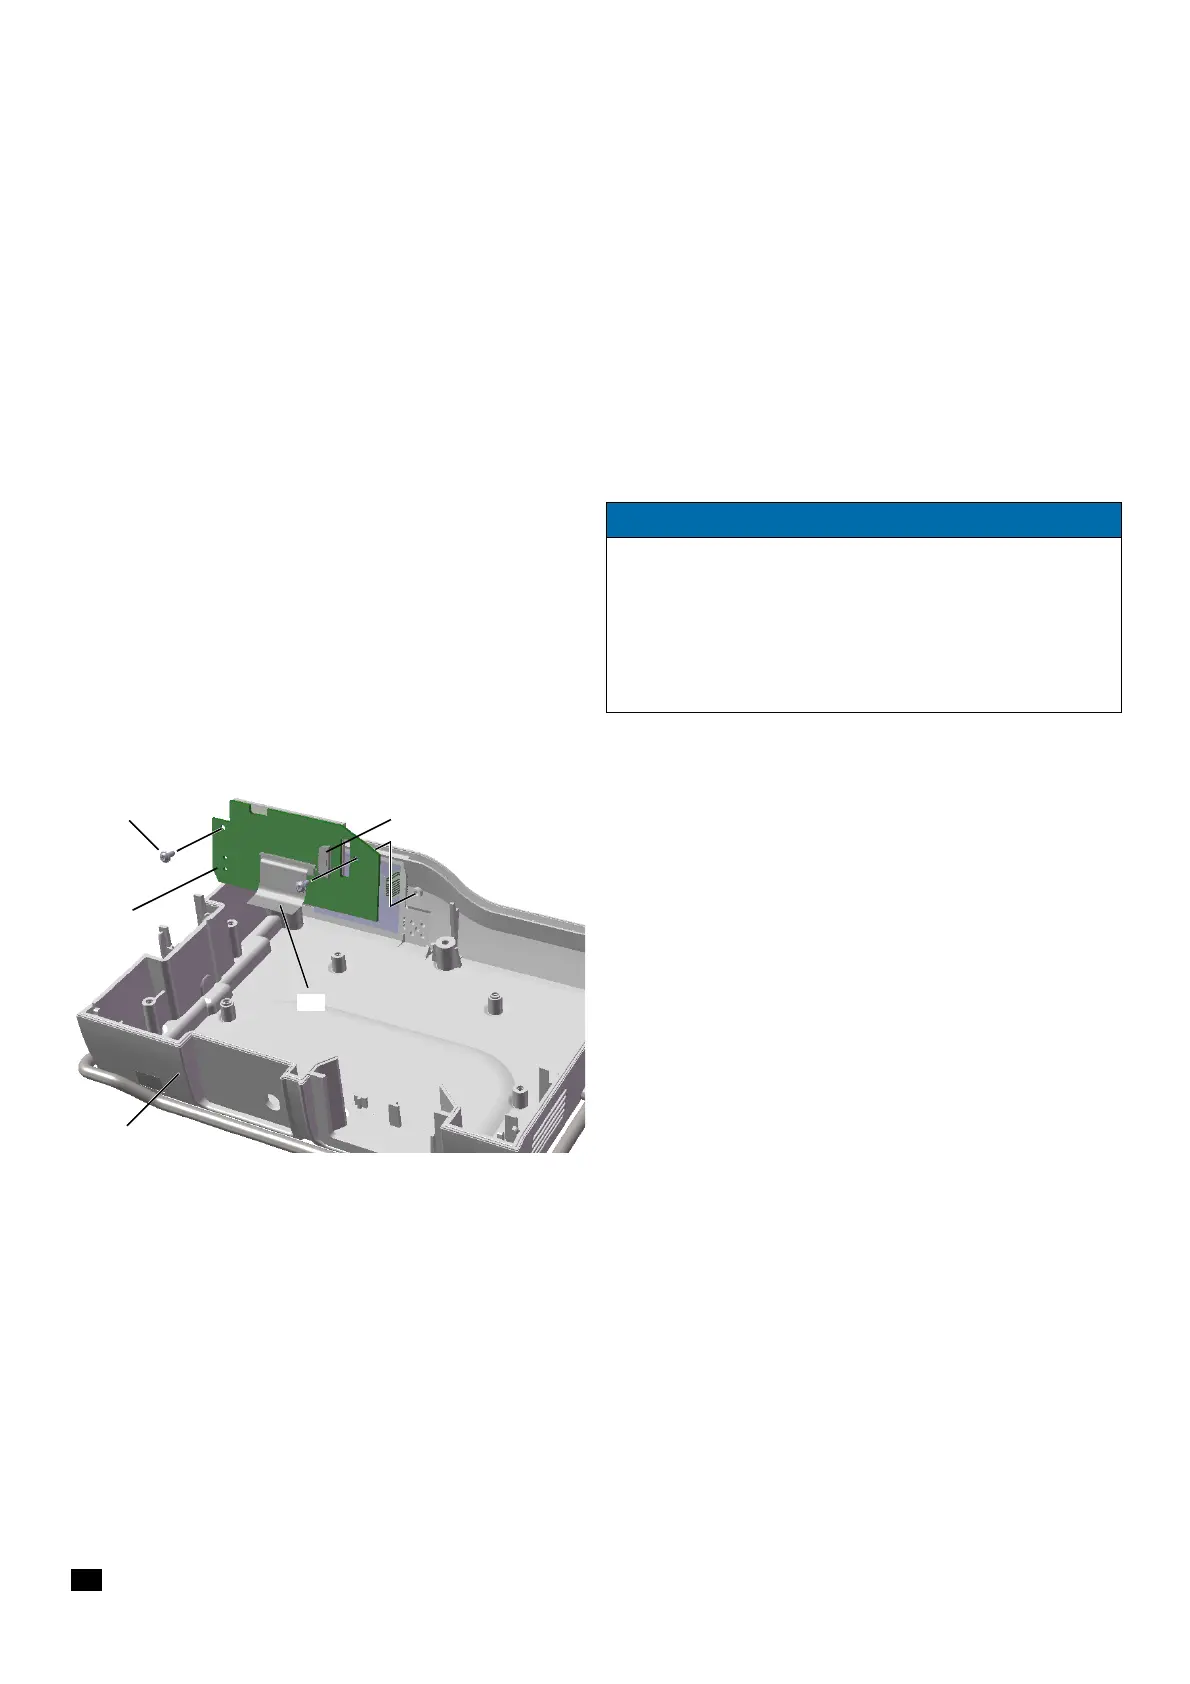
1. On the processor board, completely unlock the connector for
the connecting cable of the display board and pull out the
ribbon cable
(Fig. 3 - 24 / Item 2).
(not necessary if the processor board has been removed as
shown in
Fig. 3 - 24)
2. Completely unlock the connector for the connecting cable of
the membrane keyboard
(Fig. 3 - 24 / Item 1) and pull out the
ribbon cable.
3. Unscrew the two screws (Fig. 3 - 24 / Item 4) using an 8IP
TORX plus screwdriver and remove the display board
(Fig. 3 - 24 / Item 3) with the display.
4. To replace the connecting cable for the display board
(Fig. 3 - 24 / Item 2), completely unlock the connector on the
display board and pull out the ribbon cable.
5. To replace the housing, upper part (Fig. 3 - 24 / Item 5), the
processor board has to be removed as well.
NOTICE
Starting with serial number 1200 of the device, the display board
with display is affixed to the housing, upper part with keypad. If
one of these components is defective, the housing upper part
including keypad and display board with display has to be
replaced with the corresponding spare part, ord. no 34522290.
(see "Housing, upper part" ➡ p. 3 - 20)
Fig. 3 - 24
1 Connector membrane keyboard
2 Ribbon cable display board
3 Display board
4 Screw DELTA PT 25x6 WN 5451
5 Housing, upper part