3 Disassembly / Assembly
Infusomat® compact
plus
P 1.0 3 - 11
EN
For internal use, only
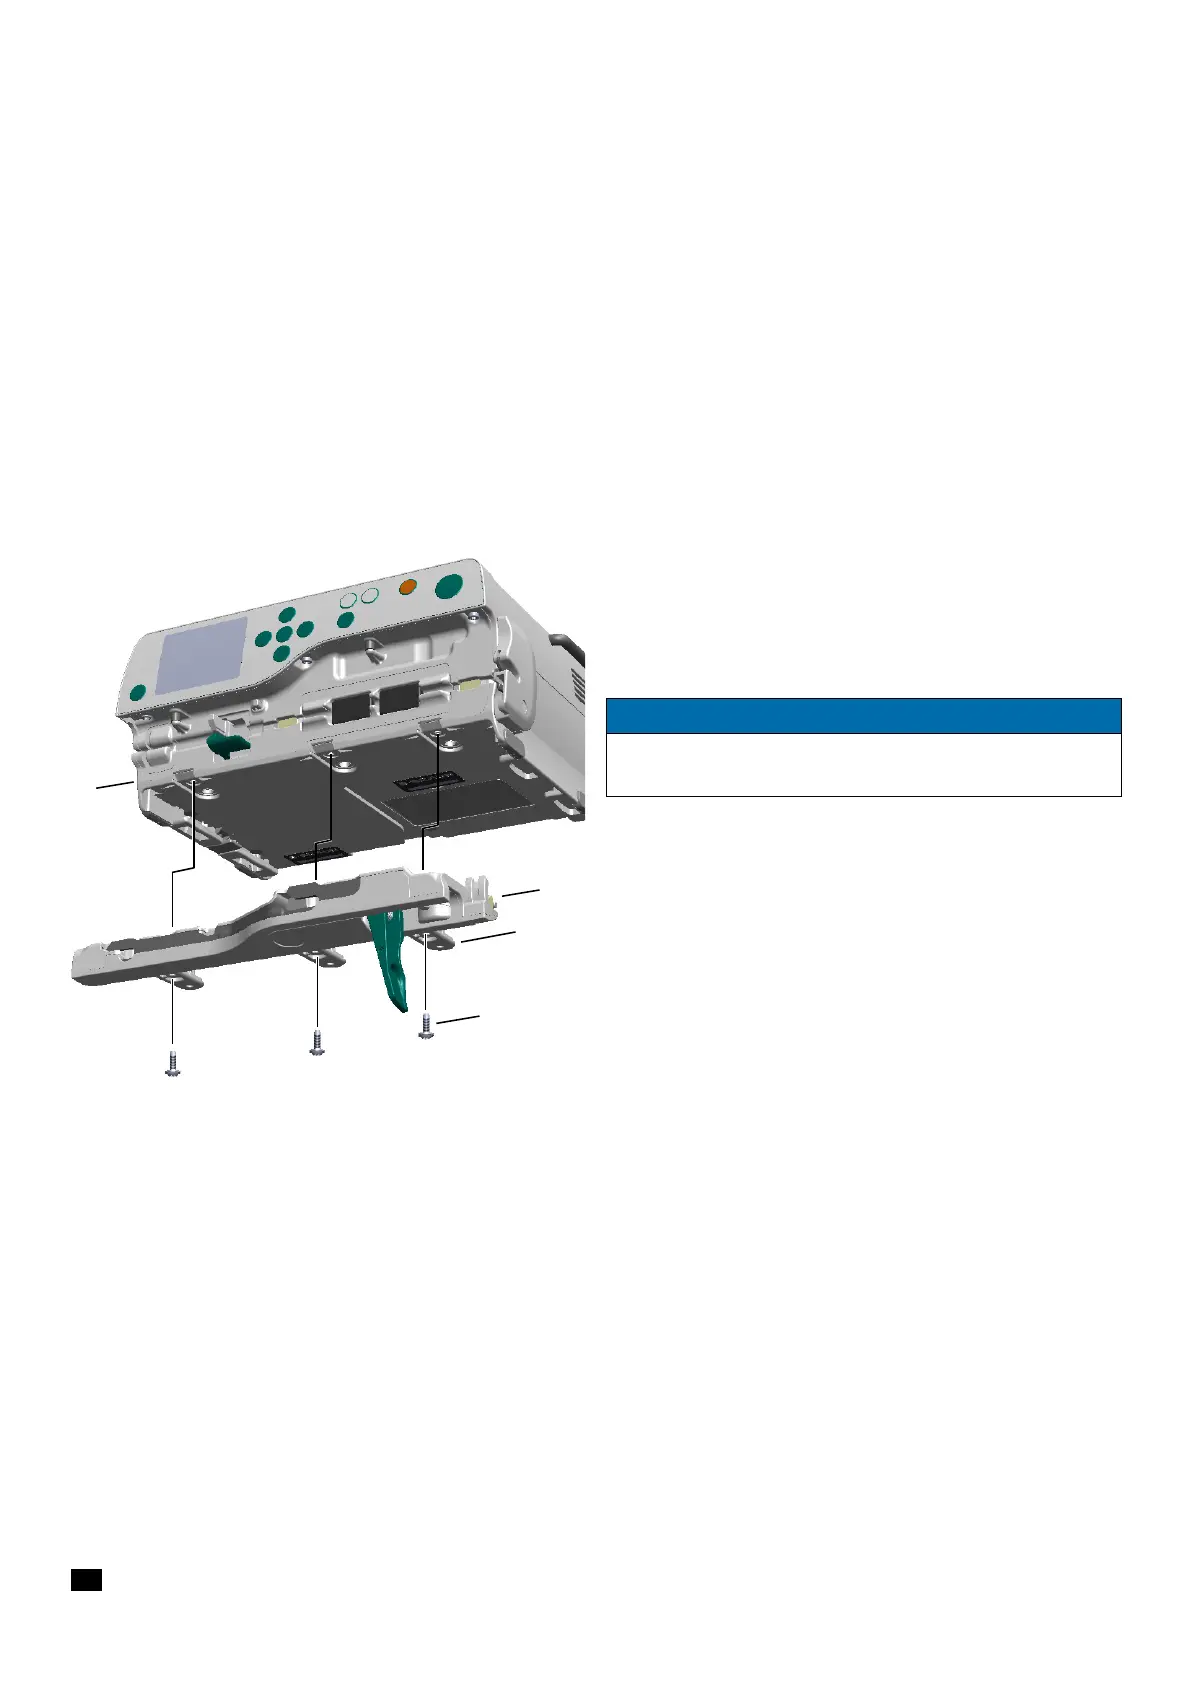
3.7 PUMP DOOR Designation Ord. No.
Pump door ICPP . . . . . . . . . . . . . . . . . . . . . . . . . . . . . . . . .34522294
Screws
(see "Sets of small parts" ➡ p. 3 - 1)
Disassembly
✓ Pump door is open.
1. Unscrew the three screws (Fig. 3 - 11 / Item 3) using a 15IP
TORX plus screwdriver.
2. Lift the hinges (Fig. 3 - 11 / Item 2) from the housing, bottom
part (Fig. 3 - 11 / Item 4).
3. Remove the pump door (Fig. 3 - 11 / Item 1).
Assembly
✓ Unit is closed.
✓ Second clamp has been mounted.
1. Tighten the screws with a torque of 0.7 Nm ± 0.07 Nm (first
and second screwing).
Fig. 3 - 11
1 Pump door
2Hinge
3 Screw DELTA PT 35x10 WN 5452
4 Housing, bottom part
NOTICE
The complete check after repair has to be performed whenever
the pump door has been removed.