61 of 109
Adjusting the Presser Foot
The machine has an adjustable presser foot that can be set from 0.5mm to
3.5mm above the needle plate. The presser foot height should be changed
when the thickness of the material you are sewing changes dramatically. To
adjust the presser foot height, the software must be open, and your ma-
chine must be on and communicating with it. A hoop with the fabric you
will be using should be installed.
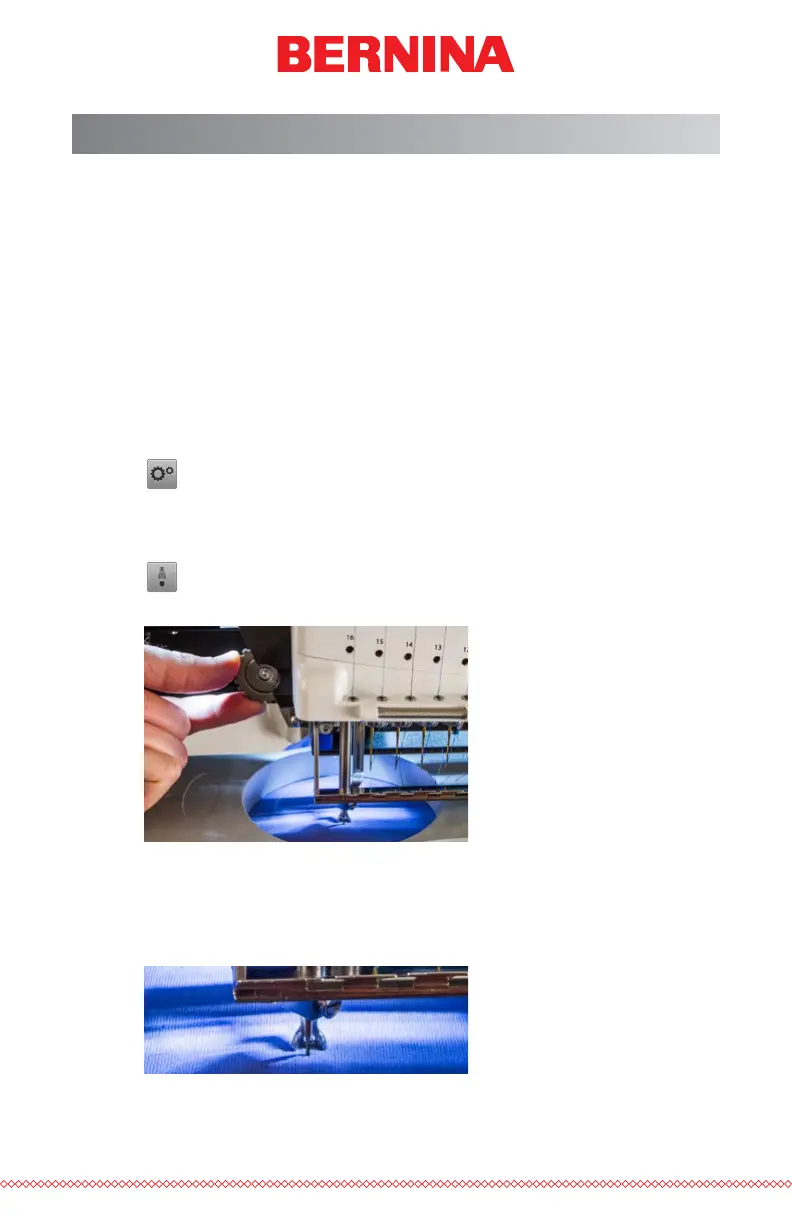
1. Adjusting the presser foot is easiest with the needle case moved
to needle 16. It is not necessary, but it makes the adjustment gear
easier to see. If the machine is not on needle #16, the gear can still
be accessed. Do not attempt to move the needle case during the
following steps.
2. In the software, press the settings button.
3. Make sure that only the material is under the needle, for the next
step will command the machine to lower the needle.
4. Press the Lower Presser Foot button.
5. Locate the presser foot eccentric (gear) behind the needle case.
6. Turn the gear with your ngers to adjust the presser foot height up
or down as needed.
7. Set the presser foot height over an unsewn section of the fabric.
Set the presser foot so that it is just touching the material.
8. Once adjusted, press the raise presser foot button in the software.