BL-CB33-0115 - 03-01-2018 9-5
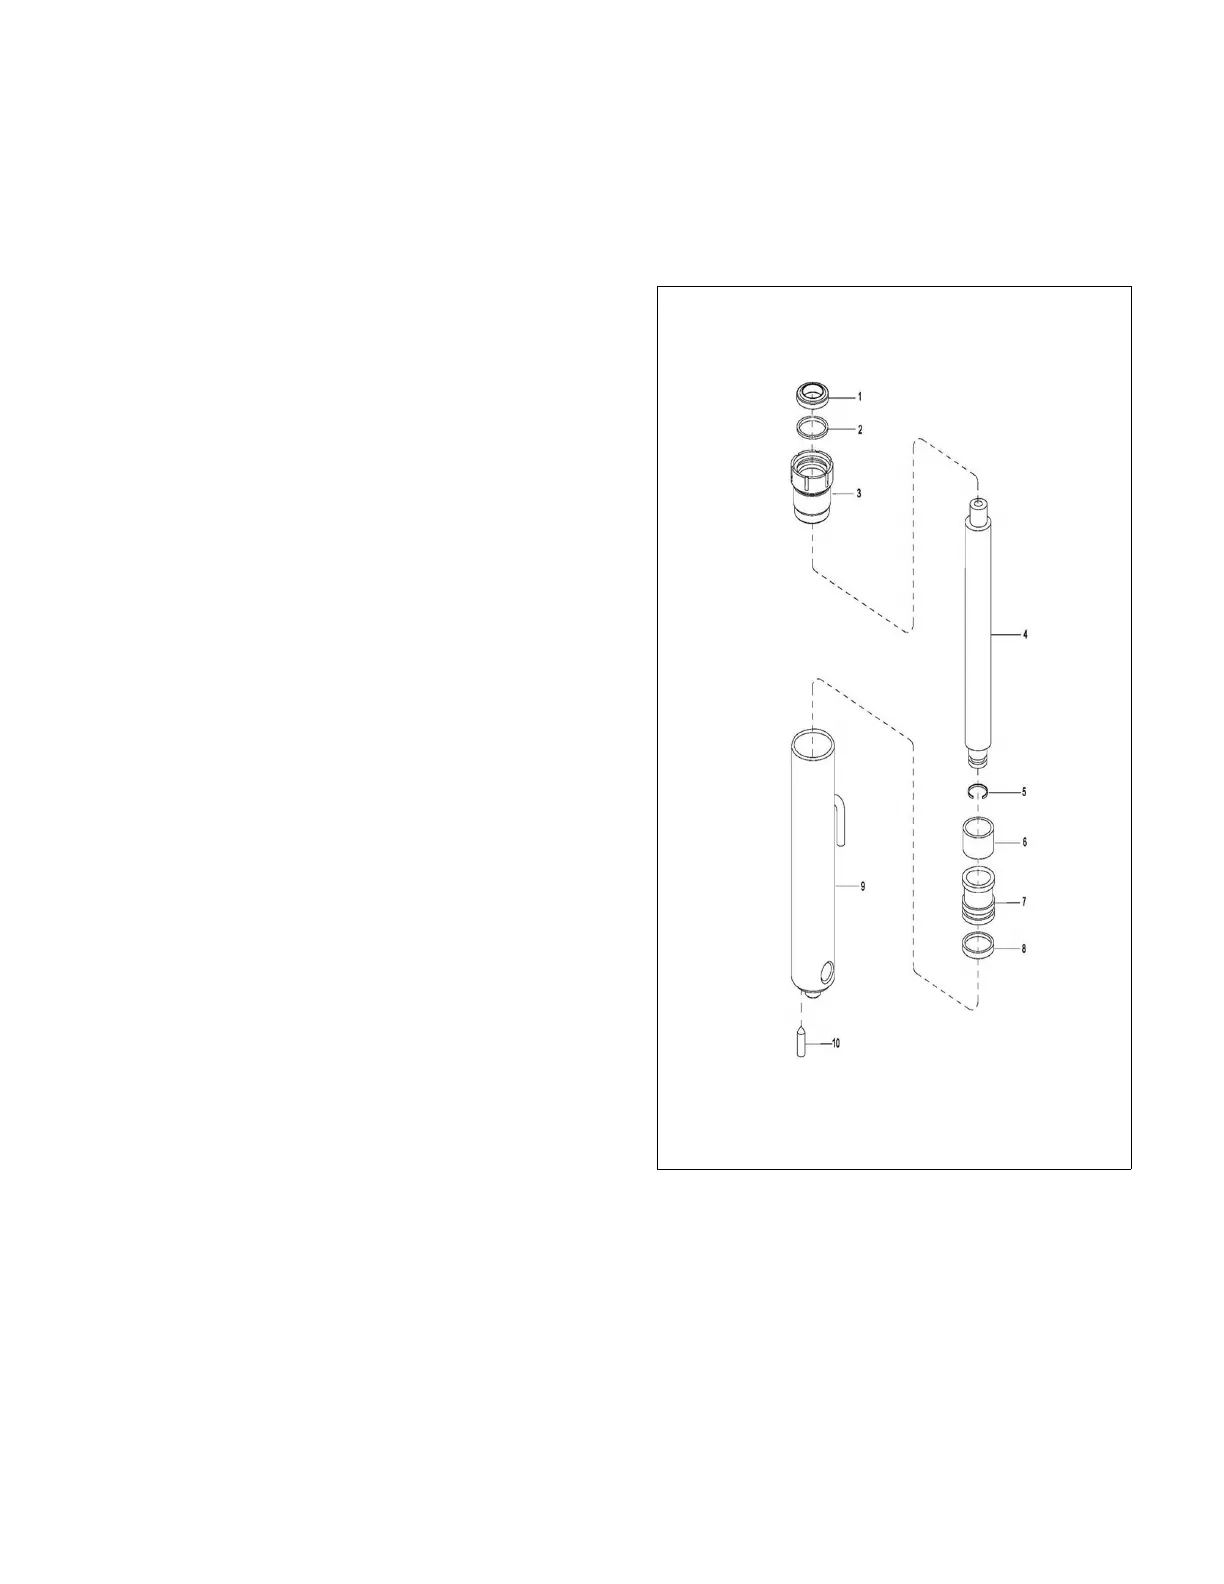
9-3.2. Repair
CAUTION: To prevent damage, use proper pipe
clamp vise. The cylinder will be distorted
if the vise is tightened too much.
1. Secure the lift cylinder in a vise, clamping lightly
at the base of the cylinder.
2. Remove gland nut.
3. Remove wiper ring and O-ring from gland nut.
4. Pull out piston rod.
5. Remove collar and piston from piston rod.
6. Remove packing and back up ring from piston.
7. Coat all parts with hydraulic oil (Table 3-2).
8. Install packing and back up ring on piston.
9. Remove piston and collar on piston rod.
10. Insert rod in cylinder tube.
11. Install wiper ring and O-ring on gland nut.
12. Install gland nut in cylinder tube.
9-3.3. Installation
1. Using another lift truck or suitable jack, raise mast
far enough to allow installation of the lift cylinder.
2. Slowly lower mast while aligning cylinder with the
tap on mast.
3. Secure the top of cylinder with flat washer, lock
washer and screw.
4. Install clip, bracket, shims, two flat washers two
lock washers, two screws and block.
5. Reconnect the tube to the bottom of the lift cylin-
der.
6. Fill the hydraulic reservoir. Use hydraulic oil listed
in Table 3-2.
7. Reconnect the batteries and turn on the key-
switch.
8. Operate the lift and lower buttons to refill the
cylinders and lines with hydraulic oil.
9. Check level of hydraulic oil. If required, add
hydraulic oil to bring to proper level. Use hydraulic
oil listed in Table 3-2.
10. Install the compartment covers as described in
paragraph 5-3.
Figure 9-4 Lift Cylinder (Telescopic)