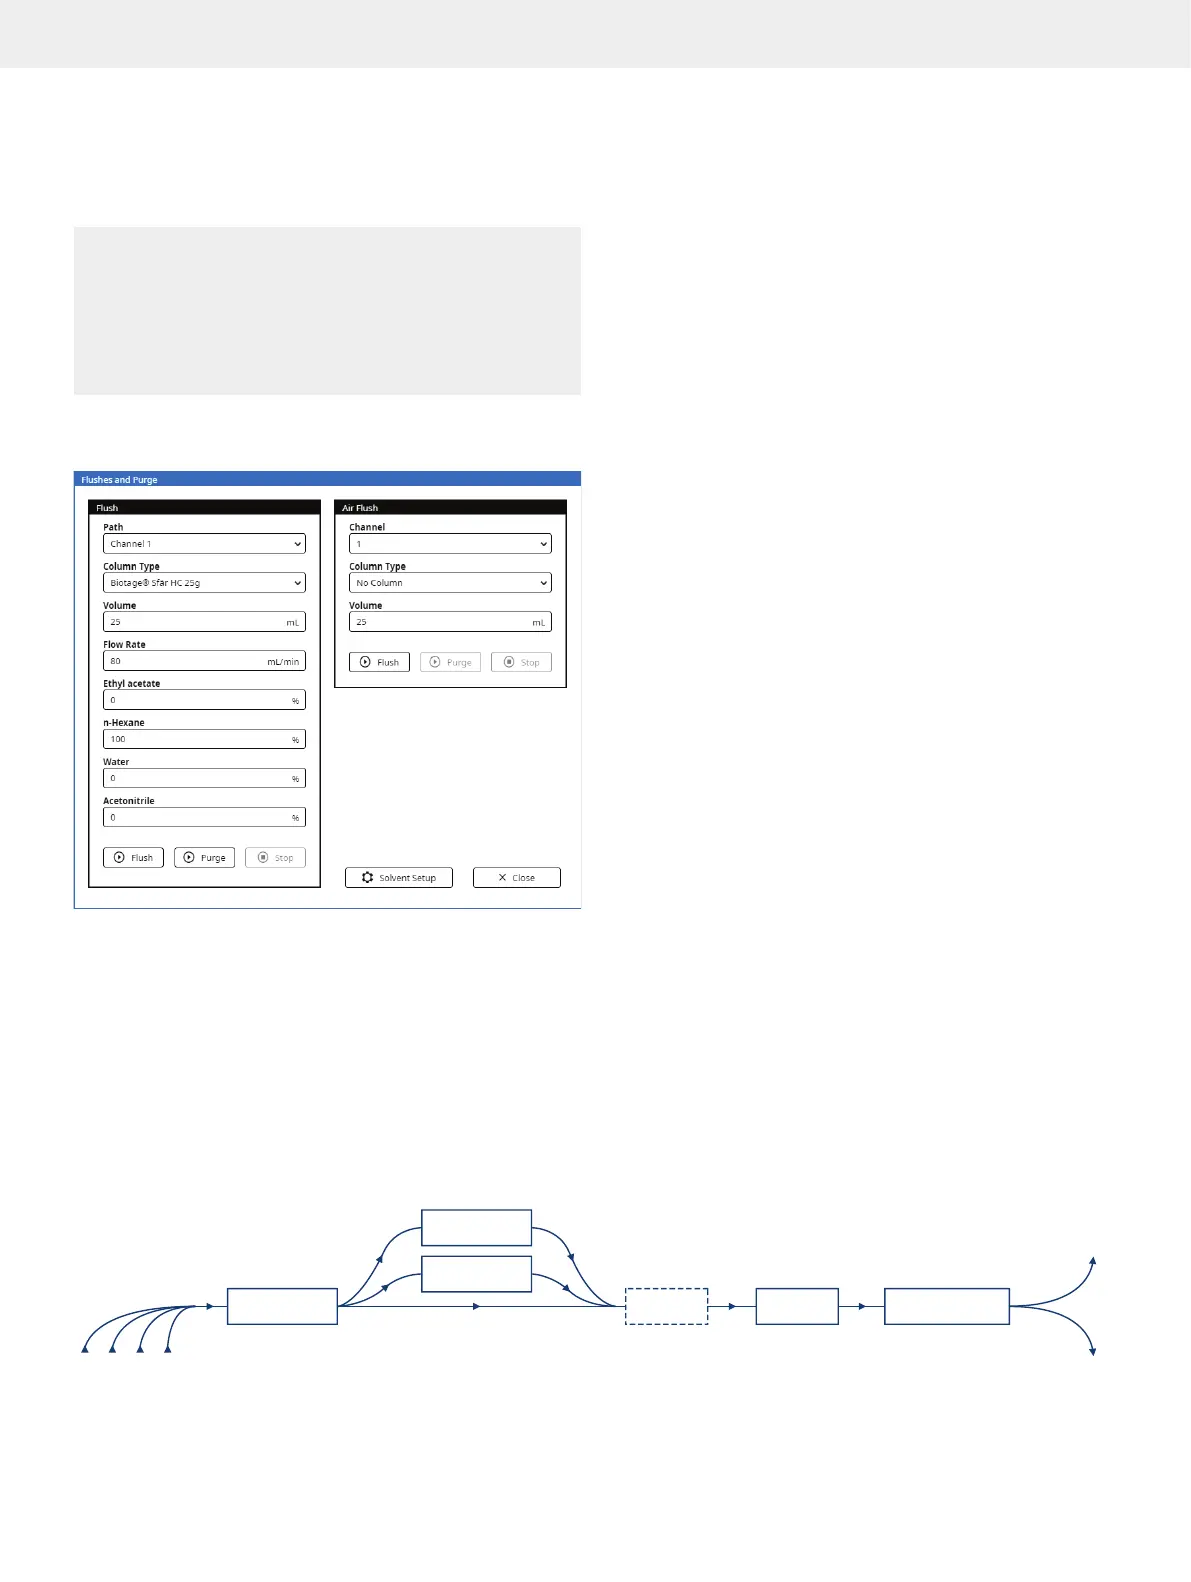
Flushes and Purge
Flushes and Purge
Warning
»
Never flush the system without a column mounted or the column
inlet and outlet tubing coupled together, on both channels.
»
Always use the purge feature to release any remaining pressure
in a column after a flush operation.
»
To prevent leakage, visually check all tubes and fittings before
flushing the system.
Enter the Flushes and Purge view (see Figure 44) by pressing
Menu and then Flushes and Purge.
Figure 44. The Flushes and Purge view.
Flush
Use the flush feature to for example:
»
Clean the flow path. If the last purification of the day
is performed with a halogenated solvent (e.g. DCM),
we recommend that you assign methanol or a similar
solvent to the inlet line used with the halogenated
solvent (see page 7) and flush with at least 30 mL.
»
Check for leaks in the tubing and fittings.
To flush the system:
1. Select the path to be flushed from the Path drop-down menu.
To flush the flow path except column channel, select the
bypass o
ption. To flush a column channel, select a channel
option. See a schematic of the flow paths in Figure 45.
2. If a channel option was selected, select the column
mounted from the Column Type drop-down menu.
If selecting “No Column”, ensure that the column inlet
and outlet tubing are coupled together.
3. Ensure that the inlet and outlet tubing on the other (unused)
channel are coupled together.
4. Enter the flush volume in the Volume text box.
5. Enter the flow rate in the Flow Rate text box. Note that
maximum flow rate applied depends on the maximum
pressure setting of the column type (if used) and the
maximum aspiration rate(s) for the used solvent(s).
6. Enter the percentage to be used of each solvent connected
to the system. If several solvents are listed and you only
want to use one solvent, enter “100” for that solvent and
“0” for the other ones.
7. Ensure that a sufficient quantity of each selected solvent
is present in the solvent reservoirs.
8. Ensure that the waste reservoir has sufficient capacity for
the flush.
9. Press Flush.
10. If a column was used, press Purge to release any remaining
pressure.
Flow Paths
Figure 45
S1 S2 S3 S4
Pump
Bypass
UV
Fraction CollectorEXT DET
C1
C2
Waste
. The flow paths in the system.