Biotage
®
Selekt User Manual | © Biotage 2020
Set Up a Purification
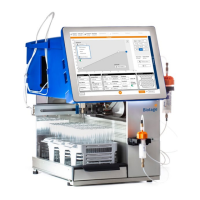
6. If you have two plates, press Add Plate and repeat steps
2 through 5 for the second plate. One plate gives a linear
gradient and two plates give a step gradient.
7. To calculate a purification gradient, press Create.
Figure 22. The TLC to Gradient editor.
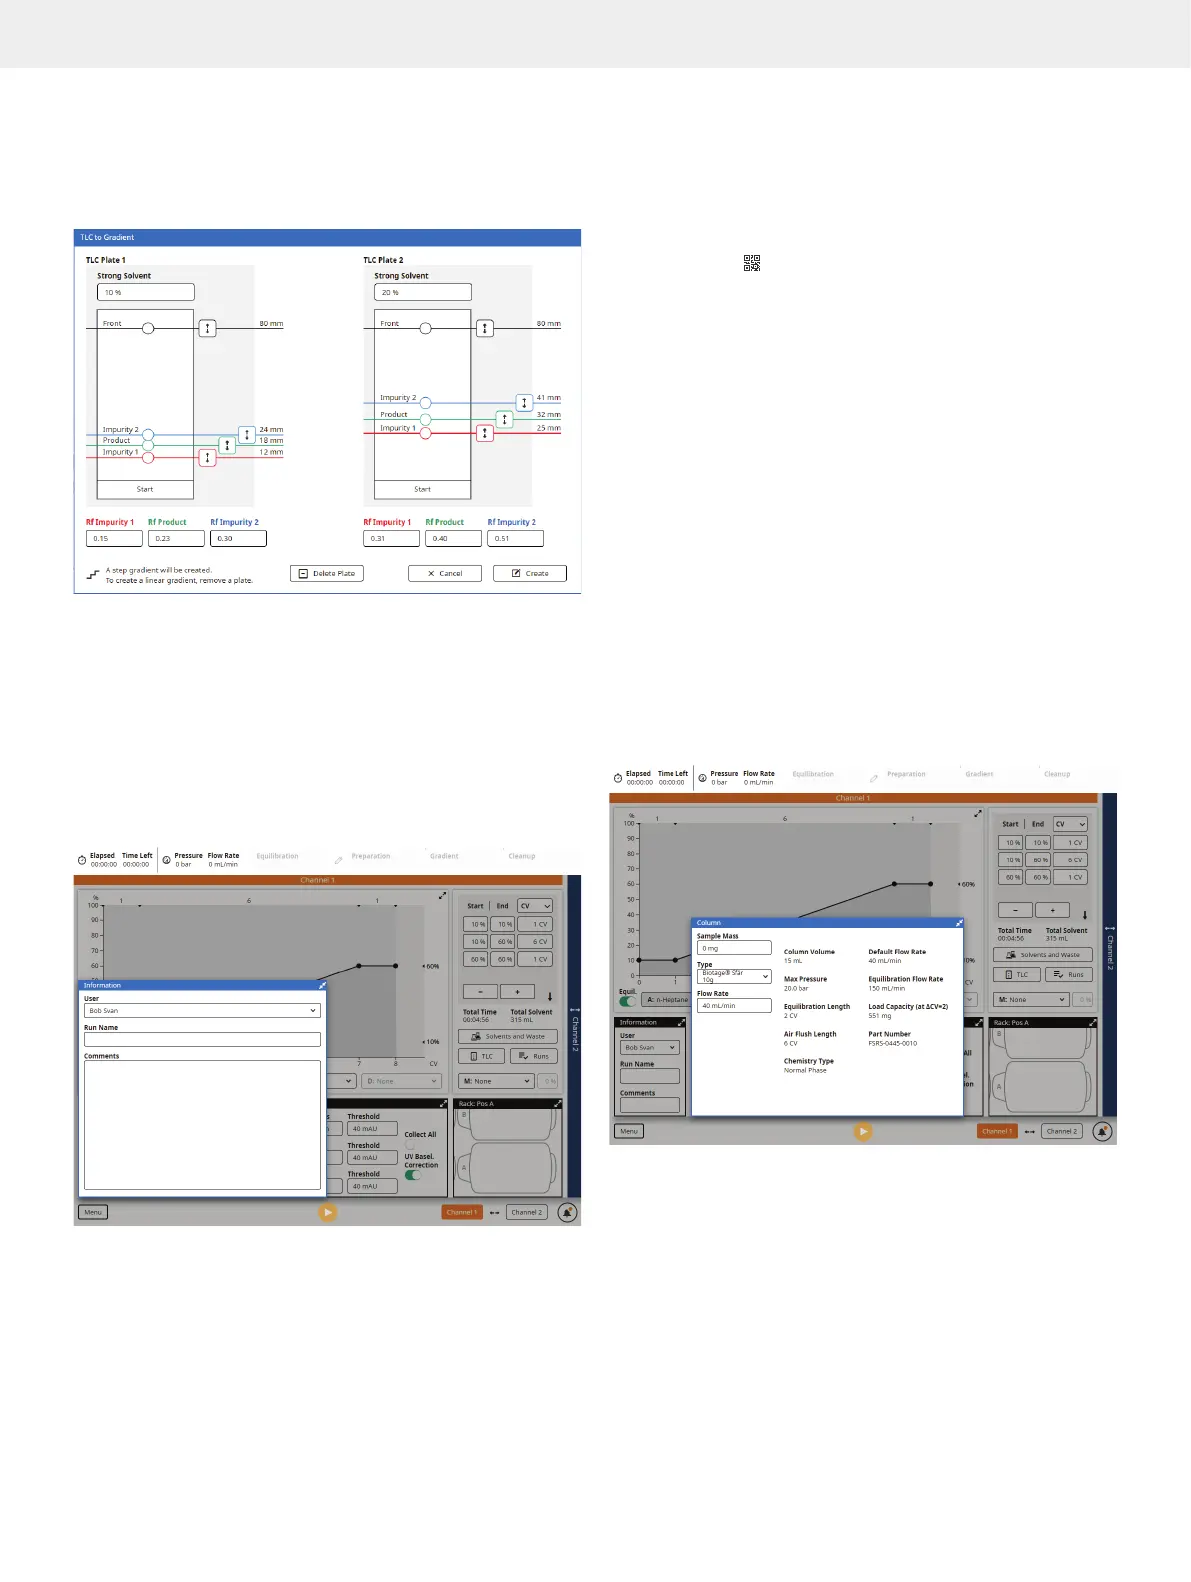
Specify the Information Parameters
»
User: The name of the user. If you have not been assigned
a user name, please contact your system supervisor.
»
Run Name: The name of the run. If left blank, the
name will be auto-generated based on date and
time when the purification is performed.
»
Comments: Comments on the purification run. (Optional.)
Figure 23. The Information panel expanded.
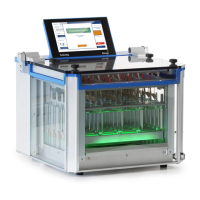
Specify the Column Parameters
»
Sample Mass: The crude sample mass.
»
Type: The column type. Either scan the column using
the QR reader underneath the touch screen or select
a column type from the drop-down list. If a column is
scanned, the
icon is shown in the Column panel.
If the column name is orange or red, its load capacity
is smaller than the entered sample mass.
Note: If using a column or a combination of a column and
e.g. dry load vessel with a total CV larger than 0.8 L, a safety
valve supplied by Biotage (P/N 417115SP) must be used.
For more information, see page 4.
»
Flow Rate: The default (recommended) flow rate
for the selected column type is preselected.
If you want to change it, consider that the maximum
flow rate applied depends on the following:
»
The maximum pressure or flow rate setting for the
column and any other accessories used in the setup.
»
The maximum aspiration rate(s)
defined for the used solvent(s).
Note: If you expand the Column panel, all of the settings
for the selected column type are displayed (see Figure 24).
If the column has been scanned, the column’s ID and the
number of times it has been used is also displayed. For more
information, see “Administrate Column Types” on page 25.
Figure 24. The Column panel expanded.