To add files remotely for playback, click on the ‘upload’ button. Using the file browser navigate
to your file and click ‘upload’. A status window will appear during the upload. You can also add
folders if needed using the ‘create folder’ button.
To download files, use the arrow icon on the far right. Your browser may prompt you to allow
downloads from the site. Click on ‘allow’. To delete a file, click the trash can icon and a delete
file window will appear. Click ‘delete’ to proceed.
Transferring Files via FTP
With your computer and HyperDeck Shuttle HD on the same network, all you need is an
ftpclient and your HyperDeck Shuttle HD’s IP address or the FTP URL in the HyperDeck
Setup utility.
1 Download and install an FTP client on the computer you want to connect your HyperDeck
Shuttle HD to. Werecommend Cyberduck, FileZilla or Transmit but most FTPapplications
will work. Cyberduck and FileZilla are free downloads.
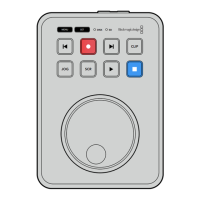
2 With HyperDeck Shuttle HD connected to your network, open HyperDeck Setup and click
on the FTP URL or press the copy icon to paste it manually. You may need to click the link a
second time if the FTP program doesn’t open a connection.
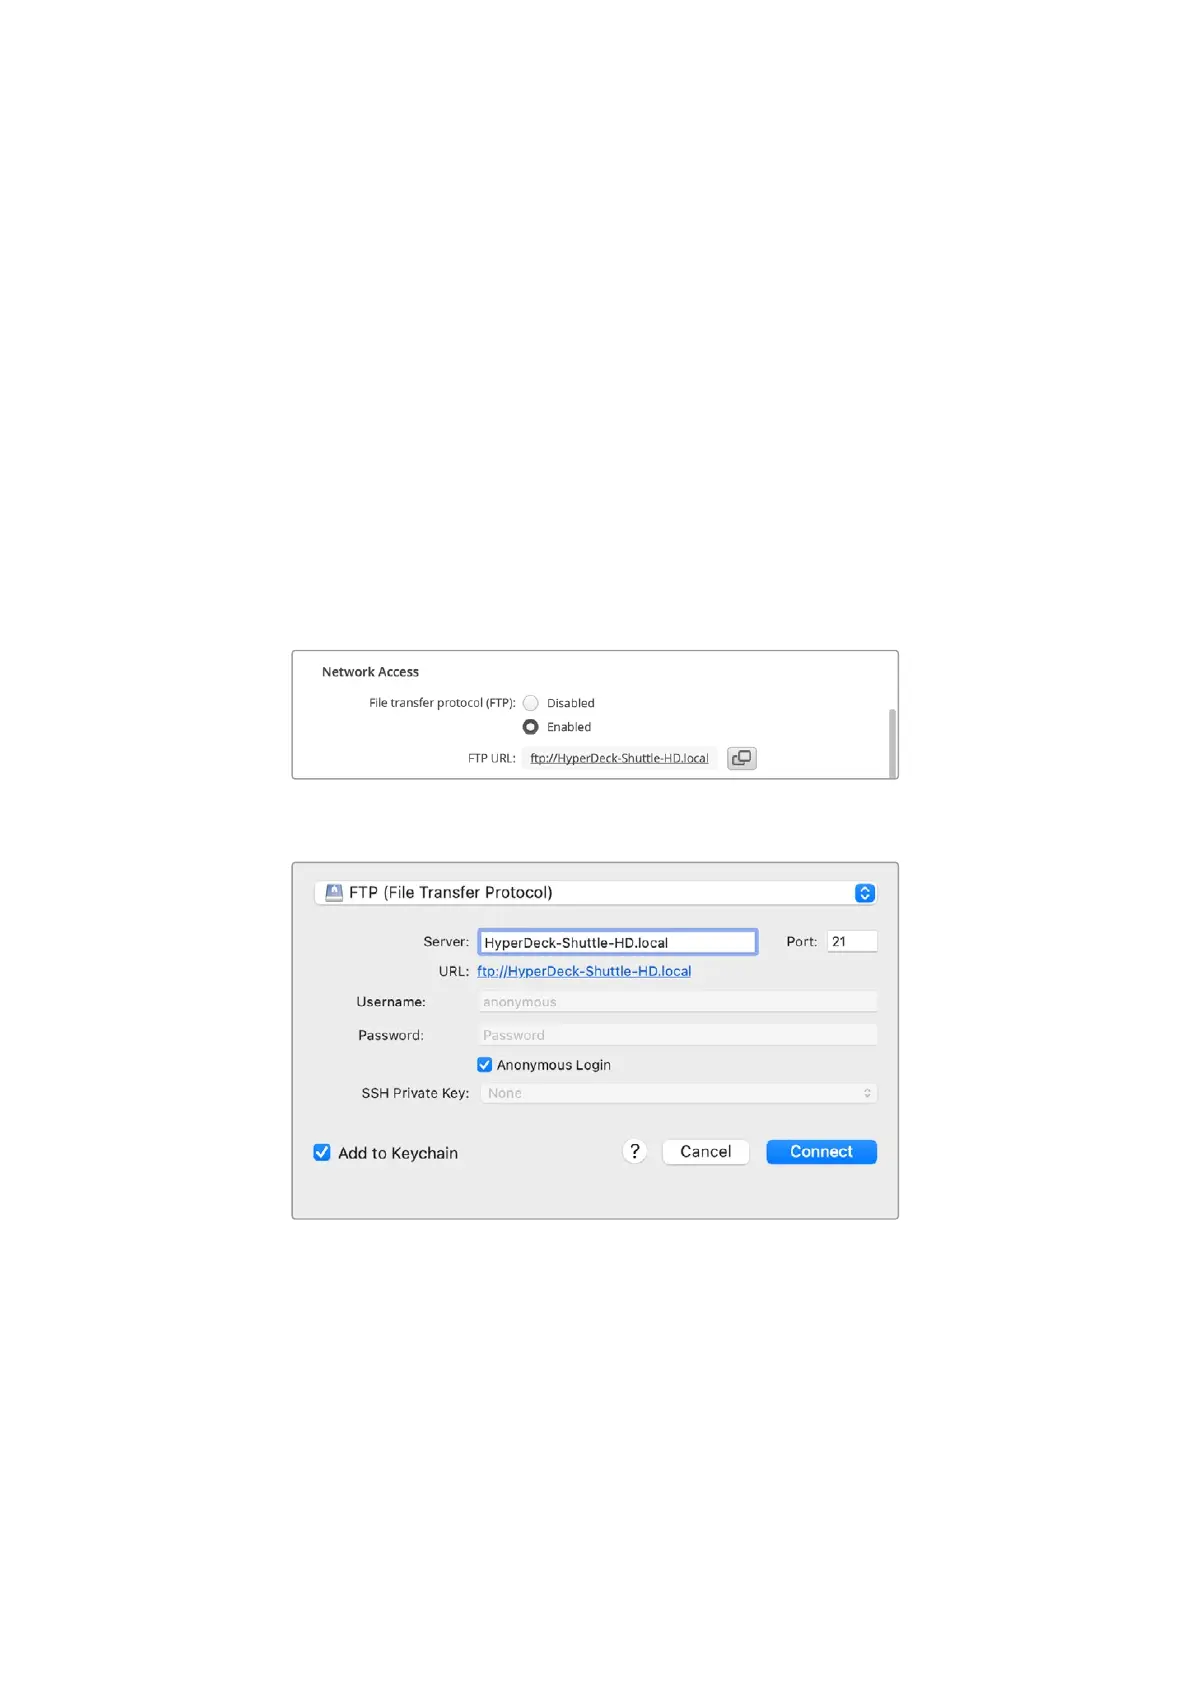
3 If you are manually opening an FTP connection, paste the URL into the server field. Check
‘anonymous login’ if available.
37Transferring Files over a Network
 Loading...