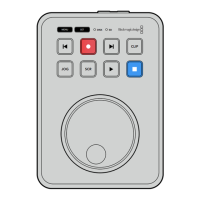
Playback
Press the ‘play’ button to start playback. During playback, the play button will illuminate and
the‘disk’ or ‘SD’ media slot indicator will illuminate green.
If there are multiple clips that have been recorded, you can quickly move through them by
pressing the forward and backward skip buttons.
JOG SCR
CLIP
MENU SET
DISK SD
Using the Skip Buttons
Press the backward skip button to cue the clip at the start. Pressing more than once will move
back through previously recorded clips.
Press the forward skip button to move forward through your clips. The skip buttons will also
flash when the ‘identify HyperDeck’ checkbox is selected using HyperDeck Setup utility.
JOG SCR
CLIP
MENU SET
DISK SD
Use the forward and backward skip buttons to cue to the start of each clip
TIP To play back video files on your HyperDeck, you will need to set the codec to
match the codec used to record the files. You can do this using the menu. Refer to the
‘changing settings’ section later in this manual for more information.
Looping Clips
During playback, pressing the ‘play’ button again will set your HyperDeck Shuttle HD to loop
allclips until you press the ‘stop’ button.
If you want to loop a single clip, set your HyperDeck to ‘clip’ mode and press the ‘play’ button
once to play and again to loop.
Loop all clips During playback, press the ‘play’ button a second time to loop all recorded clips
Loop current clip When in clip mode, press the ‘play’ button a second time to loop the current clip
8Playback
 Loading...