VG4 Modular Camera Series Installing the In-Ceiling Mount | en 75
Bosch Security Systems, Inc. Installation Manual F.01U.162.025 | 6.0 | 2010.03
4.2 Pre-installation Check List
1. Determine the location and distance for the power supply box based on its voltage and
current consumption. See Section 5 Cable and Wire Standards, page 85 for specifications.
2. Install all rough wiring including: power, control, video, alarms I/O, relay I/O, and fiber
optic cabling.
3. A minimum of 216-mm (8 1/2-inch) of air space above the ceiling is required to install the
In-ceiling Mount.
4. If this AutoDome installation utilizes the AutoTracker feature, refer to
Section A Installation Notes for AutoTracker, page 101, before mounting the AutoDome.
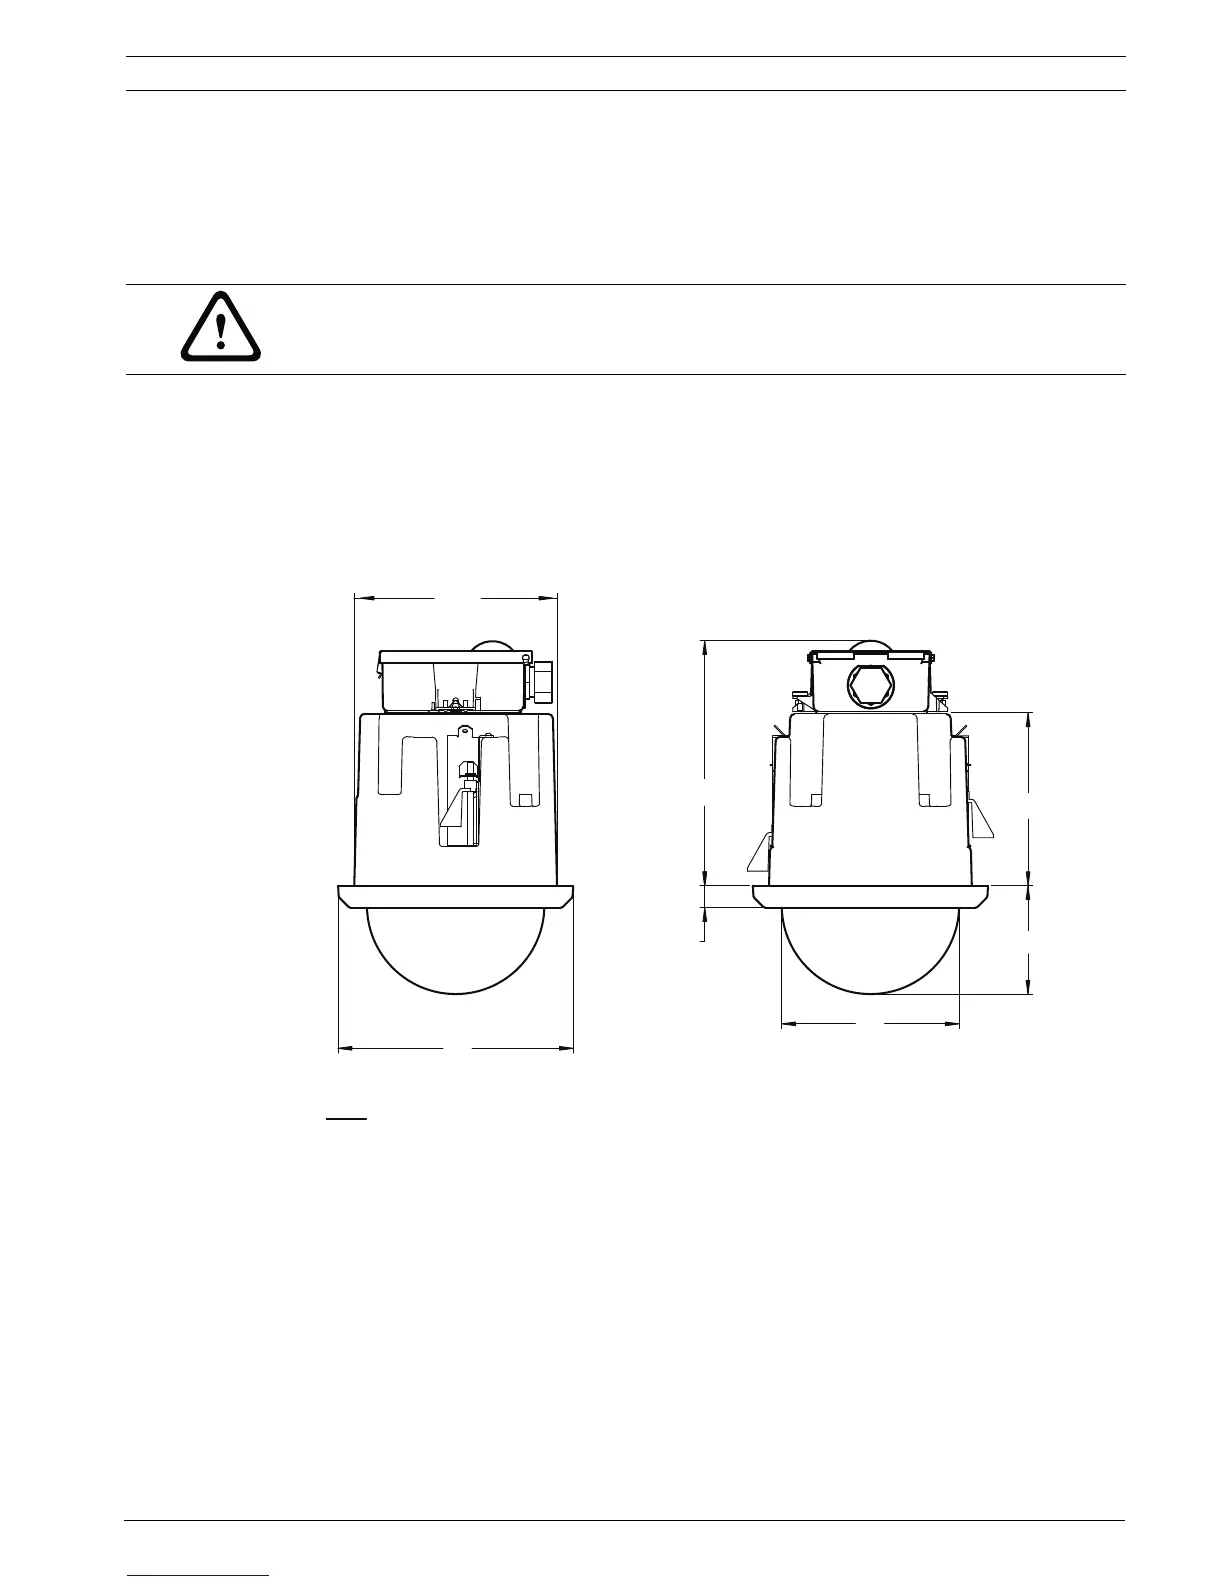
4.3 Dimensions
Figure 4.1 In-ceiling Dimensional Outline
4.4 Prepare Drywall Ceiling for Installation
1. Choose the desired location to mount the dome.
2. Use the bracket Base Plate as a template or cut a 178 mm (7 in.) hole in the ceiling with
a drywall utility saw or Jig Saw. Proceed to Section 4.6 Wire the Interface Box, page 78, for
further instructions.
WARNING!
24 VAC Class 2 power supply only.
mm
inches
210.7
8.30
19.0
0.75
153.9
6.06
150.2
5.91
94.0
3.70
176.8
6.96
204.3
8.04
DIA.
 Loading...