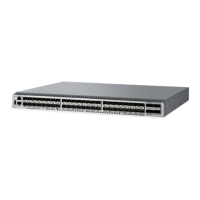
7850-Install-IG101 Installation Guide
Brocade
®
7850 Extension Switch Hardware Installation Guide
Identifying the Direction of the Fan Assembly Airflow
The Brocade 7850 Extension Switch supports only a port side exhaust. The fan assemblies are identified by the following
airflow direction:
Intake fan assembly with an orange arrow and an I symbol label or without any label: Pulls air from the nonport side
of the switch and exhausts it out the port side.
•
Nonport-side air intake
•
Port-side air exhaust
•
Back-to-front (nonport-side to port-side) airflow
•
Part numbers ending with -R
Fan Assembly Fault Indicators
Use one of the following methods to determine the status of the fan assemblies:
•
Check the fan assembly status LED. See Fan Assembly Status LED to interpret the meaning of LED operation.
•
In Web Tools, click the Fan Status icon.
•
Enter the fanShow command at the prompt to display fan assembly status, as shown in the following example:
Device:admin> fanshow
Fan 1 is Ok, speed is 11695 RPM
Fan 2 is Ok, speed is 11695 RPM
Fan 3 is Faulty
Fan 4 is Ok, speed is 11695 RPM
Fan 5 is Ok, speed is 11695 RPM
Fan 6 is Ok, speed is 11695 RPM
Fan Assembly Task Guide
You can perform a set of steps to install or replace a fan assembly or to replace two or more fan assemblies. By default,
all six fan assemblies are installed in the device.
Replacing a Fan Assembly (Hot-Swap)
NOTE
•
Disassembling any part of the fan assembly voids the part warranty and regulatory certifications. There are
no serviceable parts inside the fan assembly.
•
You can replace up to four fan assemblies without shutting down the switch. However, you must replace the
fan assemblies one at a time.
•
The cooling system relies on pressurized air. Do not leave any of the fan slots empty longer than two minutes
while the device is operating.
•
If a fan fails, leave it in the device until it can be replaced.
•
Maintain all six fan assemblies in operational condition to provide redundancy.
7850-Install-IG101
82