3 - 45
Main parts
Main unit
Assembly
5
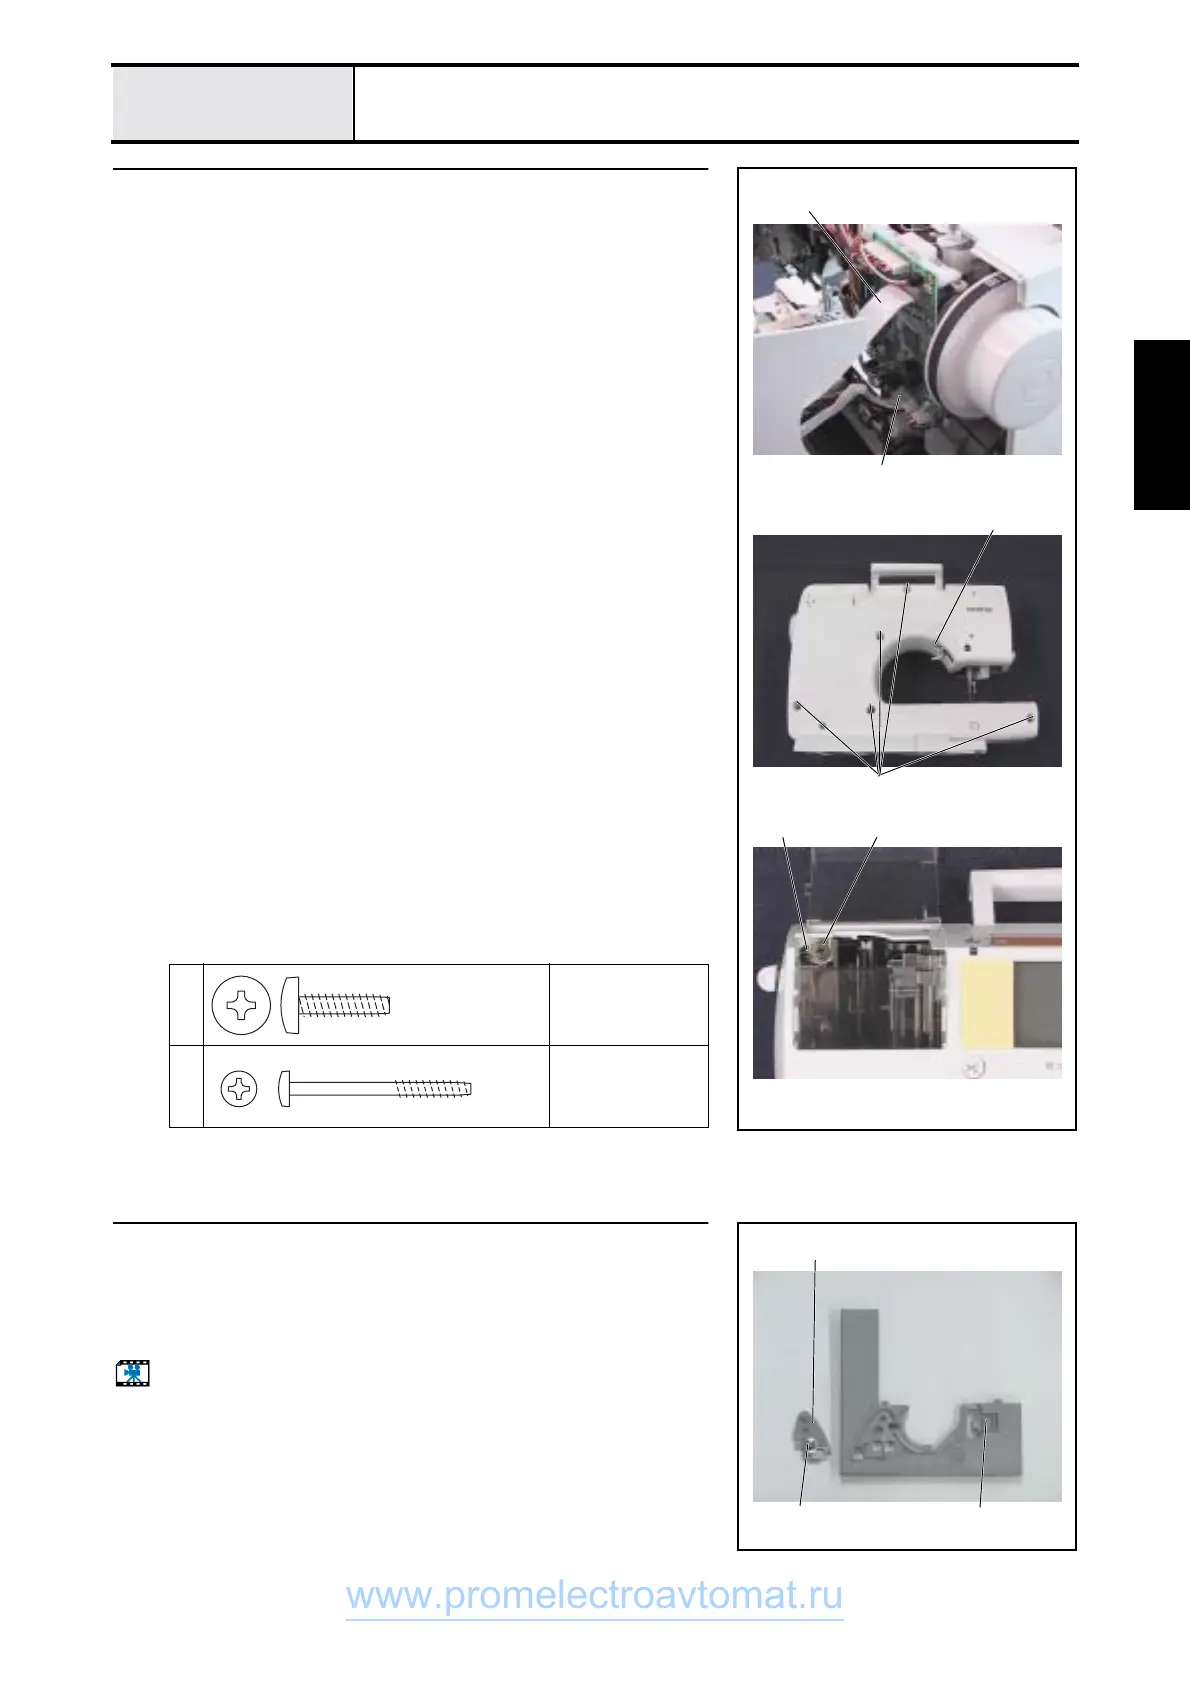
Front cover assy. attachment
1. Connect the operation S2 (or S3) flat cable 1 and the power PCB assy.
lead wire connector 2 to the main PCB assy. on the arm bed side.
2. Attach the front cover assy. to the arm bed using screws 1 (one on the
front side, five on the rear side) and screw 2 (one on rear side).
*Key point
• Be careful to push the thread tension mechanism spring 3 to
the left side, and not damage it when attaching the front cover.
1
Torque
1.18 - 1.57 N-m
2
Torque
0.78 - 1.18 N-m
2
1
3
1
(rear)
2
1
(front)
Giza Tite
5X16
Color; Gold
Giza Tite
3X32
Color; Gold
6
Needle plate B assy. assembly
1. Attach the slide button 1 to needle plate B.
2. Attach the NT lower thread cutter and spring plate 2 to the cutter cover
3.
3. Attach the cutter cover 3 to needle plate B.
Start movie clip (CD-ROM version only)
1
3
2
www.promelectroavtomat.ru
 Loading...


