4 - 14
Adjustment (Main Unit)
Feed adjustment
●Check (front cover attachment operation)
1. Press and while turning the power on (the buzzer will sound four times, and test mode will start).
2. <S2>
Select (feed forward and reverse mode) using .
<S3>
Select (feed adjustment mode) using or , and press .
3. Press and run "Feed adjustment mode," checking the forward and reverse feed amounts.
*Key point
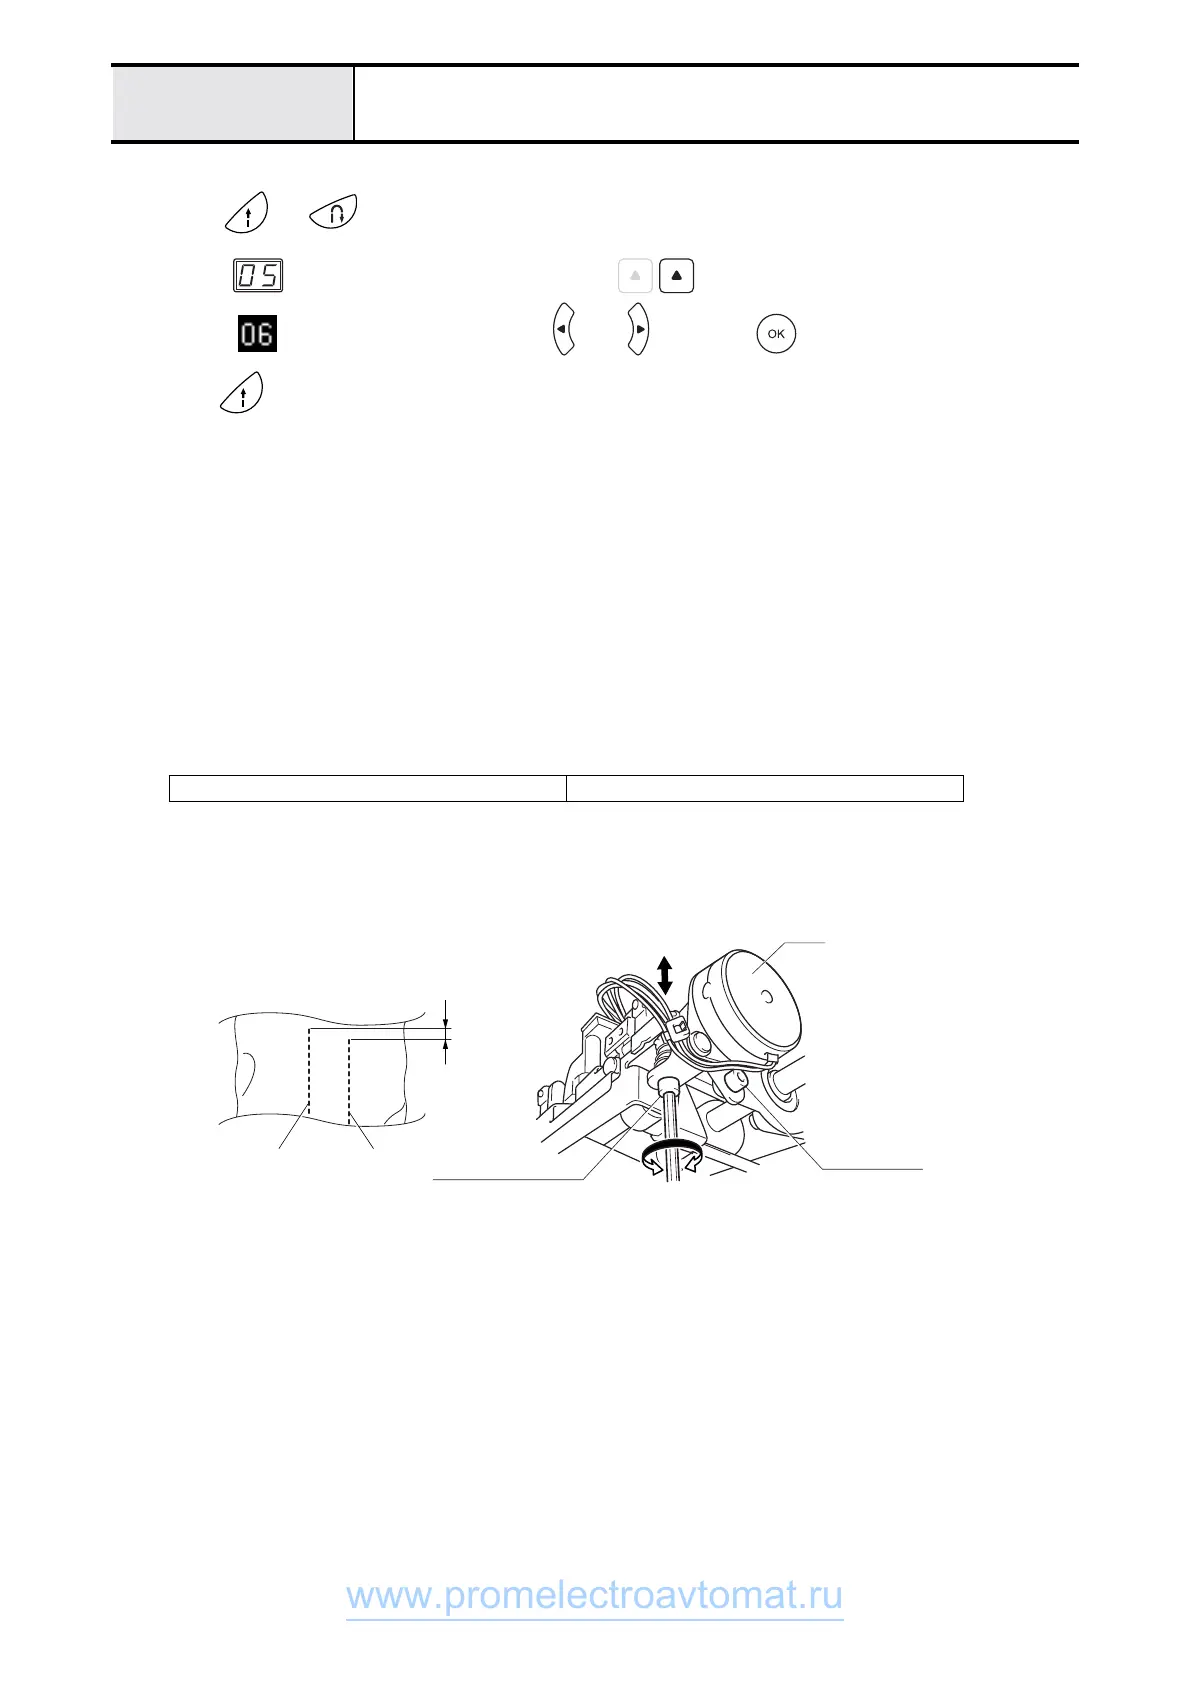
• When a material of two layers of broadcloth with paper in between is given 100 stitches forward and reverse
("Feed adjustment" mode), the forward side should be 0 – 10 mm longer than the reverse side.
●Adjustment (work with front cover removed)
4. Loosen the FPM holder assy. screw (3 x 8).
5. Adjust the forward and reverse feed using the FPM holder assy. screw (4 x 25).
*Key point
• Tightening the screw (4 x 25) --) shortens the reverse side.
• Loosening the screw (4 x 25) --) lengthens the reverse side.
6. Fully tighten the screw (3X8).
7. Apply a small amount of screw locking compound to the M4X25 socket bolt.
Screw 3X8
torque 0.27 - 0.48 N-m
Forward side Reverse (back)
side
Bold, socket 4 × 25
Screw 3 × 8
FPM
Lower right of feed module
0 - 10mm
www.promelectroavtomat.ru
 Loading...


