3 - 18
Upper shaft mechanism
Main unit
3
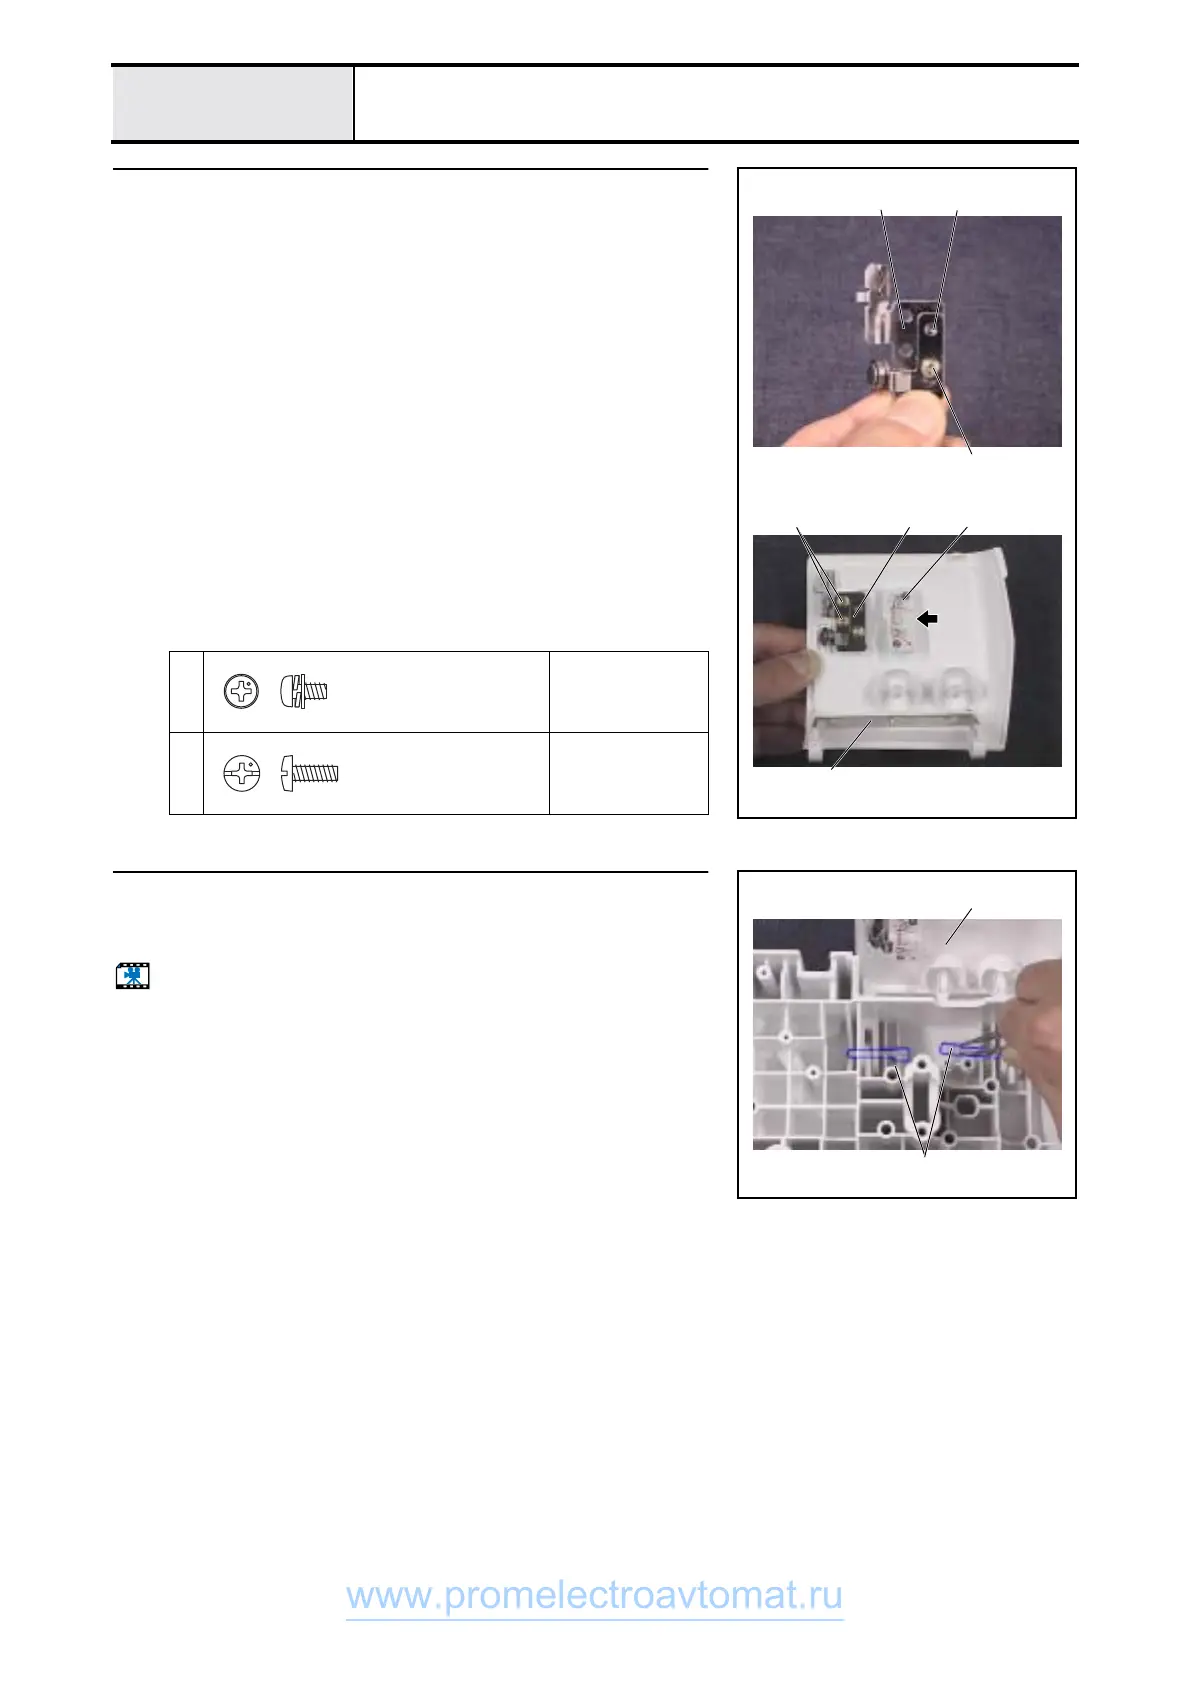
Bobbin winder cover assy. assembly
1. Attach the bobbin winder cover supporter 1 to the bobbin winder cover.
2. Attach the thread tension assy. 2 to the thread tension plate 3 using
screw 1.
*Key point
• Hand start screw 1, and fully tighten after 4 - 18 "Bobbin
winder (uneven bobbin winding and bobbin winding amounts)
adjustment."
3. Attach the thread tension plate 3 to the bobbin winder cover using screws
2 (two).
4. 4Attach the thread tension cover.
1
Torque
Hand start
2
Torque
Hand start
23
1
2 4
3
1
Screw, Pan (S/P washer)
M3X6DA
Color; Gold
Screw, Bind
M3X8
Color; Silver
4
Bobbin winder cover assy. attachment
1. Attach the bobbin winder cover assy. 2 to the arm bed using the shafts 1
for the bobbin winder cover (two).
Start movie clip (CD-ROM version only)
1
2
www.promelectroavtomat.ru
 Loading...


