45
Assembly
Tools required (not supplied)
7mm adjustable/spanner/wrench open
ended.
PZ2 screw driver/ bit.
Determine height and location required on
surface to be mounted.
If feet are required.
Remove backing off (Item 3) adhesive
feet & stick on corners of stand base
(Item 2). Ensure fixing holes are not
obscured.
If stand is to be screwed to desk
surface.
Loosely attach interface bracket (Item 1)
to base Item 2) with 3 x M4 nuts (Item 4)
and washers (Item 5).
Align holes in bracket (Item 1) with
SSP VESA mount holes and attach
stand using 4 x M4 screws (Item 6)
with washers (Items 5 & 7). Note plain
washer should be nearest bracket. As
shown in Fig.5 Locate on desk the
required location and mark with pencil,
rear 2 fixing holes.
Remove SSP with bracket (Item 1) from
base (item 2).
Fix base (Item 2) to desk top with screws
(not provided) using the 2 marked fixing
holes as reference.
Re-attach interface bracket (Item 1) to
base Item 2) with 3 x M4 nuts (Item 4)
and washers (Item 5) and tighten.
If stand is to be placed on desk
surface.
Attach interface bracket (Item 1) to base
(Item 2) with 3 x M4 nuts (Item 4) and
washers (Item 5).
Align holes in bracket (Item 1) with
LSP VESA mount holes and attach
stand using 4 x M4 screws (Item 6)
with washers (Items 5 & 7). Note plain
washer should be nearest bracket. As
shown Fig.5.
Do not over tighten. Typically 1Nm.
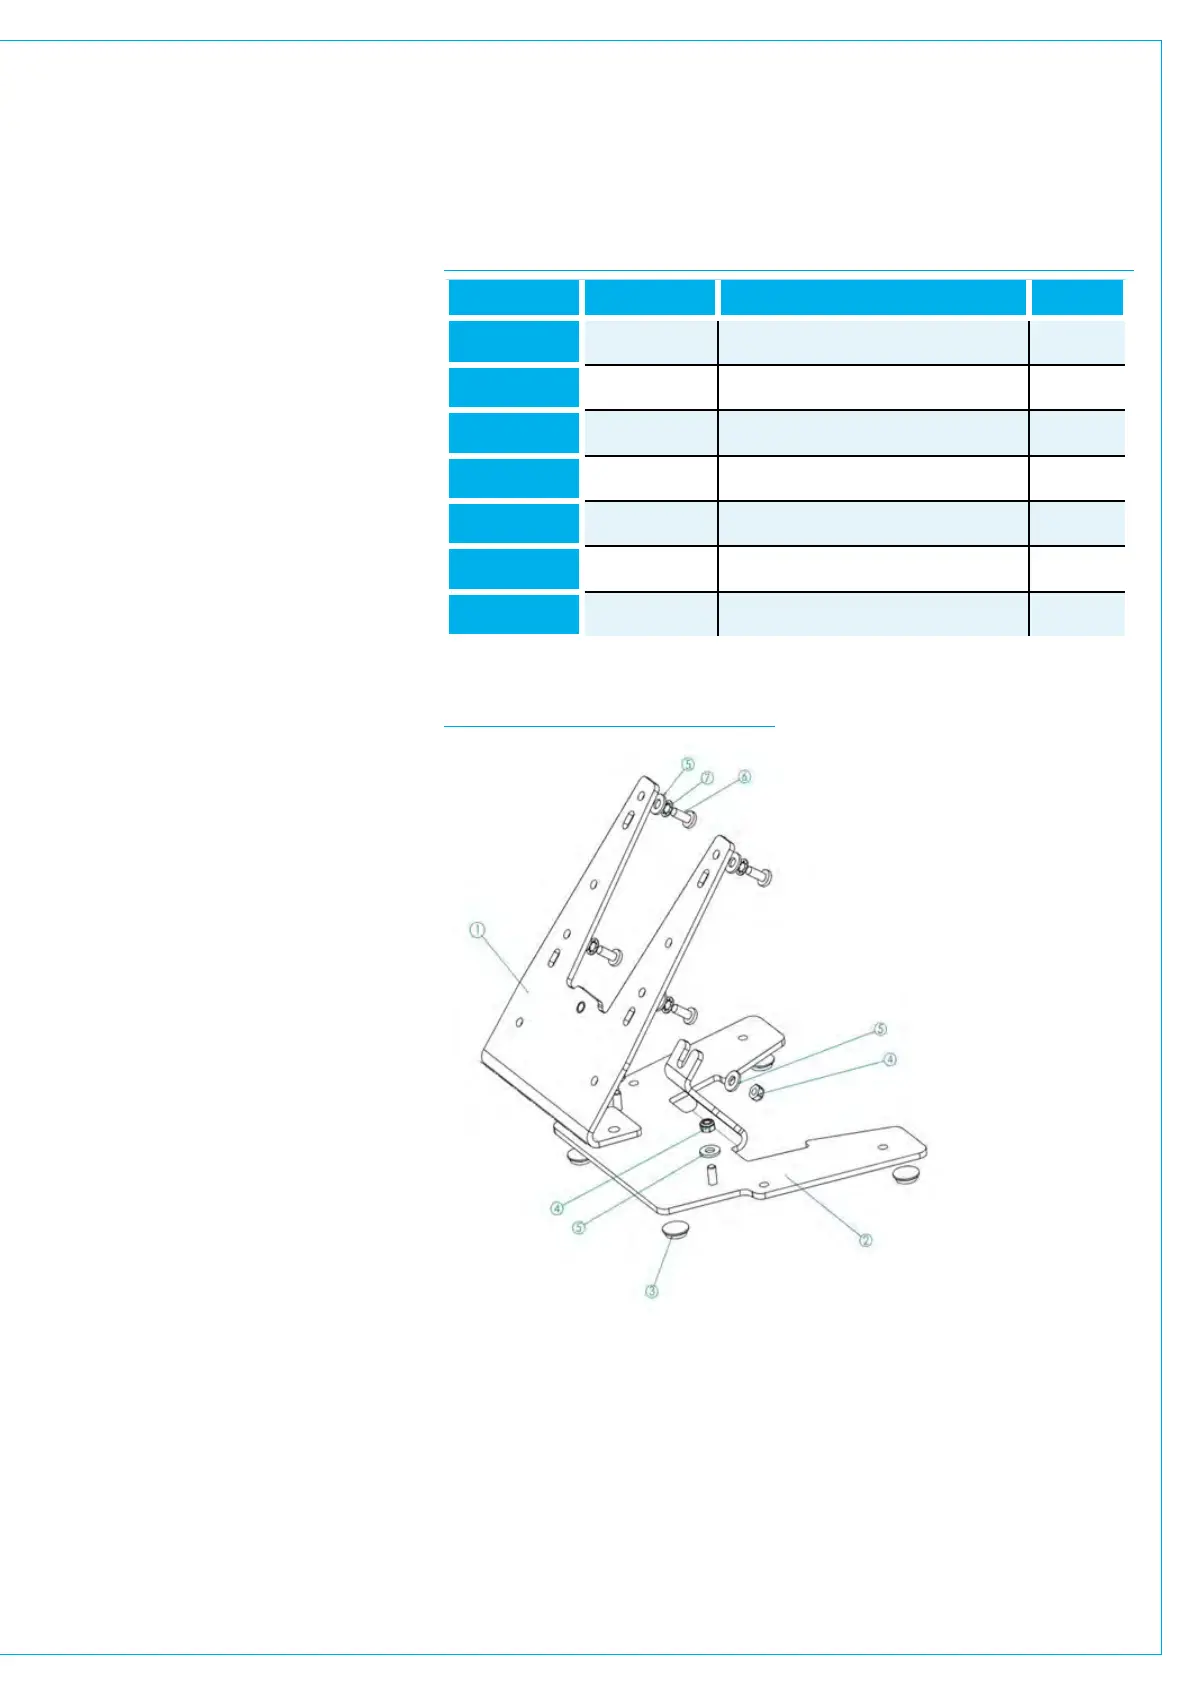
FIG 4 SUPPLIED PARTS TABLE
FIG 5 SUPPLIED PARTS ASSEMBLY
Item Number Part Number Description Quantity
1 720-987 SSP Interface Bracket 1
2 720-983 LSP/SSP Stand Base 1
3 390-193 RBS-1BK Adhesive Foot 4
4
360-124 Nut M4 Nyloc 3
5 370-007 Washer M4 Plain 7
6 350-043 M4x10mm Pozi Pan 4
7
370-008 Washer M4 Internal lock 4