42 TYPE R Radio Production System Fixing Bracket Assembly Instructions
LARGE SOFT PANEL ON DESK STAND (720-999001)
Large Soft panel on desk stand, fixed
50 deg viewing angle, see Fig 1.
MU6411 Mounting options using 75mm
VESA mount fixing screw holes.
The Panel may be mounted landscape
or portrait, with or without rubber feet.
Secured with crews or free standing.
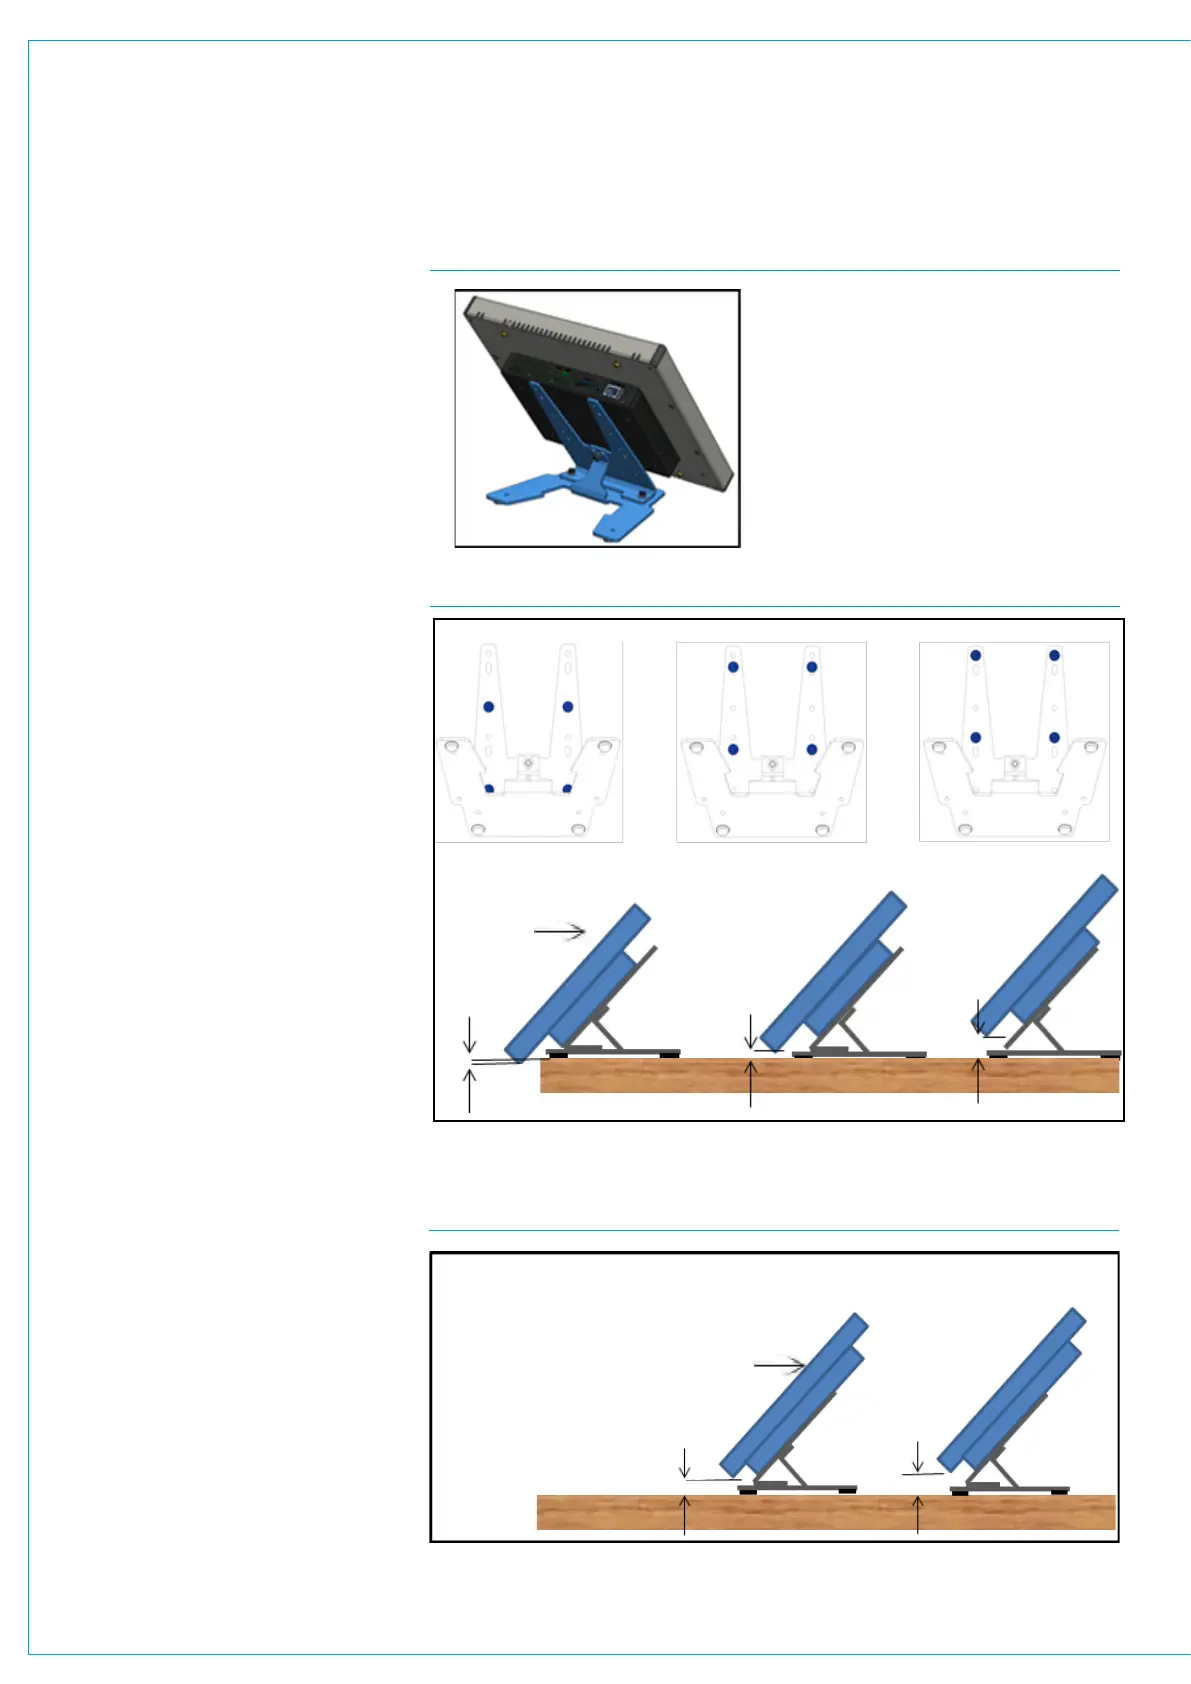
Landscape, fixing hole positions, see
Fig2.
a) bottom edge 10mm to desk surface
without feet, with feet 6.5mm.
b) bottom edge 13 to 18mm to desk surface
without feet, with feet 16.5 to 21.5mm.
c) bottom edge 26mm to desk surface
without feet, with feet 29.5mm.
Stand Base
With stick on feet (supplied).
Without stick on feet screwed down to desk
top with screws (not supplied).
Portrait, fixing hole positions, see Fig3
a) N/A.
b) Bottom edge 4 to 9mm to desk surface
without feet, with feet 7.5 to 12.5mm.
c) Bottom edge 17mm to desk surface
without feet, with feet 20.5mm.
Assembly
Tools required (not supplied)
7mm adjustable/spanner/wrench open
ended.
PZ2 screw driver/ bit.
Determine height and location required on
surface to be mounted.
If feet are required.
Remove backing off (Item 3) adhesive feet
& stick on corners of stand base (Item 2).
Ensure fixing holes are not obscured.
If stand is to be screwed to desk surface.
Loosely attach interface bracket (Item 1) to
base Item 2) with 3 x M4 nuts (Item 4) and
washers (Item 5).
Align holes in bracket (Item 1) with LSP
VESA mount holes and attach stand using
4 x M4 screws (Item 6) with washers (Items
5 & 7). Note plain washer should be nearest
bracket. As shown in Fig.5 Locate on desk
the required location and mark with pencil,
rear 2 fixing holes.
Remove LSP with bracket (Item 1) from
base (item 2).
Fix base (Item 2) to desk top with screws
(not provided).
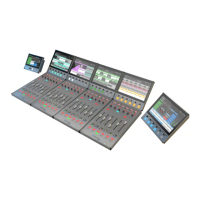
FIG 1 LARGE SOFT PANEL ON DESK STAND
FIG 2 LARGE SOFT PANEL ON DESK STAND LANDSCAPE MODE
Front
Bottom
Edge
FIG 3 LARGE SOFT PANEL ON DESK STAND PORTRAIT MODE
Front
Bottom
Edge
a) b) c)
a) N/A b) c)