48 TYPE R Radio Production System Fixing Bracket Assembly Instructions
Assembly - See Fig 4 & 5
Tools required (not supplied)
7mm adjustable/spanner/wrench open
ended.
PZ2 screw driver/ bit.
Wood screws.
Saw.
Mounting Procedure
Mark out and cut hole in desk surface
to accommodate LSP 247mm (9.7in) x
226mm (8.9in).
Ensure sufficient clearance for
brackets (item 2) from any other
items on the underside of desk.
Loosely attach under desk brackets
(Item 2) to bracket (Item 1) with 4 x M4
nuts (Item 6) and washers (Item 4) as
required for desk thickness, mounting
options a), b), c) or d). Refer to Fig 2 & 3.
Align holes in bracket (Item 1) with LSP
and attach stand using 4 x M4 screws
(Item 5) with washers (Items 3 & 4). Note
plain washer should be nearest bracket.
As shown Fig 5.
Fitting to desk/surface
Cut hole in desk 247mm (9.7in) x
226mm (8.9in).
Offer LSP through hole in desk from
underside.
Fix brackets (item2) to underside of desk
with 4 screws (not supplied) suitable for
desk surface.
Push up LSP from underside until LSP
is flush with surface and tighten 4 x M4
nuts (Item 6).
Do not over tighten. Typically 1Nm.
FIG 4 SUPPLIED PARTS TABLE
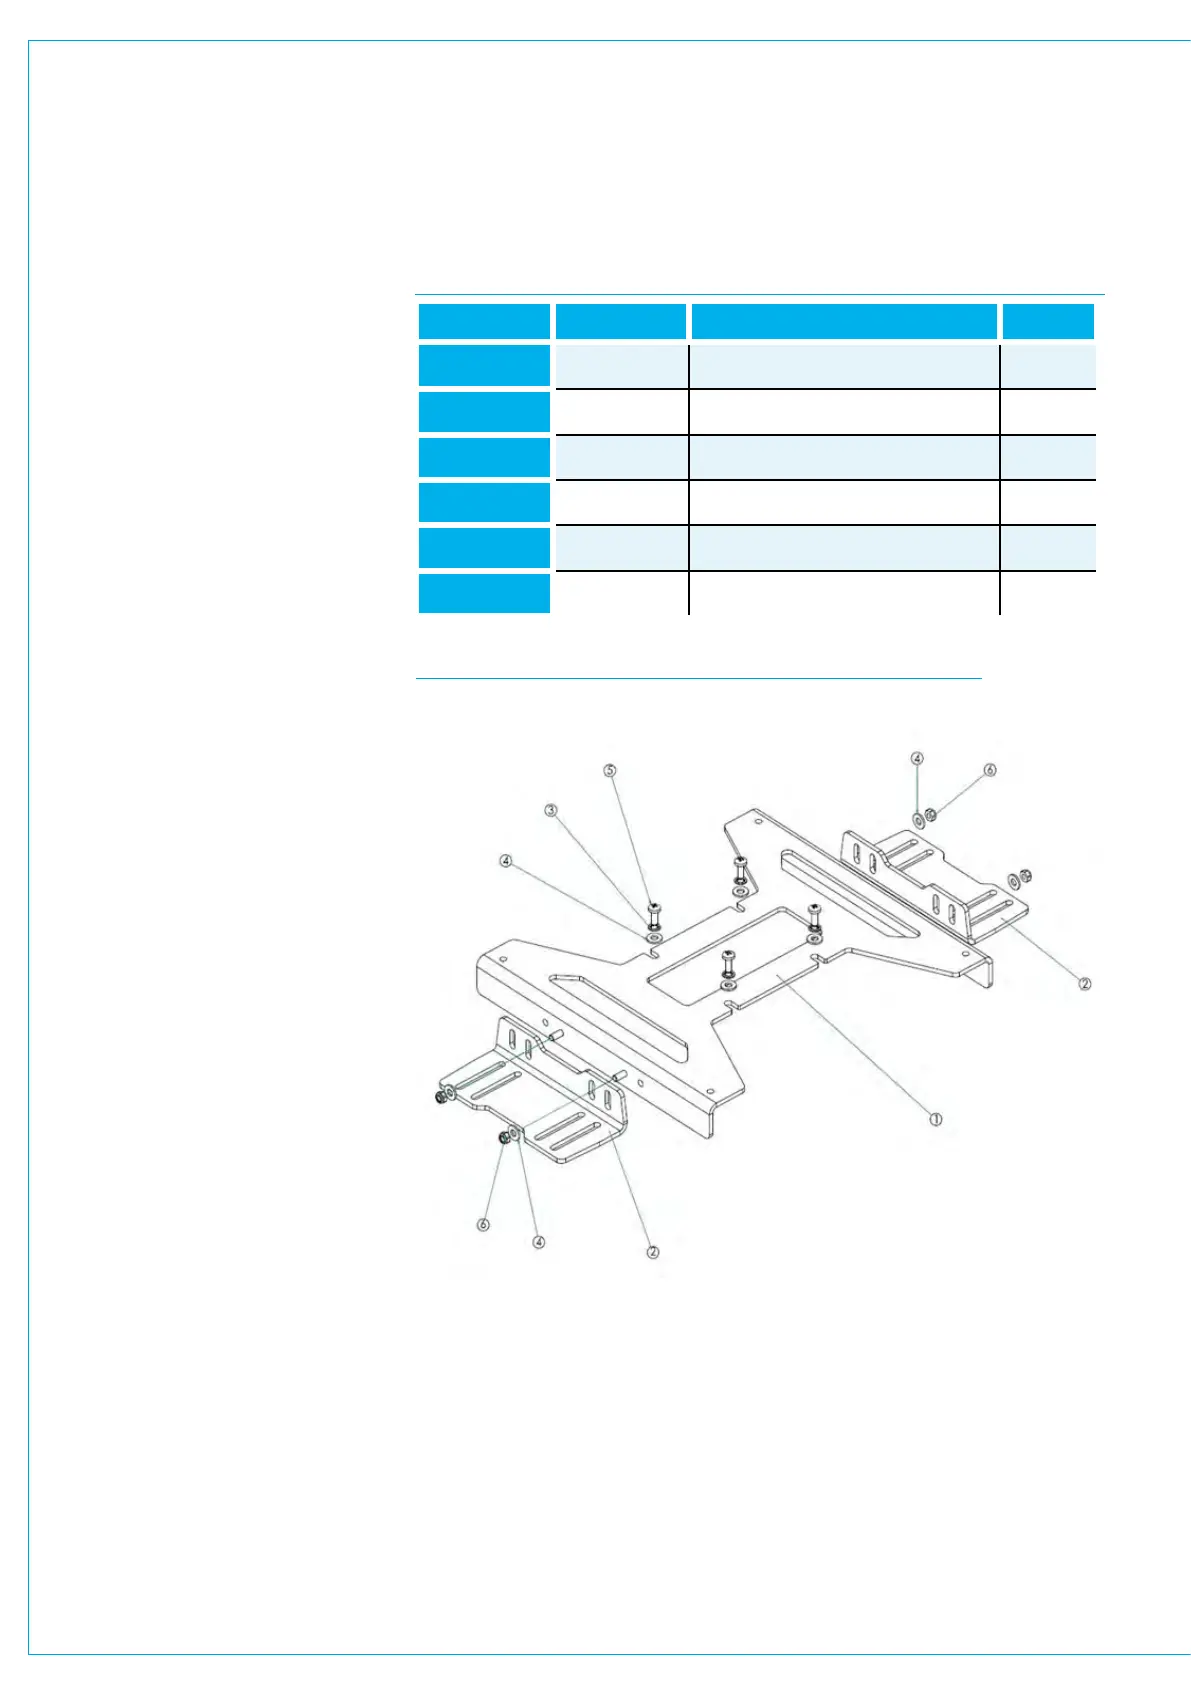
FIG 5 LSP BRACKET MOUNT & UNDER DESK BRACKETS
Item Number Part Number Description Quantity
1 730-031 LSP Bracket Recess Mount 1
2 730-033 Under Desk Bracket 2
3 370-008 Washer M4 Internal lock 4
4
370-007 Washer M4 Plain 8
5 350-043 M4x10mm Pozi Pan 4
6 360-124 Nut M4 Nyloc 4